Overview:
N3 AI Accounting allows users to manage and generate barcodes for stock items. This feature helps users create barcode labels for their stock items, making it easier to identify and manage stock using barcode information. The stock barcode also can be use and apply when user create transaction where they can use the barcode scanner to scan item in the Sales, Purchase and Stock Modules.
Scenario:
Users would like to use and manage the Stock Barcode in N3 AI Accounting where the Stock Barcode manage to be generate and print the barcode labels for their stock items so that the stocks can be identified using their respective barcodes during stock-related operations and daily transactions.
Solution:
1. Navigate to Stock>Stocks & Services to access the Stock & Services listing.
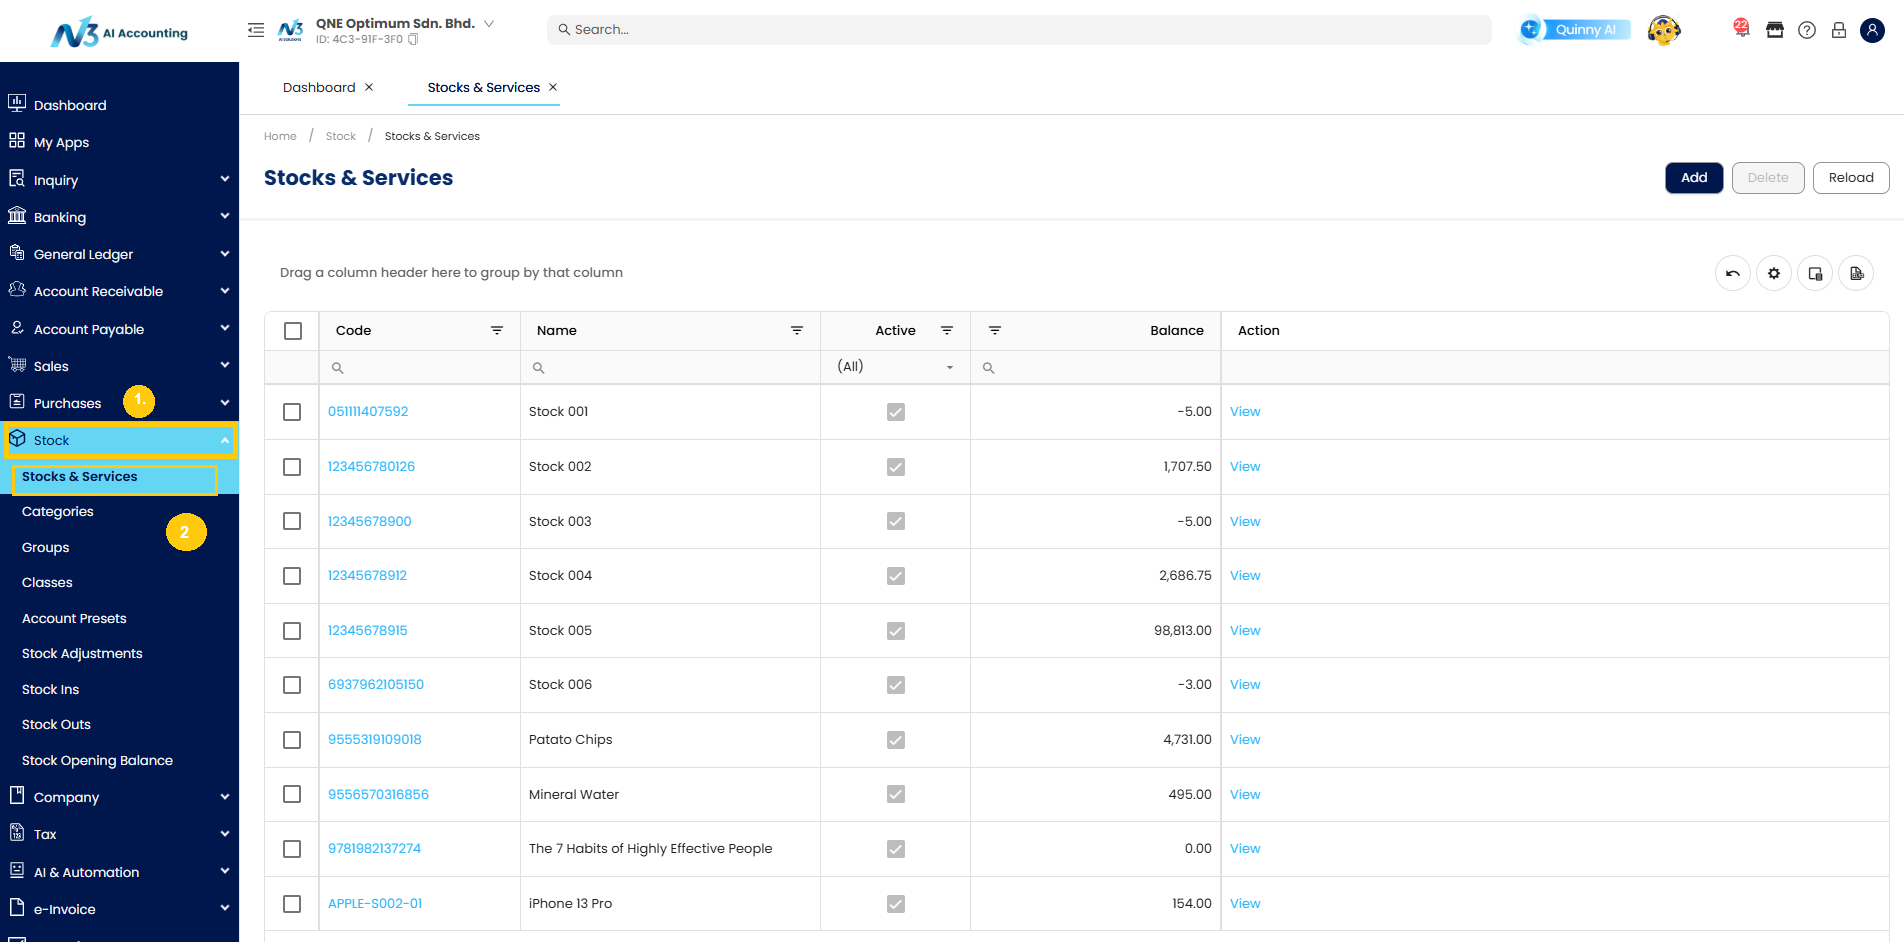
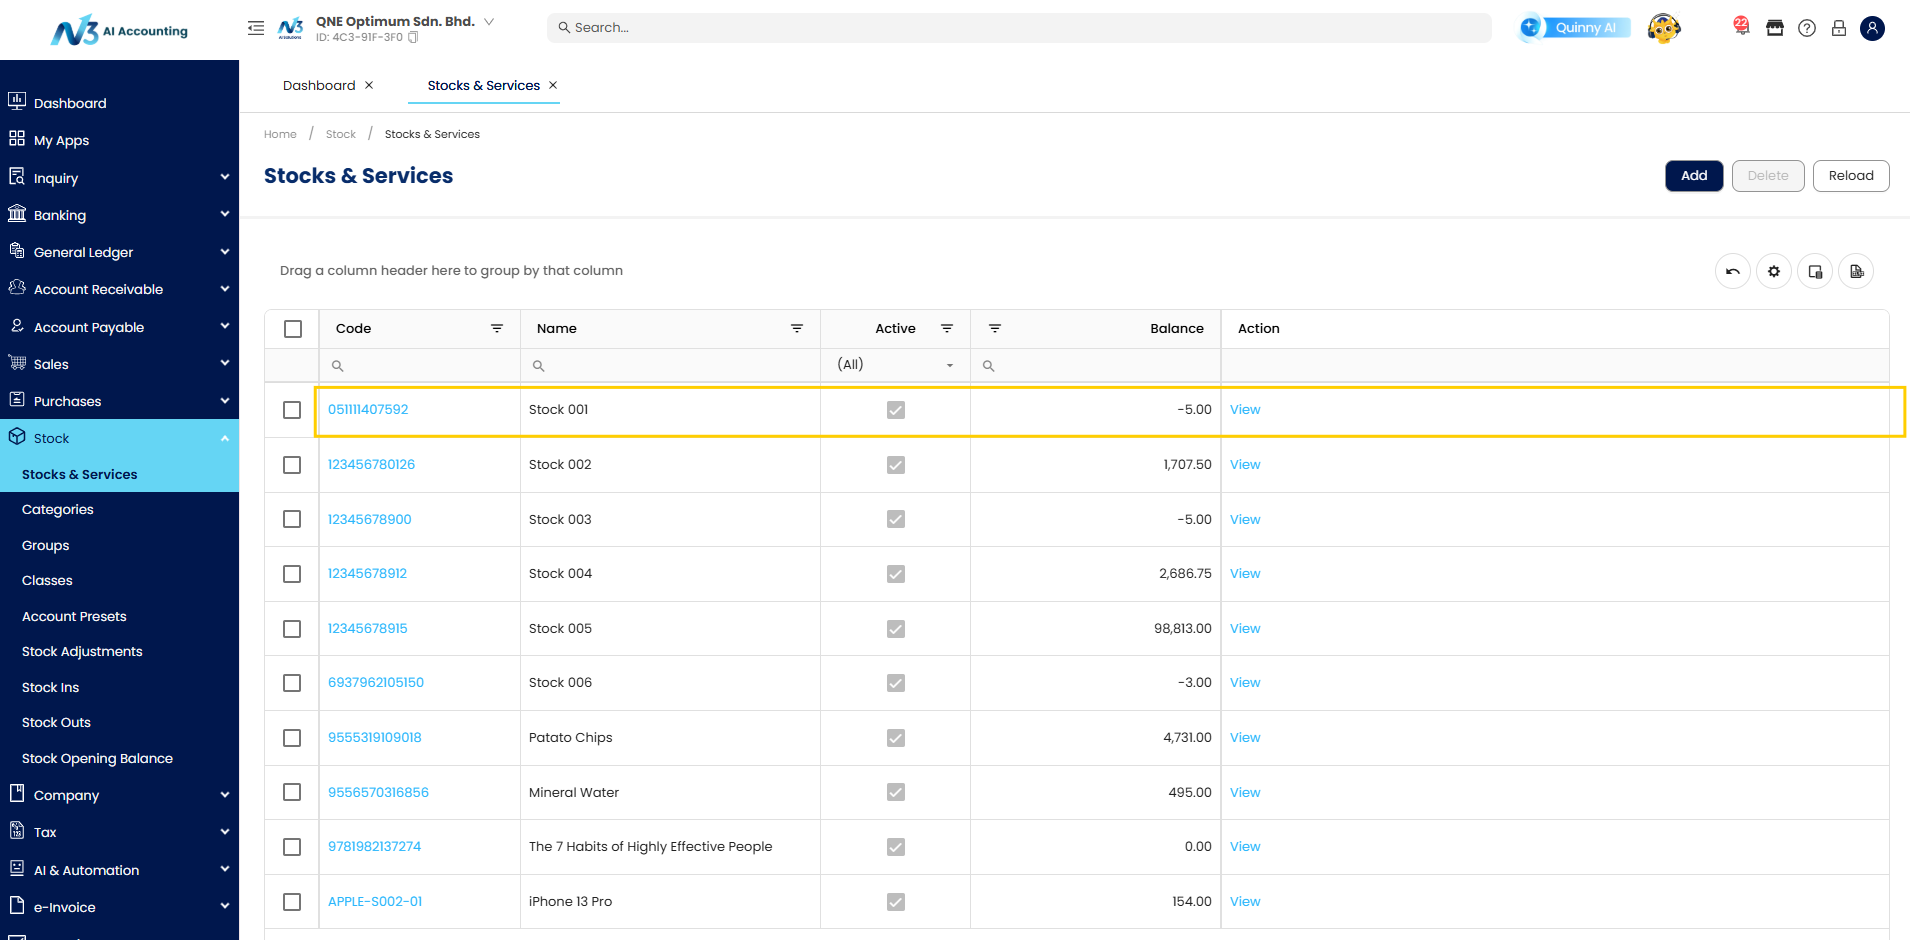
2. Select the stock item(s) for which you want to generate the barcode. For example select Stock 001
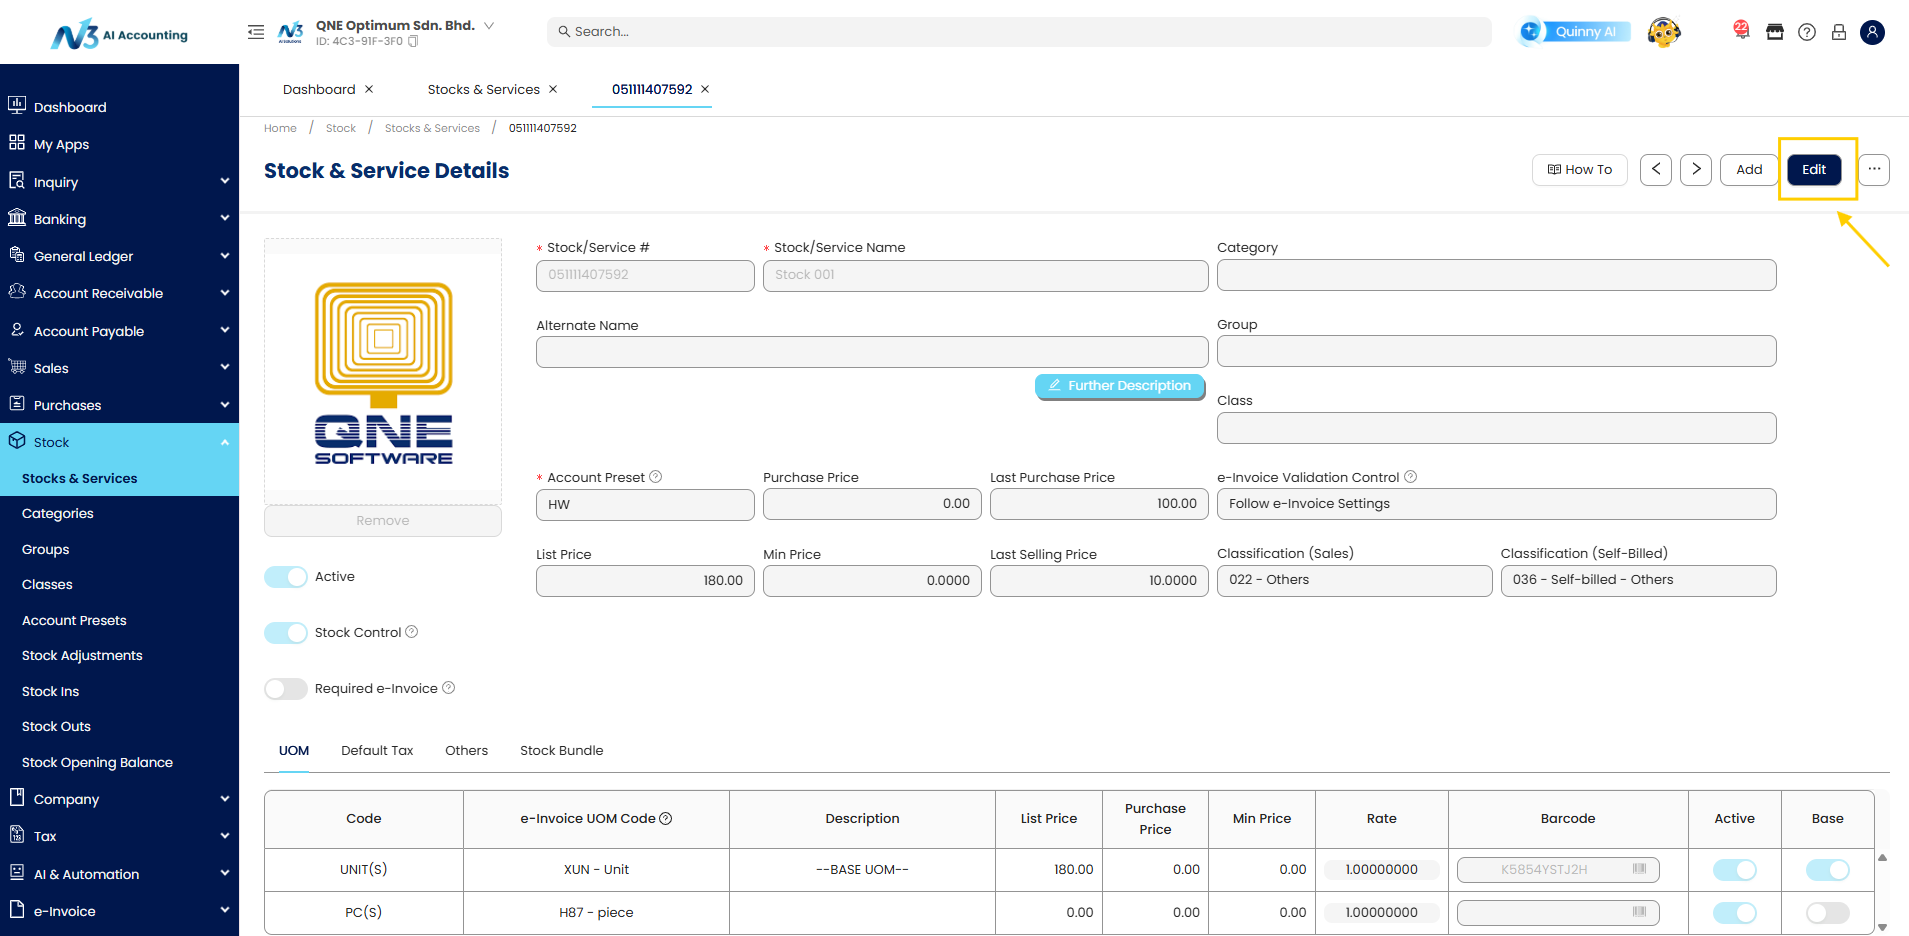
3. Click on Edit
4. Click on Auto-generate Barcode
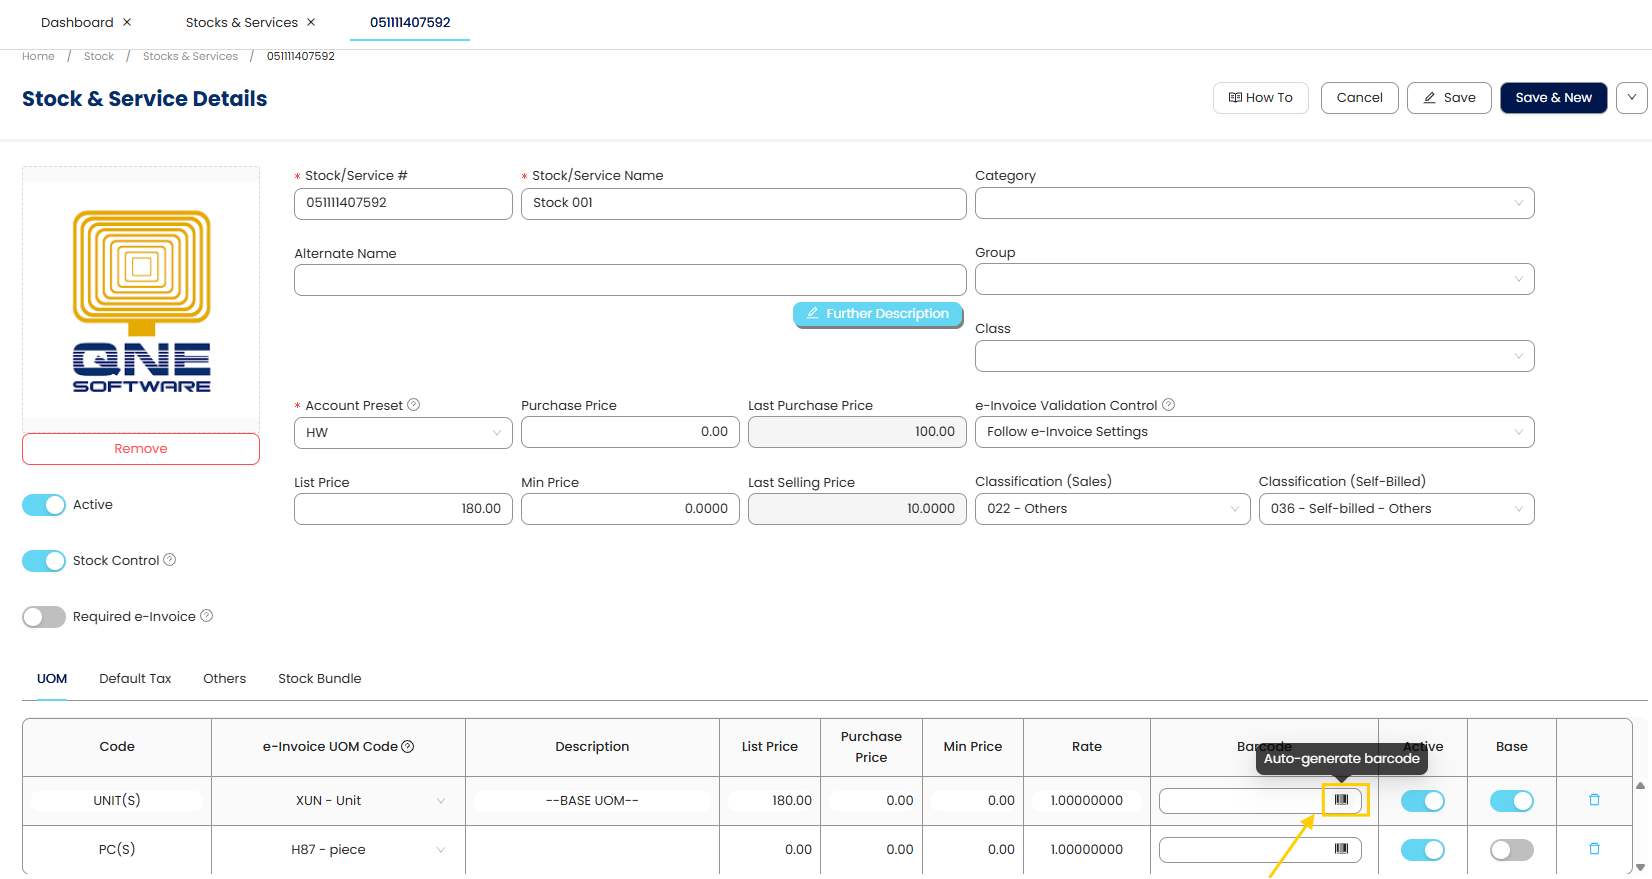
5. After click Auto-generate barcode, system will generate a random barcode for the Stock 001 or user may manually enter the barcode same code as their current stock barcode then save Stock 001.
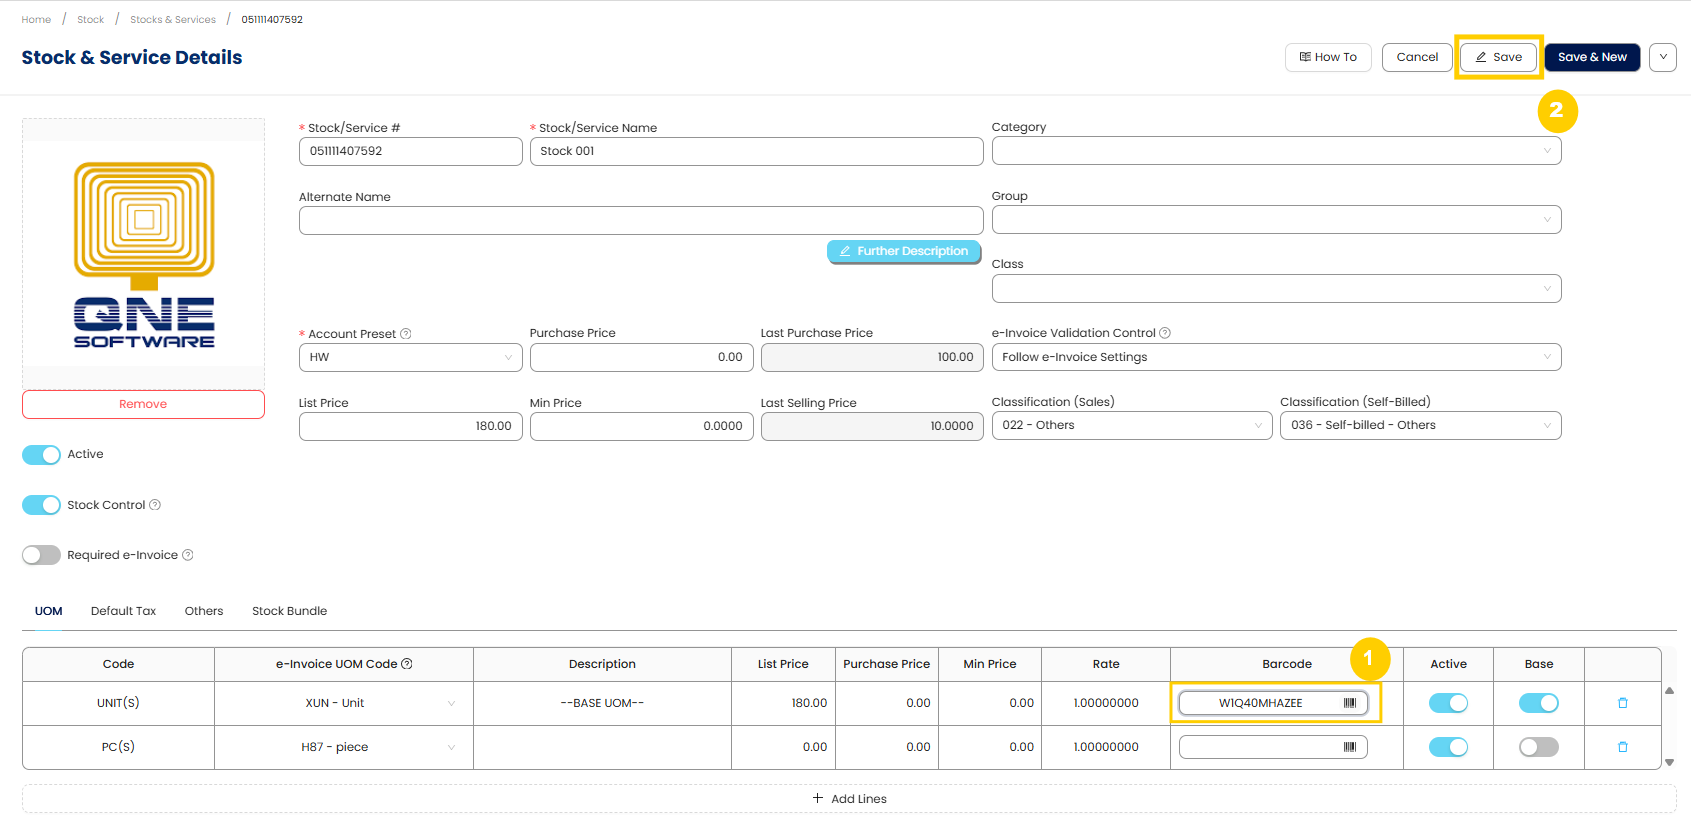
6. To preview the barcode, click the Option Button then select Print Barcode
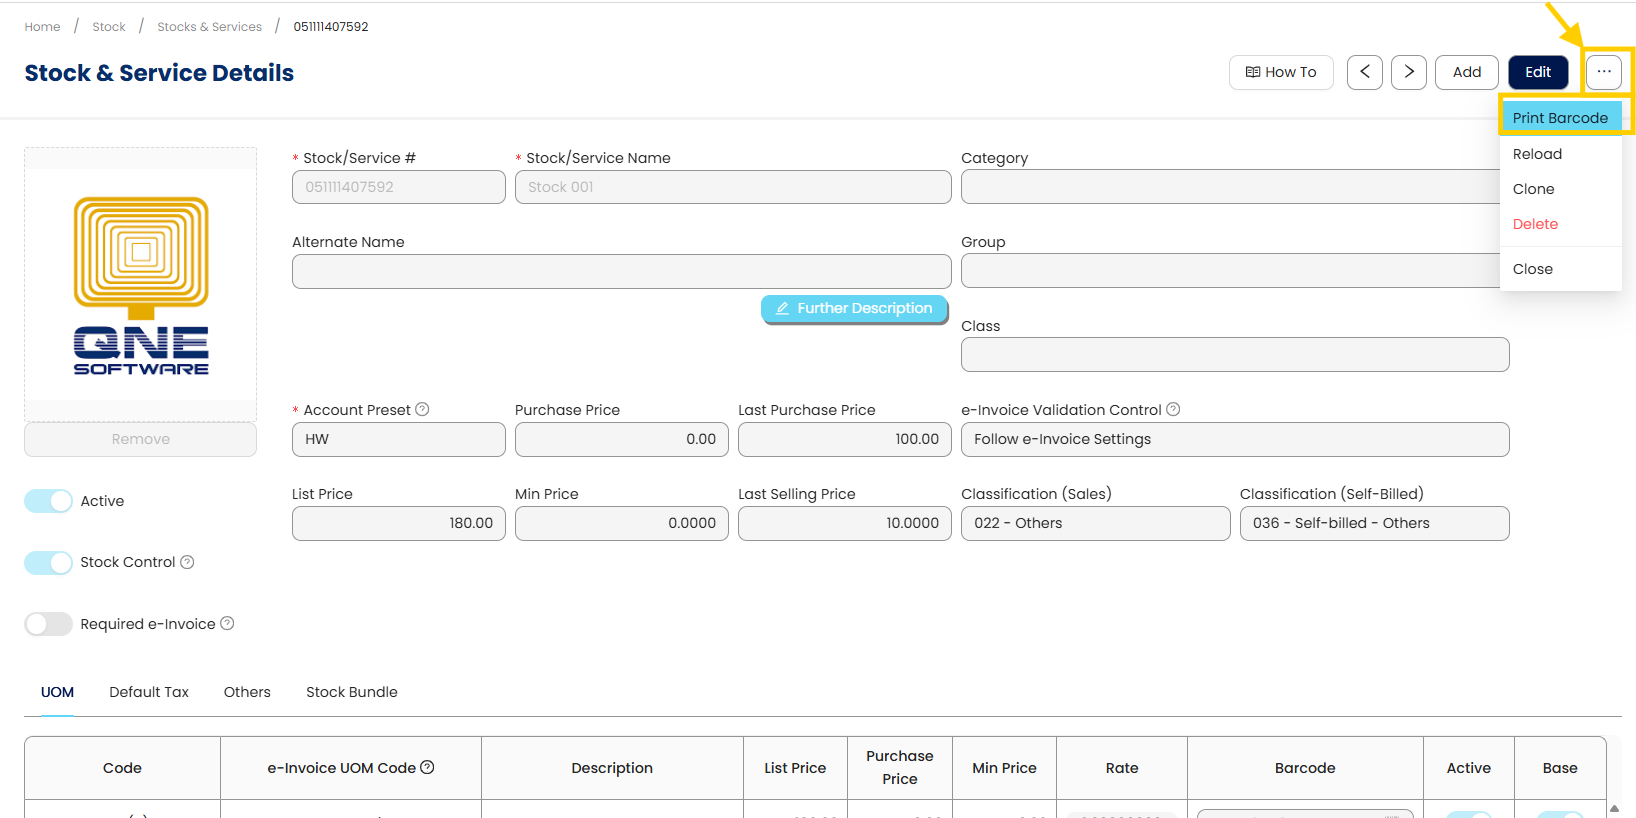
7. System will pop up Print Barcode option where user will have more option to print barcode:
- Select UOM : User can select more than 1 UOM, where system will generate barcode based on the UOM selected.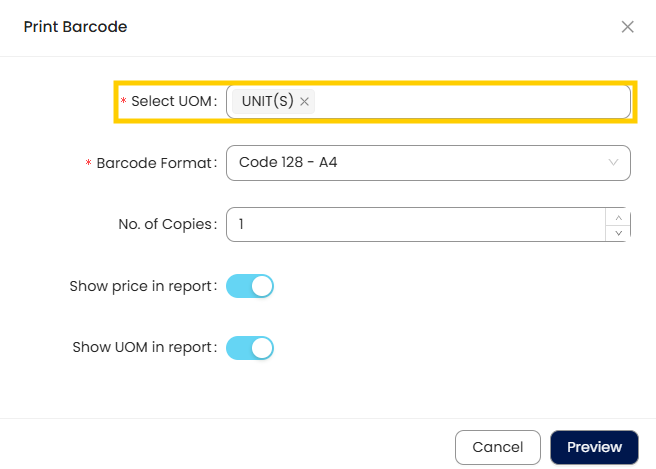
- Barcode Format : User can select which barcode format that they preferred. As for now system have 2 formats
(Code 128 – A4, Code 128 – 40x30)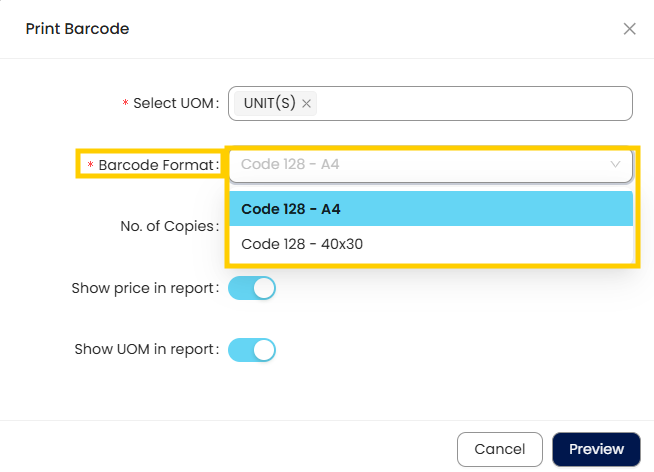
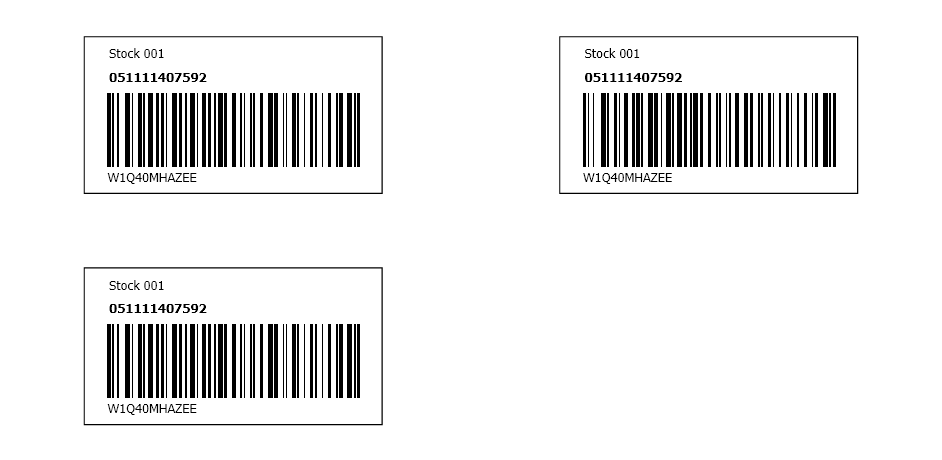
- No of Copies : User can set how many copies preferred. Example 3 copies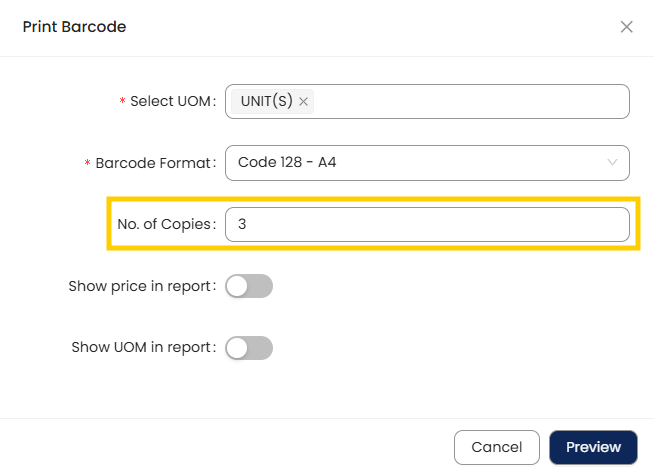 Then when preview the barcode, system will shown as 3 copies of barcode
- Show price and UOM in report options : This options will display the unit price and UOM of the stock when preview the barcode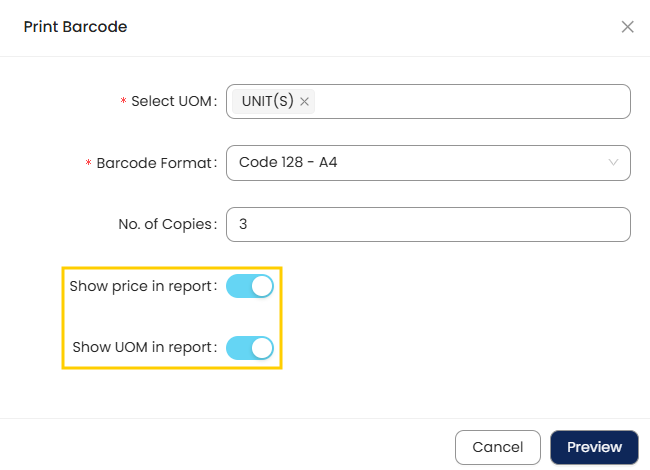
Click preview, the preview will show the barcode included the UOM and Unit Price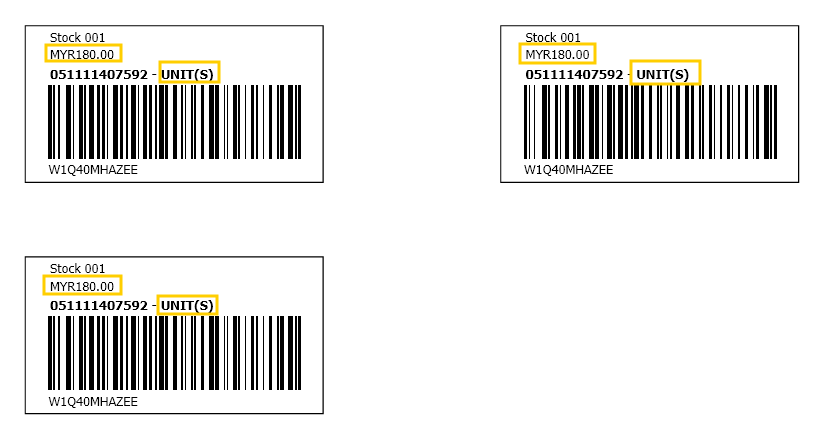
8. To utilize barcode features in the transactions, navigate to Sales>Sales Invoice> Click Add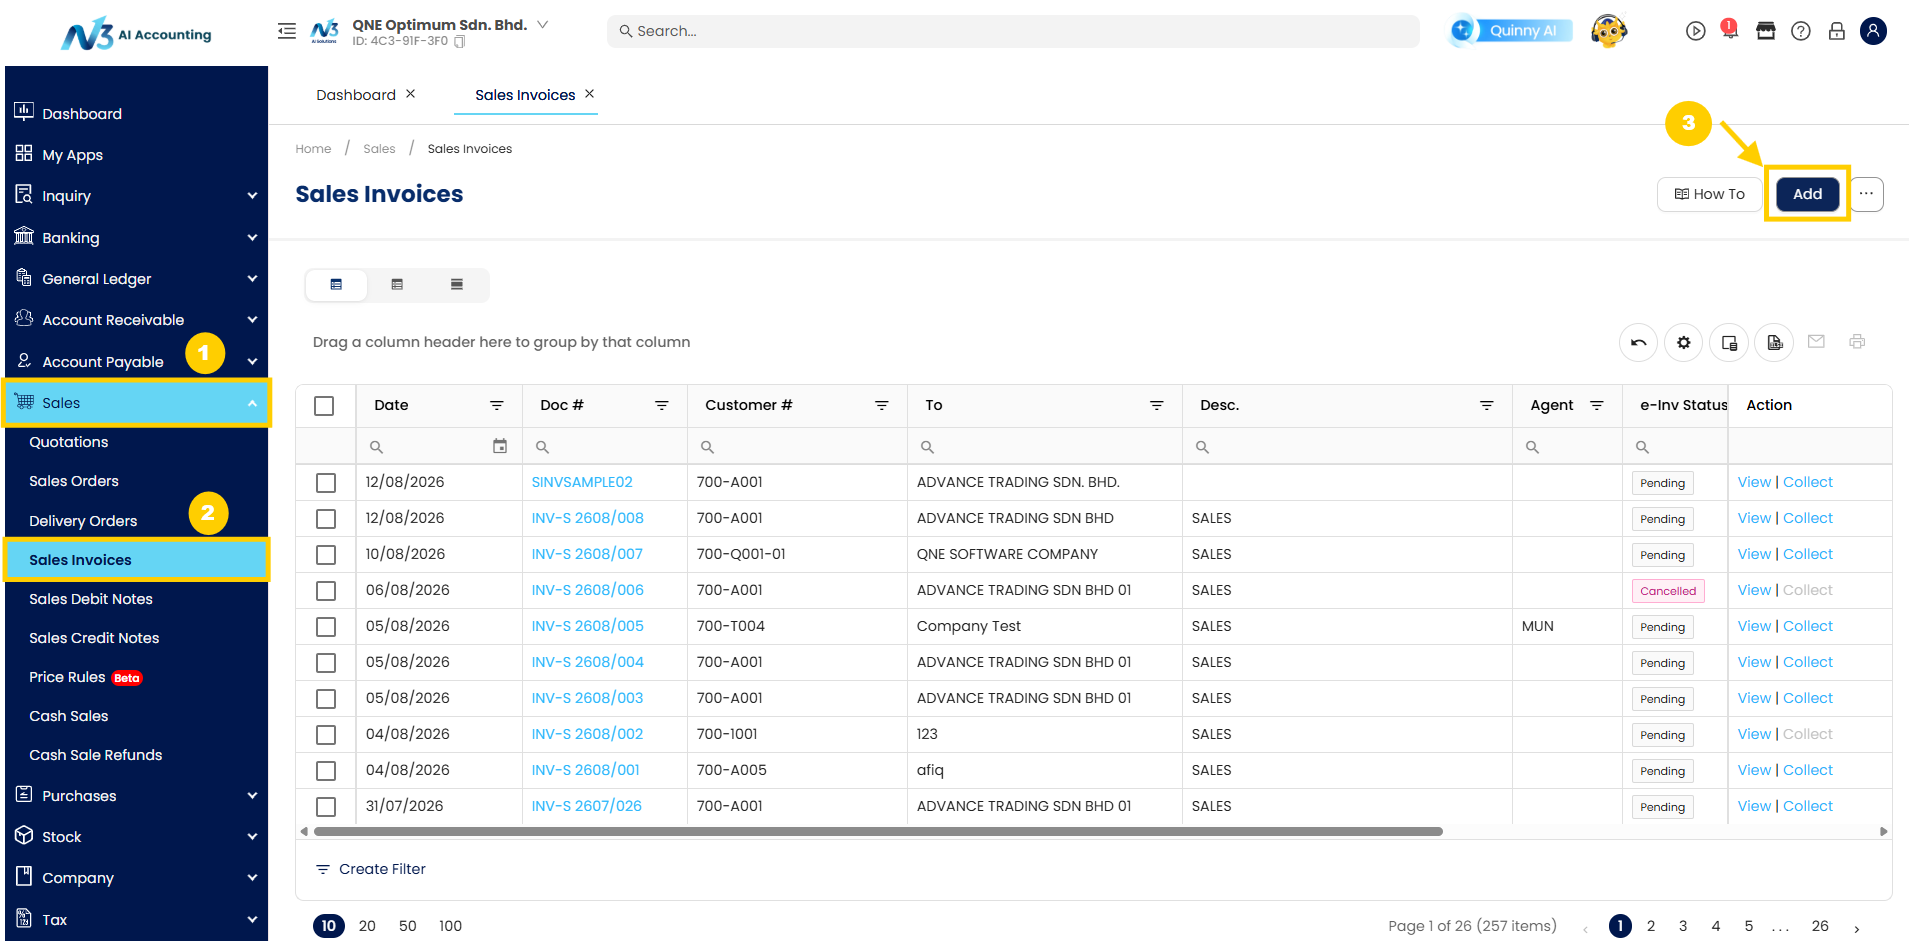
9. Select the customer first to proceed with the transaction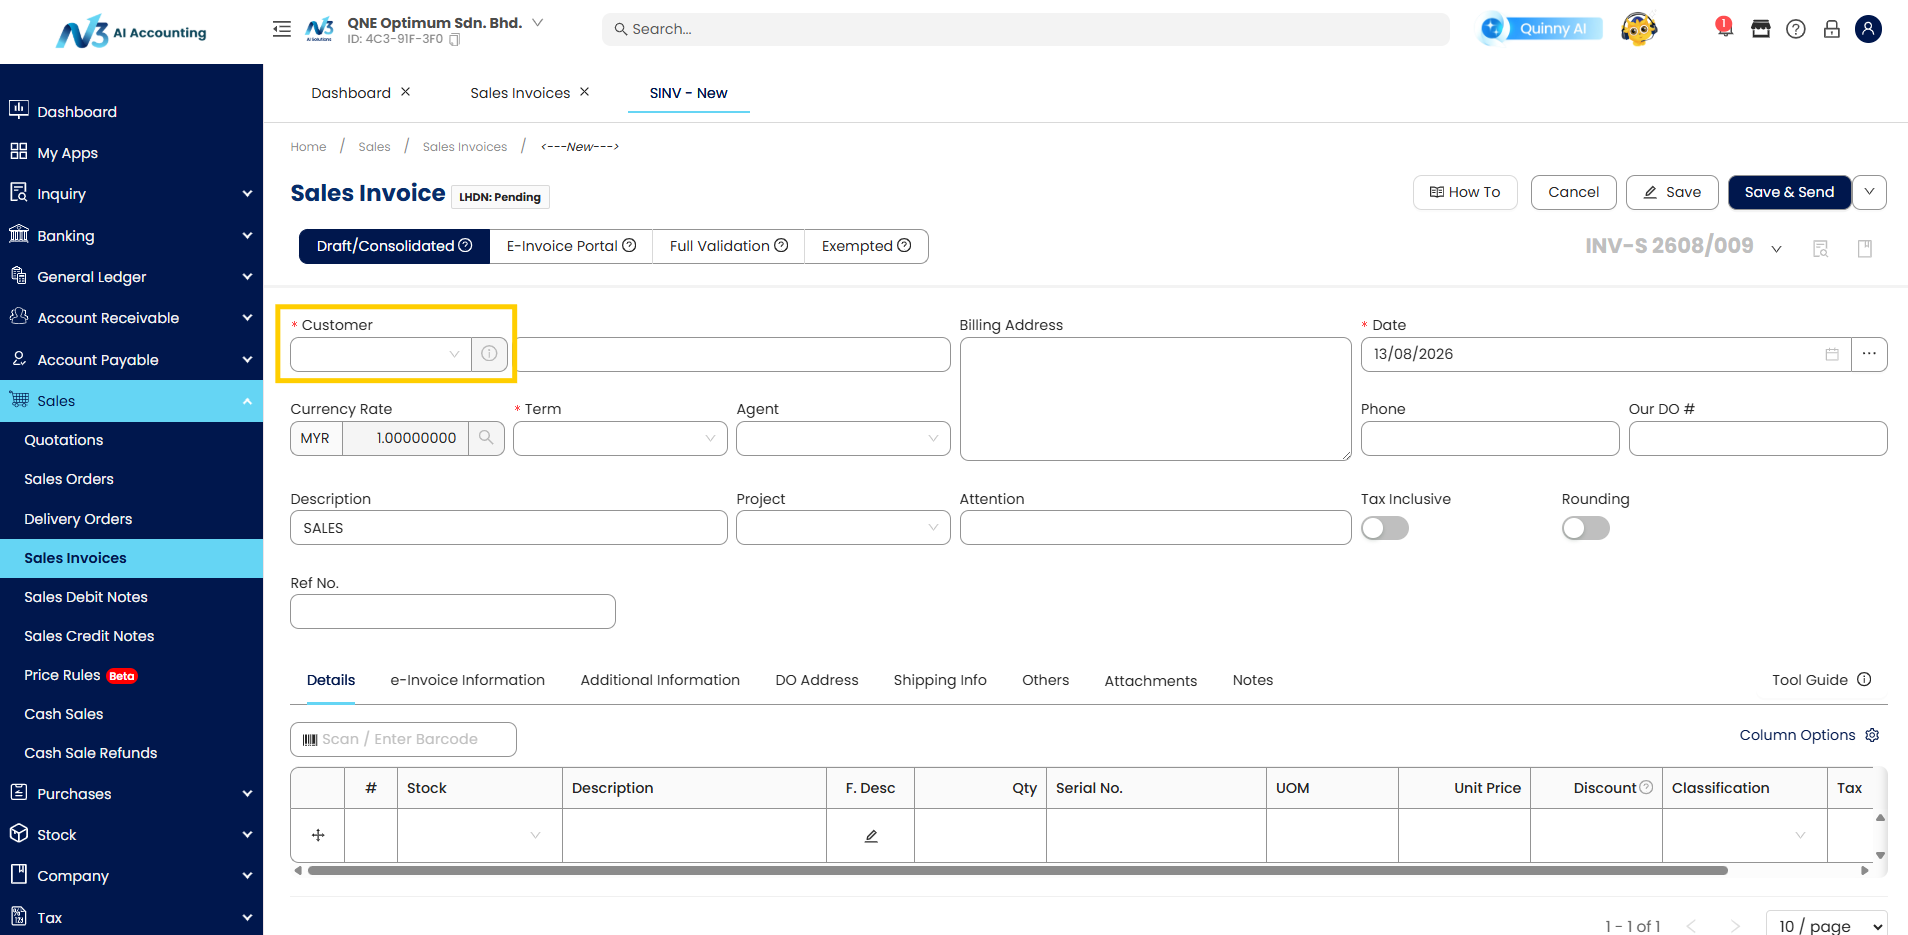
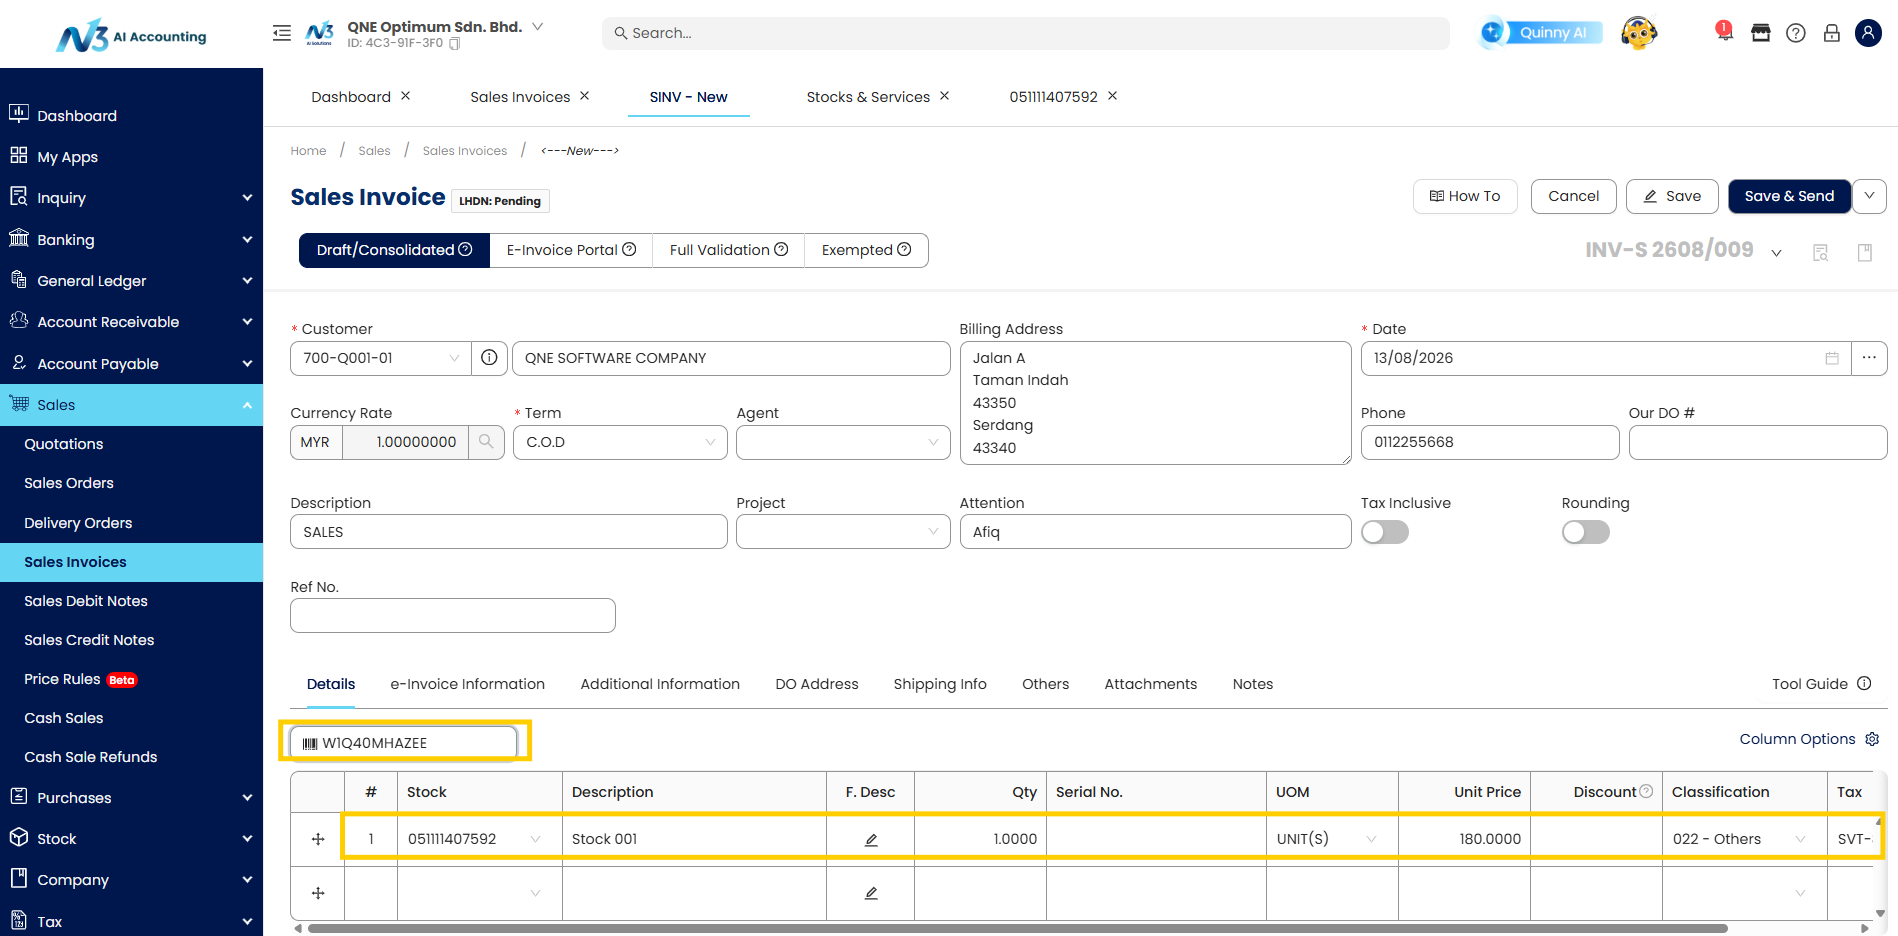
10. User may use the scanner to scan the barcode, or another option is to copy the barcode from the stock barcode and paste it into the barcode field. System will auto add the item after we entered the barcode. Click save to save the Sales Invoice
11. Please be noted that the Barcode Module can be used in :
Sales Module :
- Quotation
- Sales Order
- Delivery Order
- Sales Invoice
- Sales Debit Note
- Sales Credit Note
- Cash Sales
Purchase Module :
- Purchase Requisitions
- Purchase Orders
- GRN
- Purchase Invoices
- Purchase Returns
- Cash Purchases
Stock:
- Stock Adjustments
- Stock In
- Stock Out
- Stock Opening Balance
- Stock Transfers
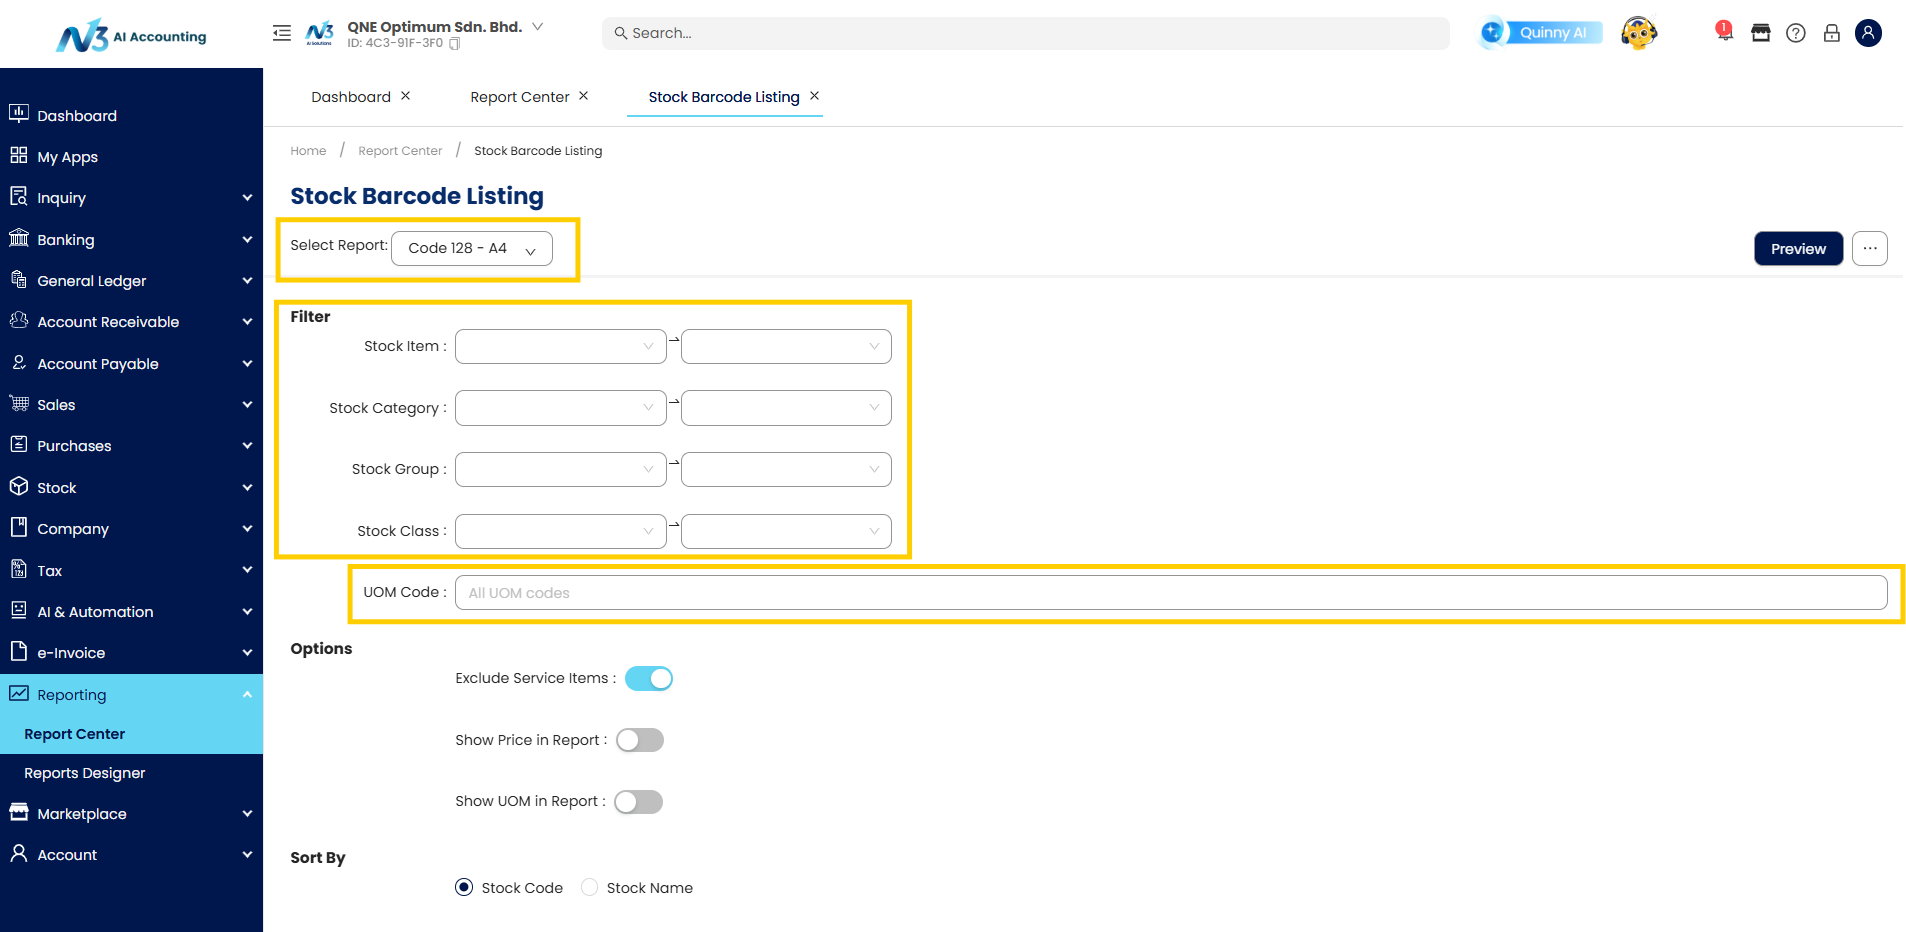
12. To print the Barcode Listing, navigate to Reporting>Report Center>Stocks>Master Reports>Stock Barcode Listing
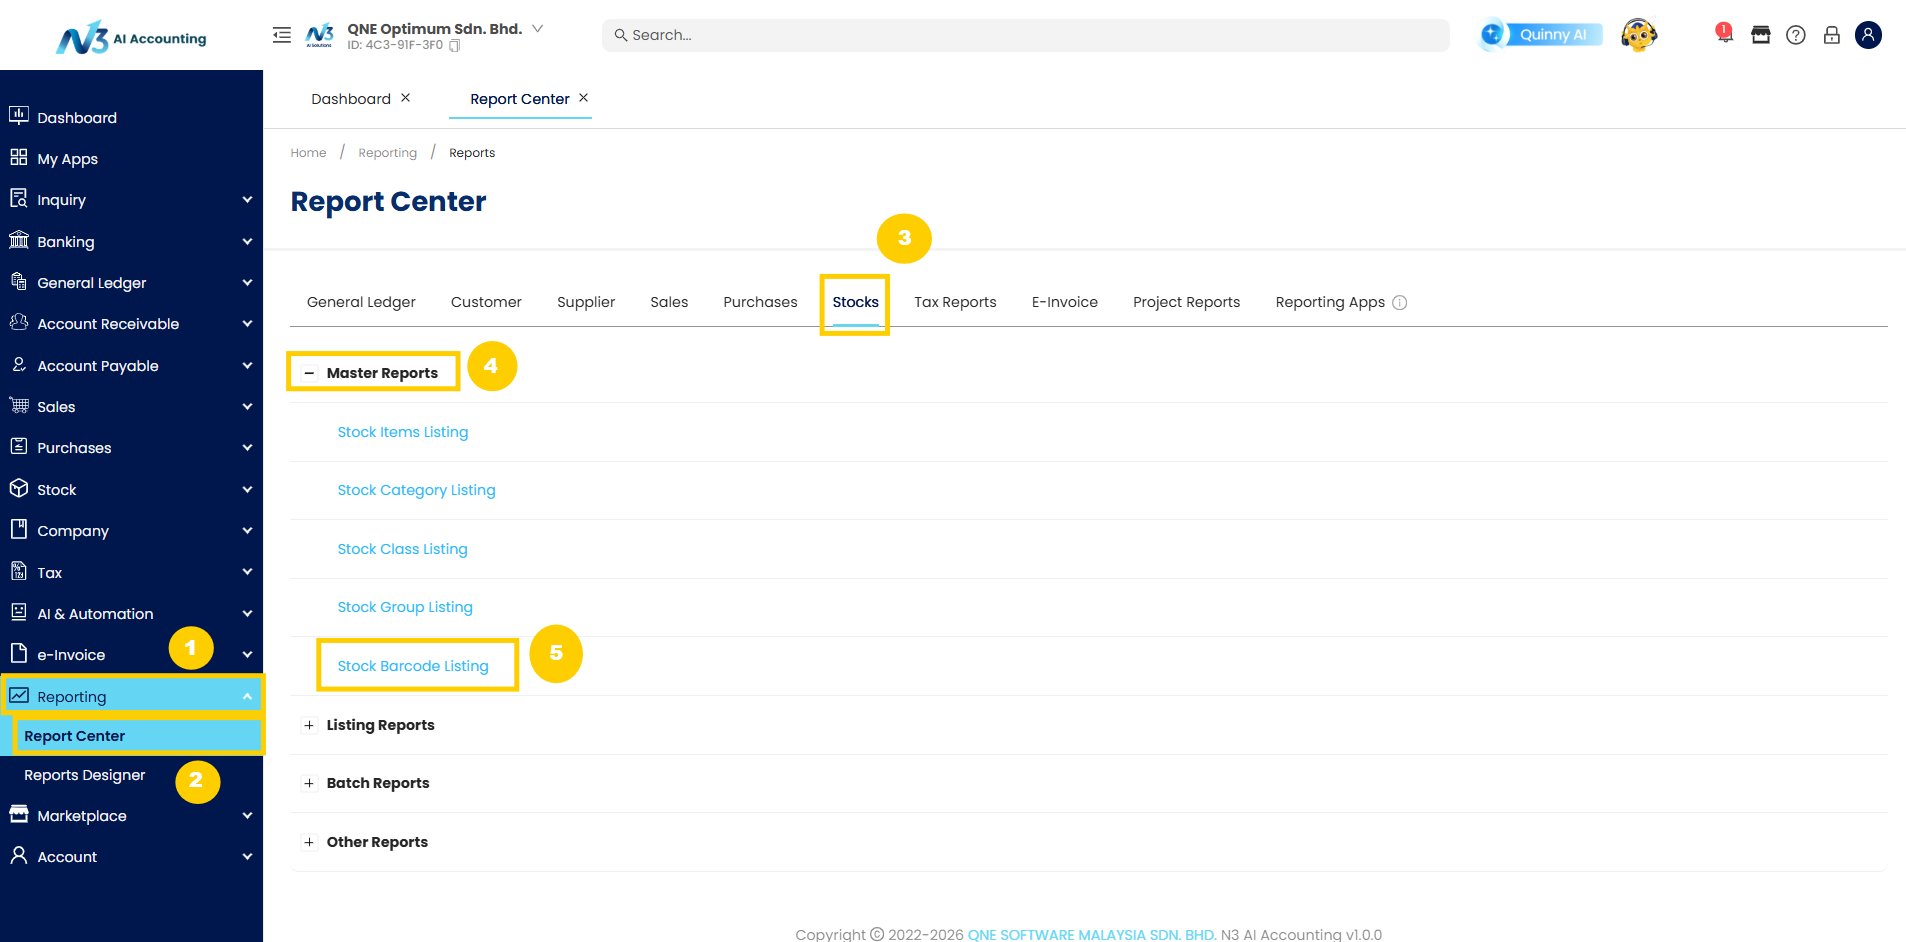
13. System will redirect to preview option settings. User may select the Report Format, then filter the Stock Item, Stock Category, Stock Group, Stock Class by range. Then user also have options to select which UOM to be included.
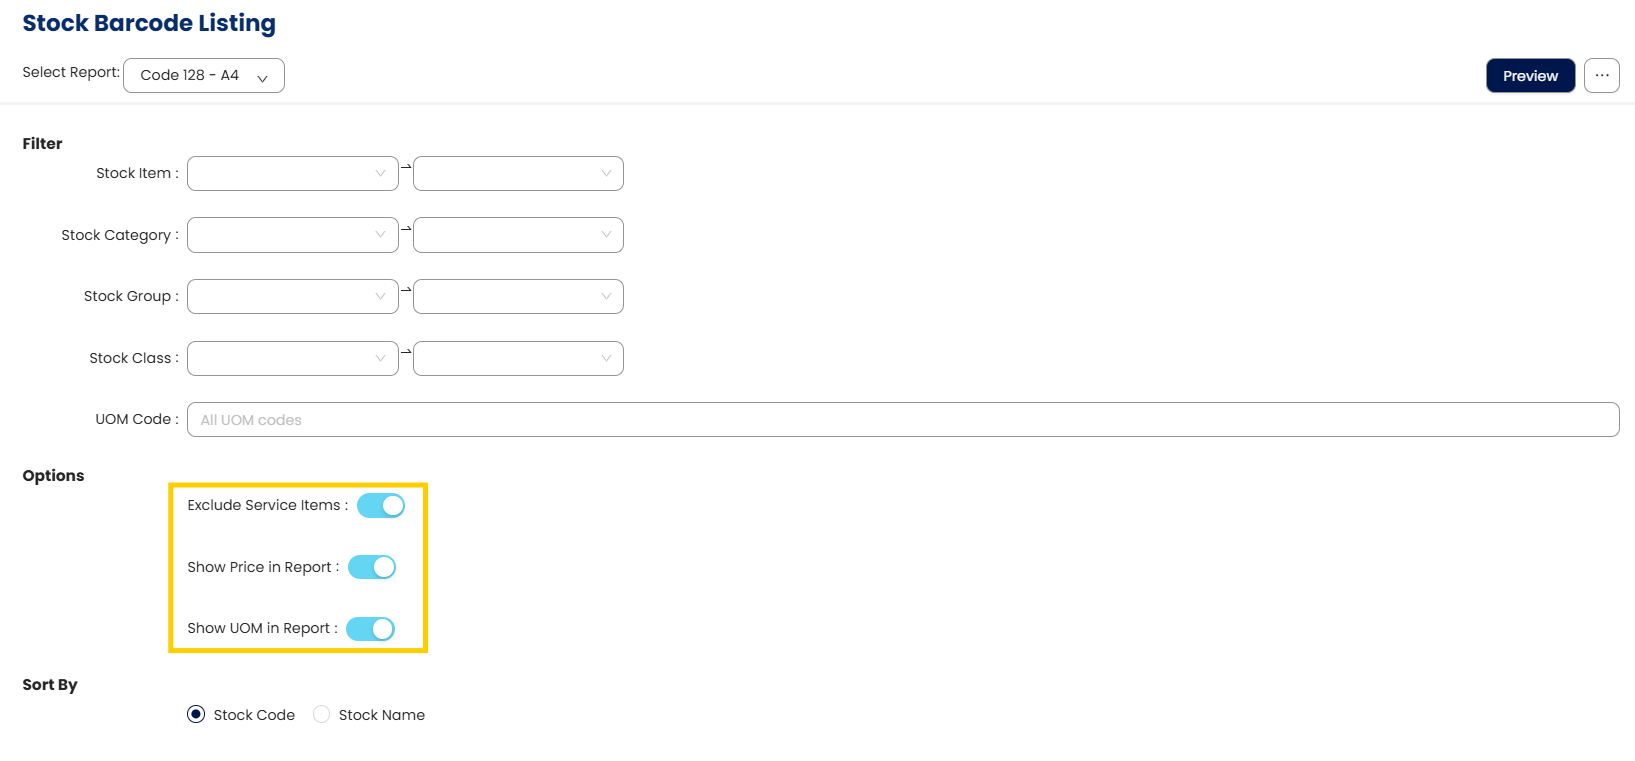
14. Another options before preview the Barcode Listing is to exclude Service item, Show Price and UOM in report.
15. Preview the Stock Barcode Listing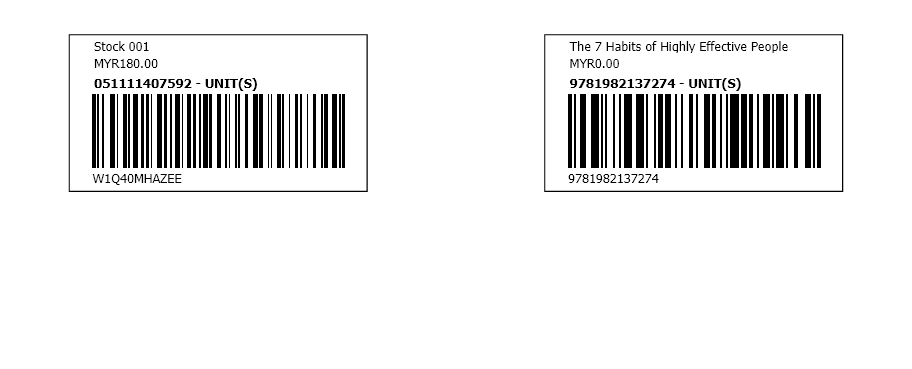
Click here to download :
Was this article helpful?
That’s Great!
Thank you for your feedback
Sorry! We couldn't be helpful
Thank you for your feedback
Feedback sent
We appreciate your effort and will try to fix the article
