Overview:
This tutorial guides you through the process of issuing and submitting a self-billed e-invoice. You will learn step-by-step how to generate a self-billed e-invoice and properly submit it in compliance with e-invoicing requirements. By the end of this tutorial, you will be able to efficiently manage self-billed e-invoices from creation to submission.
Scenario:
A self-billed invoice is issued when the Buyer is required to issue an e-invoice on behalf of the supplier.
Situations where you are required to do self-billed invoice is when:
Payment to agents, dealers or distributors
Goods or services sold are rendered by a foreign supplier
Profit distribution within a company
E-commerce
Acquiring goods or services from an individual not conducting a business
Interest payment
Note: Please be informed that only the Sales and Purchase modules can be used for e-invoice purposes.
Solution:
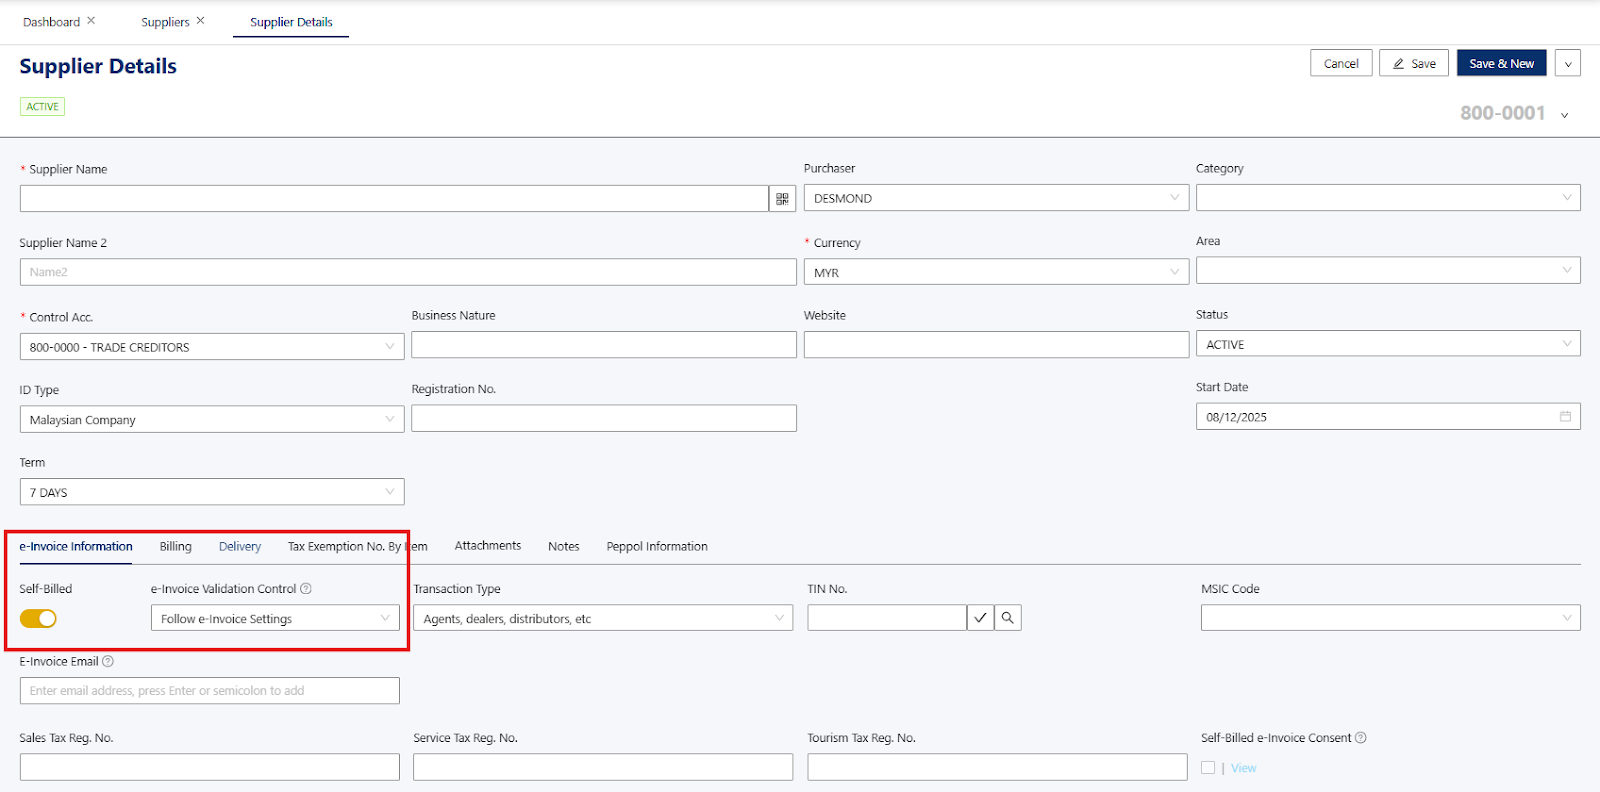
Before issuing a self-billed e-invoice, please ensure that the Self-billed toggle is turned on. Kindly refer here - How to Set Up e-Invoice Required Fields for Suppliers.
Mandatory details requested by IRBM:
Supplier’s Name
Supplier’s TIN
Supplier’s Registration
Supplier’s Address
Supplier’s Contact Number
Supplier’s SST Registration Number
Supplier’s Malaysia Standard Industrial Classification (MSIC Code)
Product Classification
Reference: E-invoice Specific Guidelines
Next, click on Purchase Module > Purchase Invoice to issue a self-billed e-invoice.
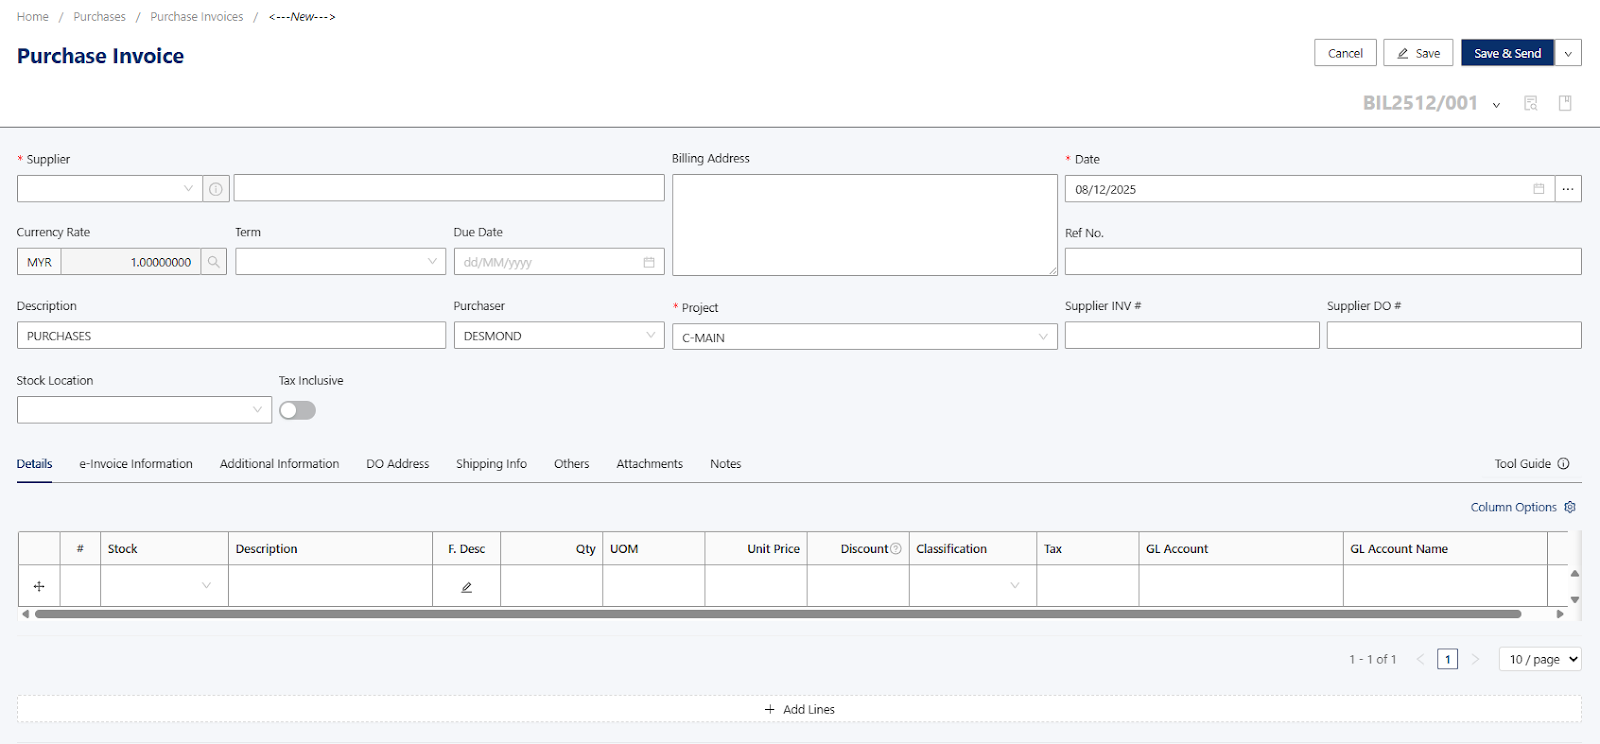
In the Purchase Invoice section, the e-Invoice selection button on the top bar may not be visible.
This happens because the e-Invoice feature is only available for suppliers that have the e-Invoice toggle enabled (as configured in Step 1).
Only for those suppliers with the toggle turned on will the system allow users to select and issue e-Invoices from the Purchase Invoice module.
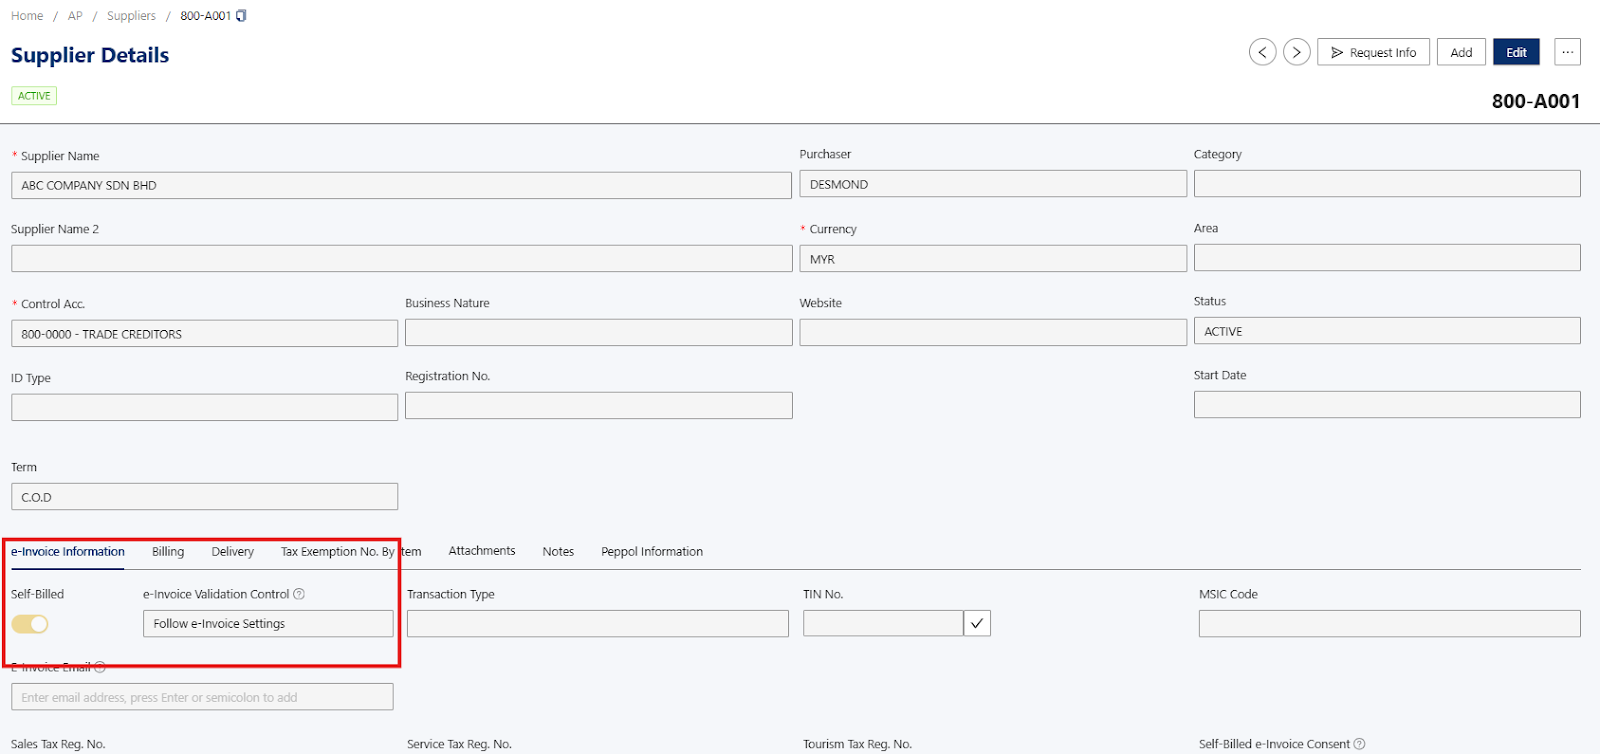
Example of Supplier with self-billed e-invoice toggle on:
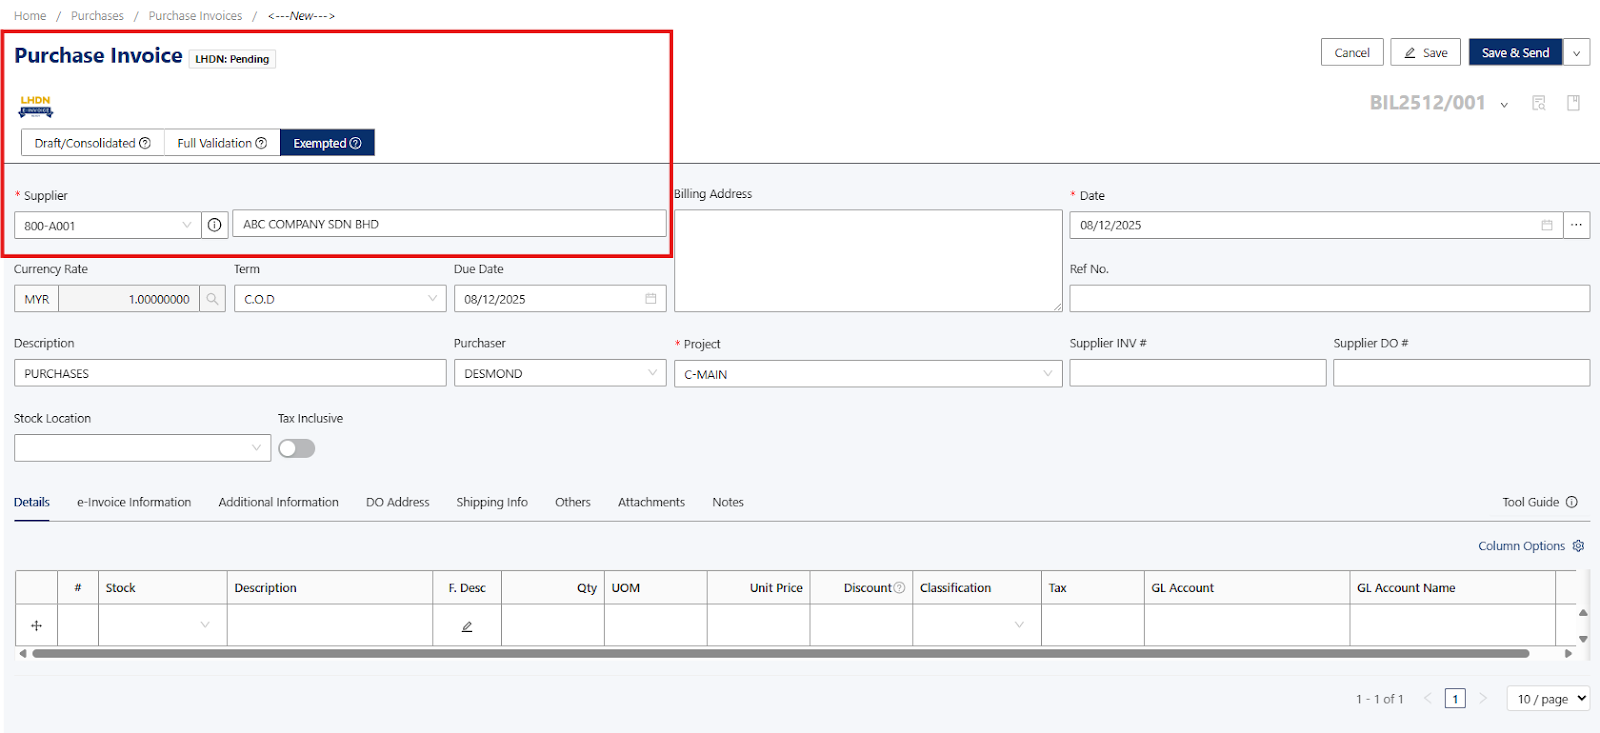
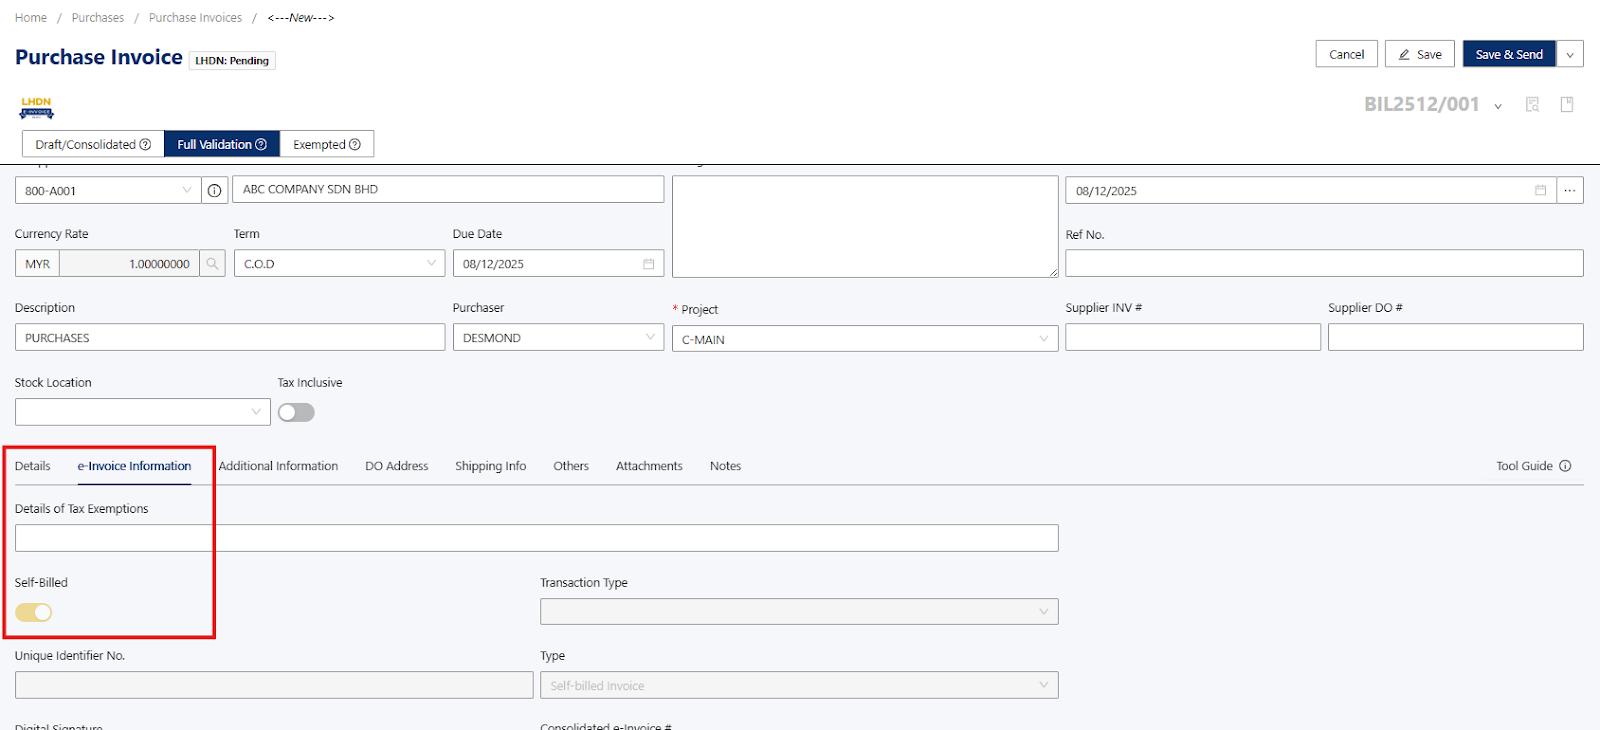
Once you’ve selected the Supplier details, you can proceed to issue a self-billed e-invoice.
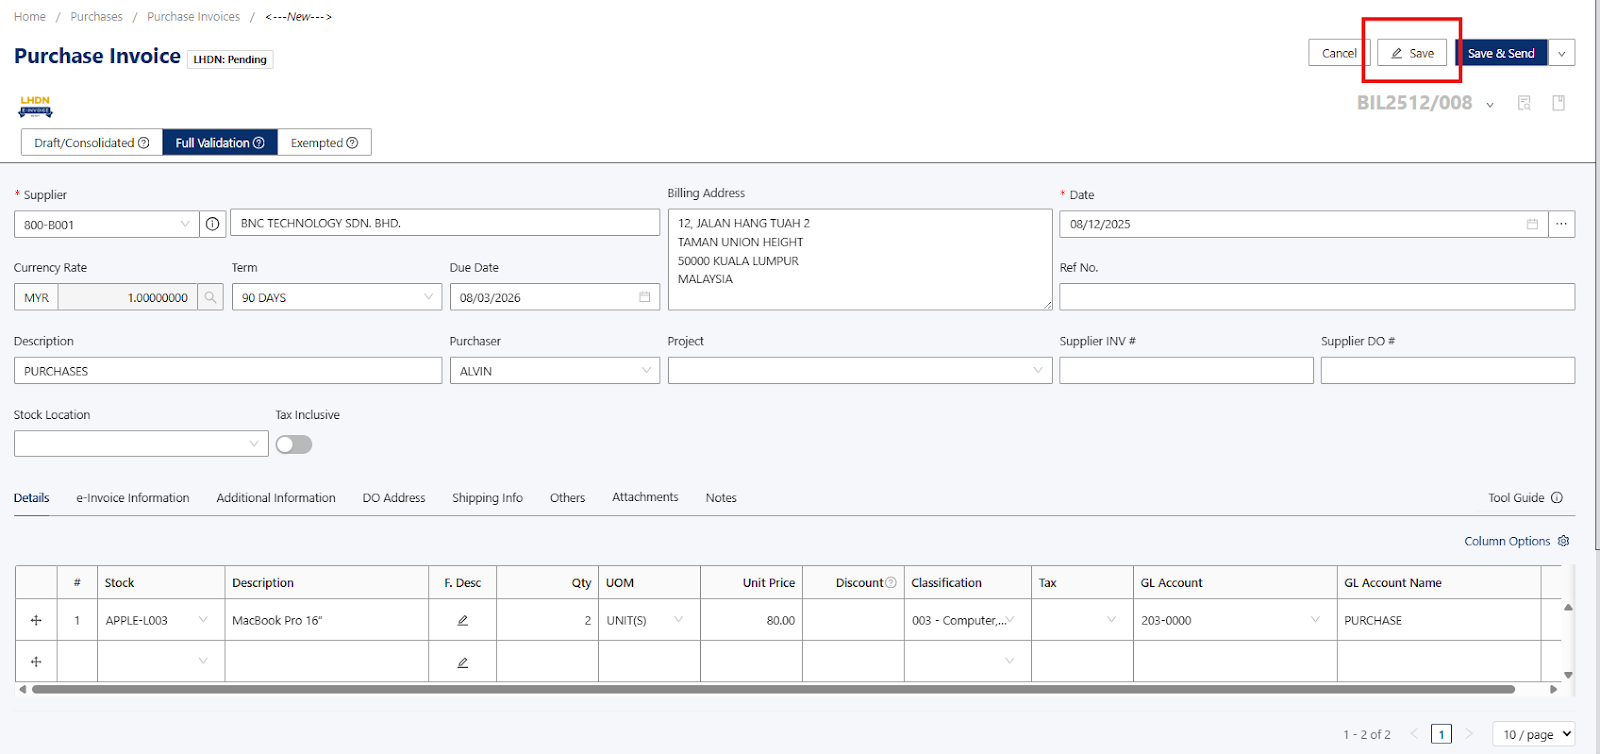
Note: The self-billed e-invoice must reflect the information exactly as if it were issued by your foreign supplier to ensure full e-invoice compliance.Once information has been provided in the Purchase Invoice, you can proceed to click on the Save Button.
The save button will save the issued Purchase Invoice in the system.
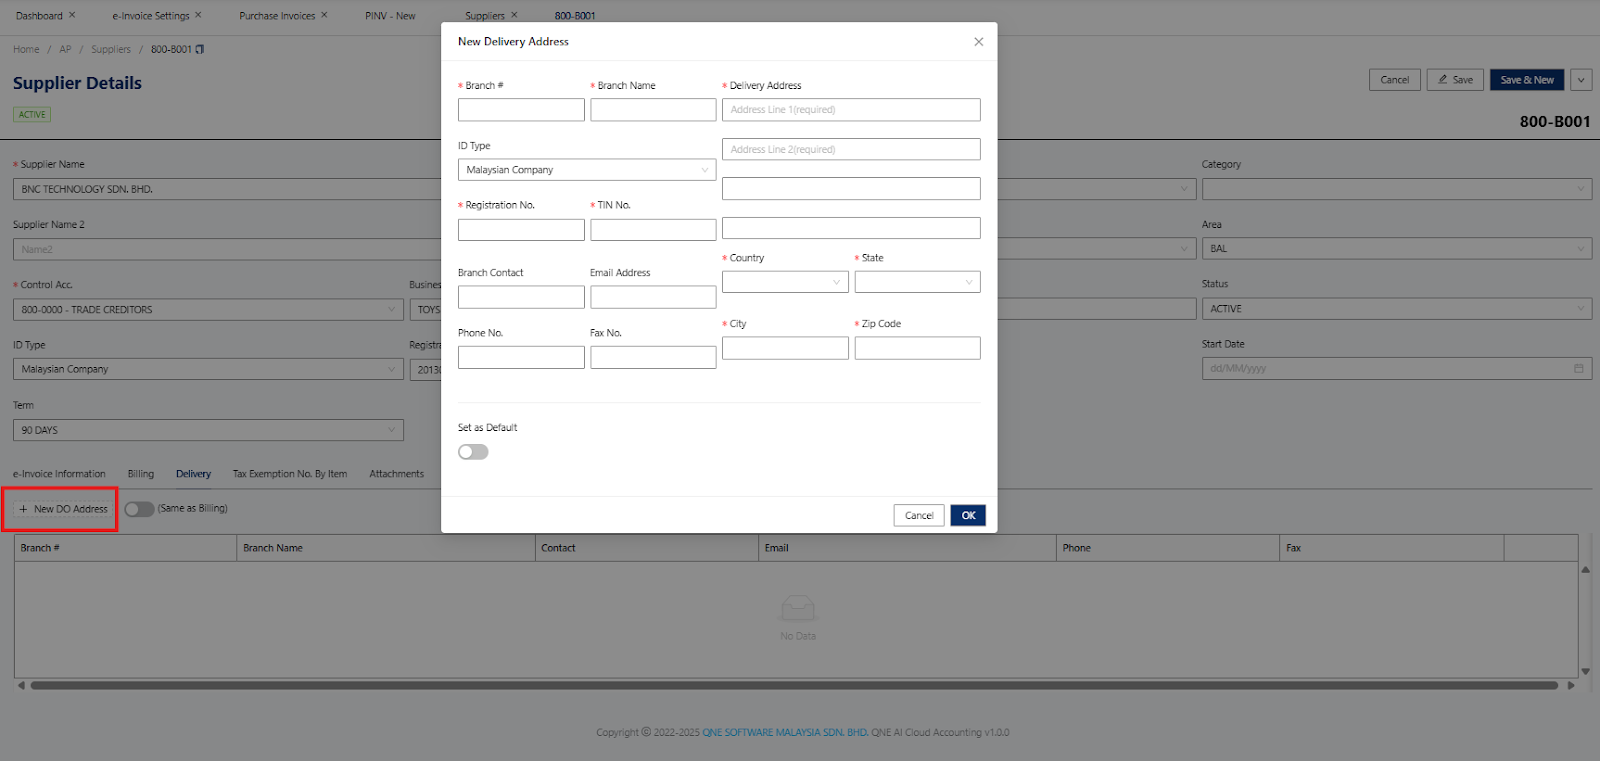
Note: If you encountered an error ‘City is required. State is required. Country is required.’

Resolution:
Supplier > Select the supplier > Edit > Billing
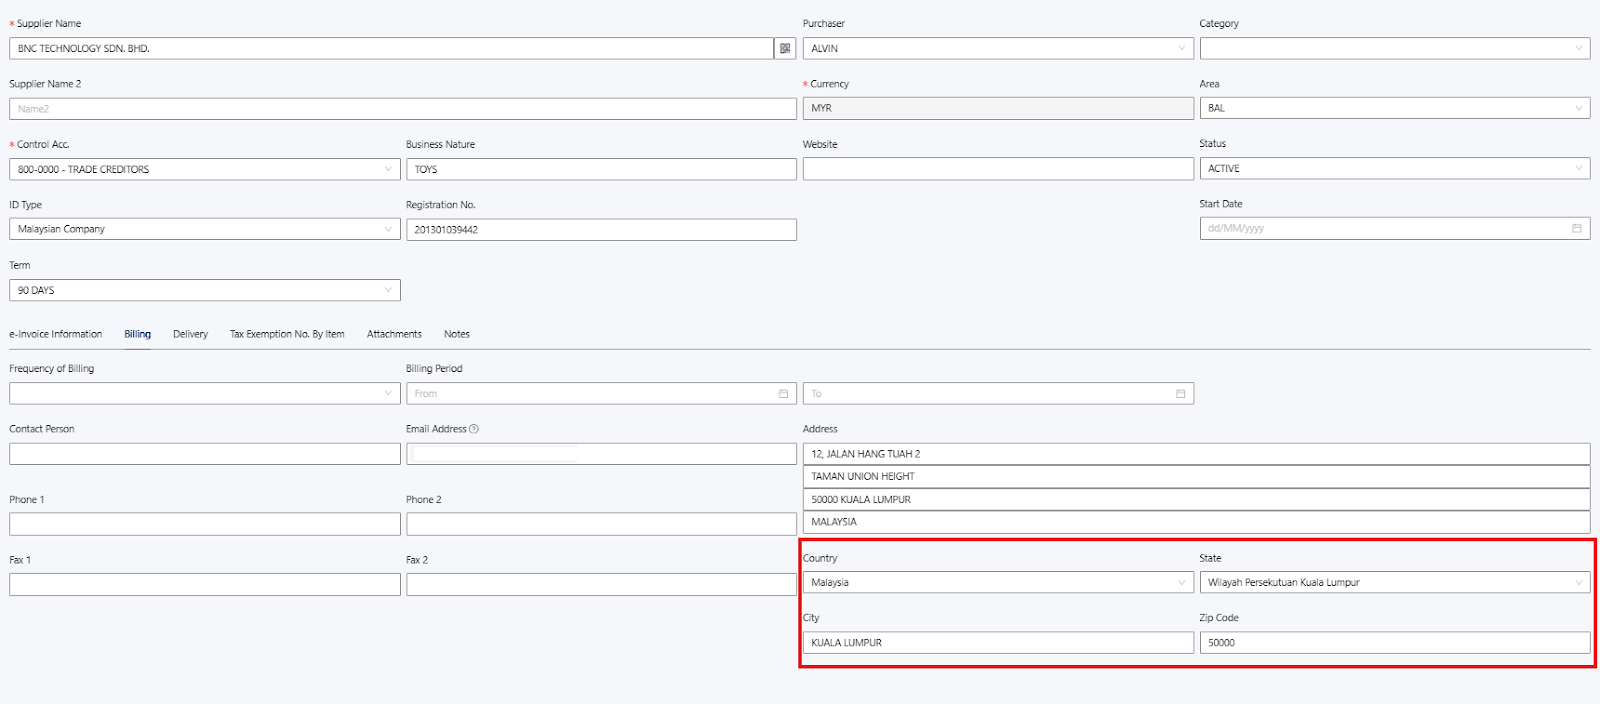
Check on the Delivery Address
Can toggle on the Same as Billing if the delivery address is the same
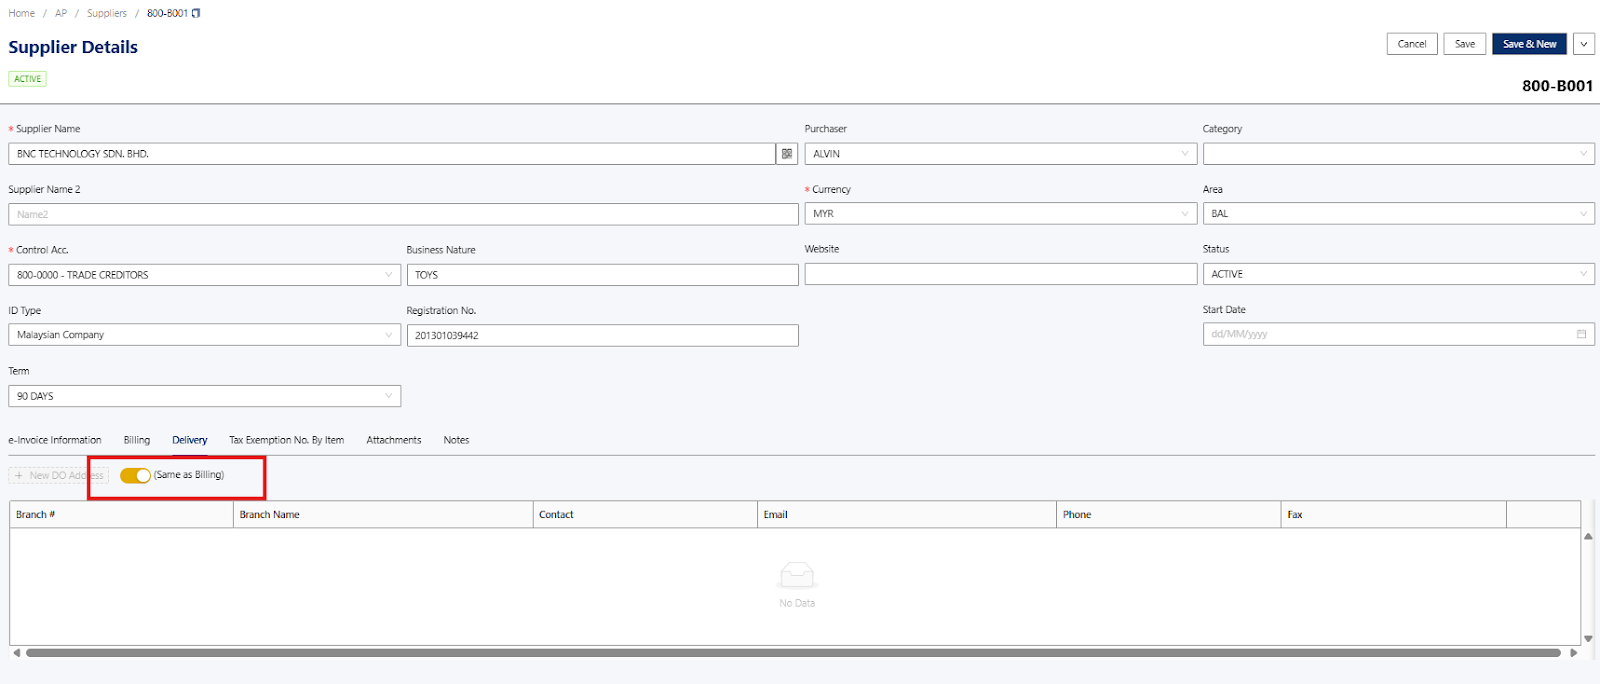
Add New DO Address if you want to include other delivery address options
Once the address has been updated, the user must proceed to go to Purchase Invoice and reselect the Supplier again to get the updated information.
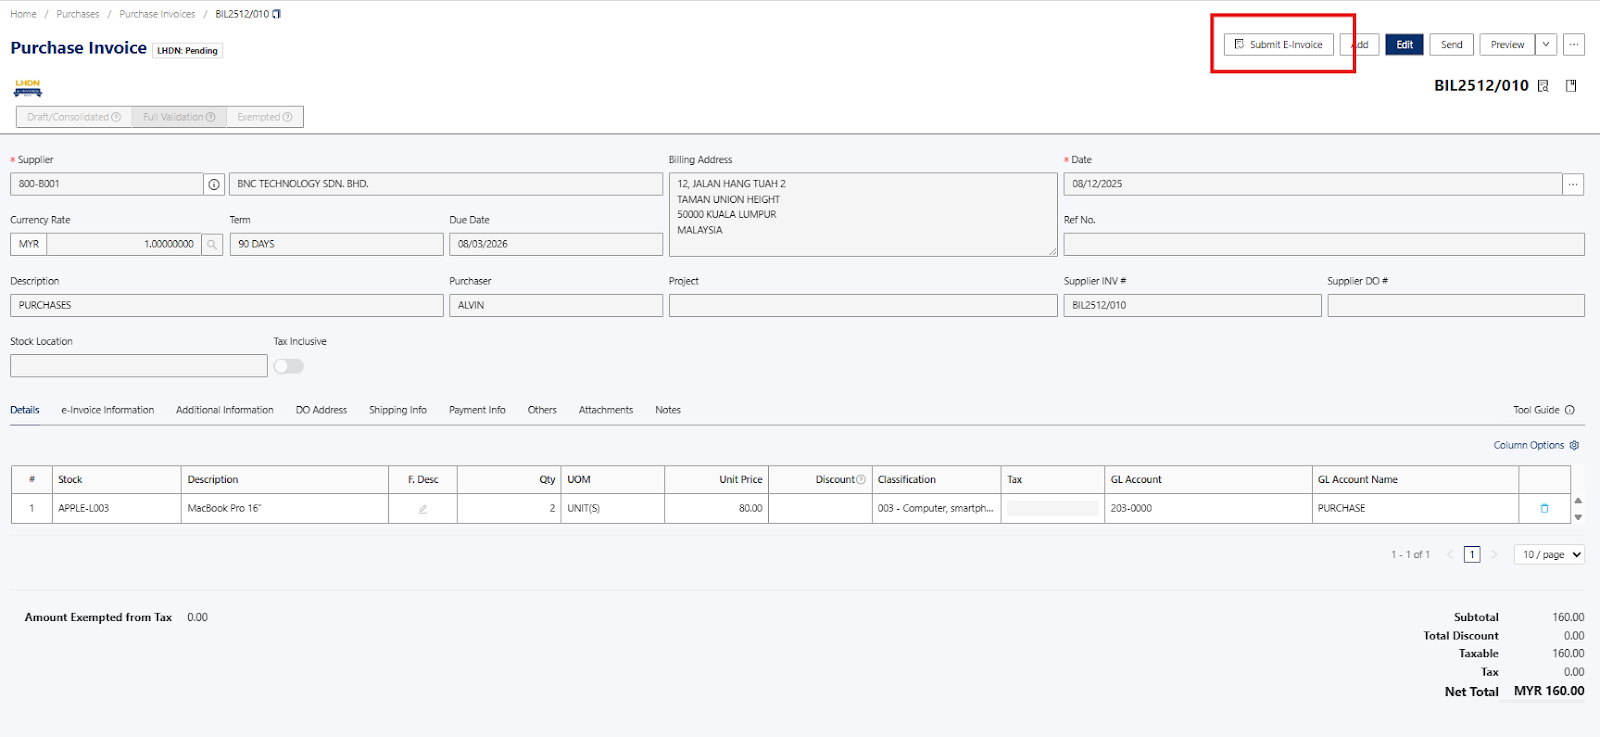
Next, the user can review and, if necessary, amend the information. Once the document is finalized and ready, click the Submit E-Invoice button to proceed.
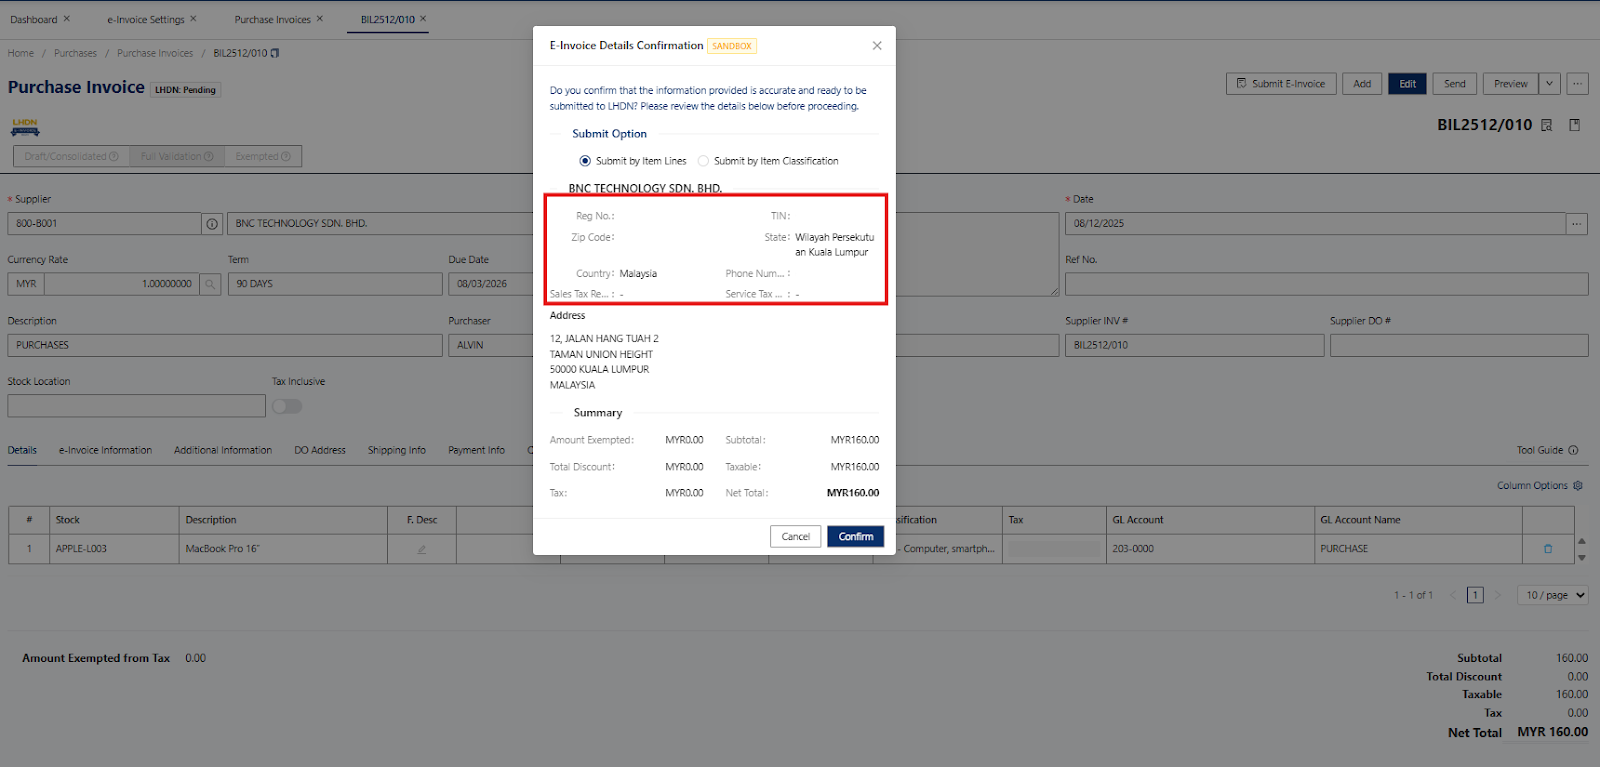
After clicking Submit E-Invoice, a pop-up box will appear to confirm the details. Review the information, then click Confirm to proceed.
Once a document has been submitted and validated, you’ll be provided with UUID and Submission ID as document reference.
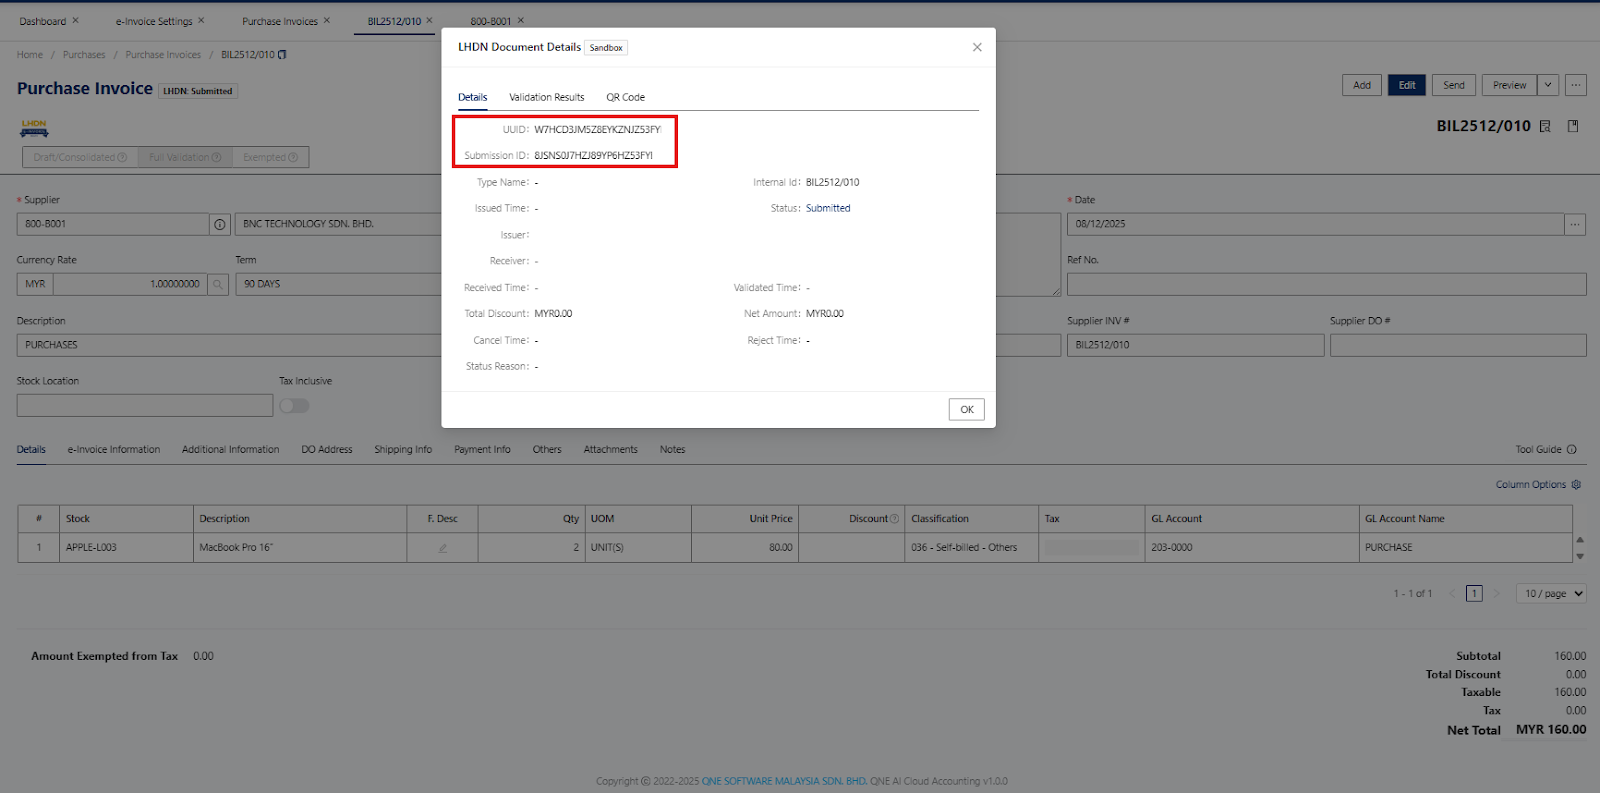
Done!
** Learn more about Azure Cloud
** Learn more about QNE Hybrid Cloud Software
Was this article helpful?
That’s Great!
Thank you for your feedback
Sorry! We couldn't be helpful
Thank you for your feedback
Feedback sent
We appreciate your effort and will try to fix the article
