Overview:
In many real-life situations, a single transaction may be settled using multiple payment methods. For example, a customer may pay partly by cash, partly through online banking, and the remaining balance via e-wallet. To support these scenarios, QNE AI Cloud Accounting provides a Multi-Payment feature across various transaction modules, including Receive Payment, Receipt Voucher, Pay Bill, Payment Voucher, and Cash Sales.
This guide explains how users can record transactions that involve more than one payment method efficiently and accurately using the Multi-Payment feature.
Scenario:
A customer makes a payment of RM300 for an invoice. However, the amount is received using different payment channels:
RM100 in cash
RM100 via Maybank transfer
RM100 through an e-wallet
Instead of creating multiple entries separately, the user can record the entire transaction in one document by using the Multi-Payment option within the respective transaction module. This ensures accurate financial records, easier reconciliation, and clearer tracking of payment methods.
Solution:
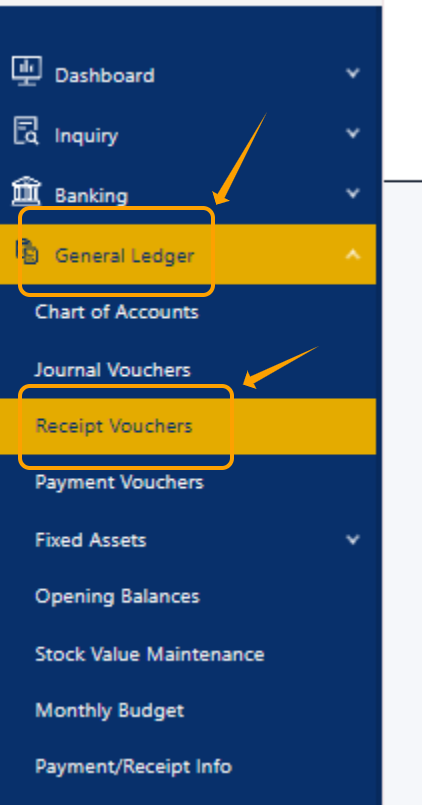
Step 1 — First, we will use the General Ledger as an example. Please expand General Ledger, then click Receive Voucher.
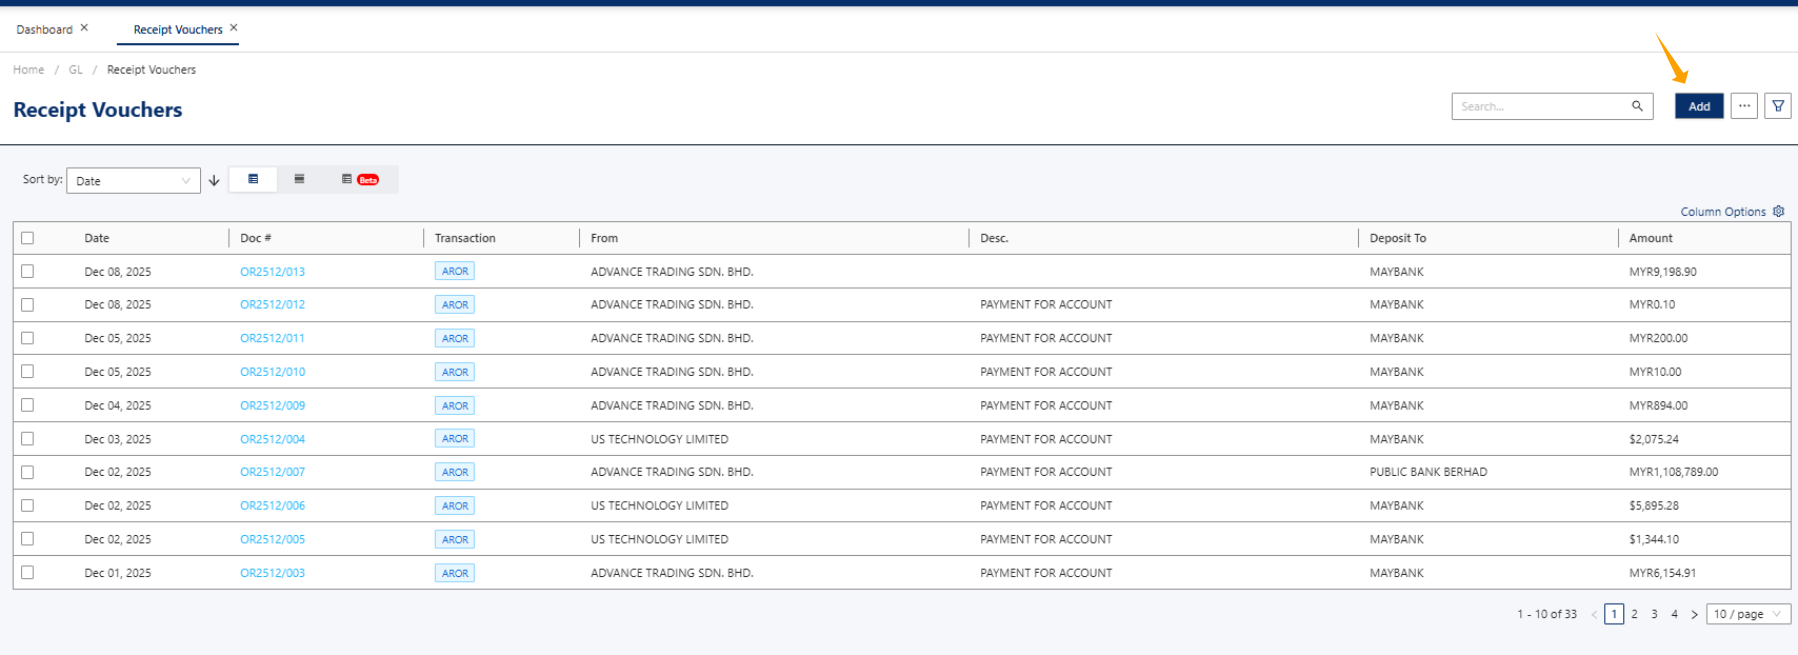
Step 2 - After clicking Receive Voucher, the system will display the Receive Voucher Listing. At this point, please click Add to create a new Receive Voucher.
Step 3 -
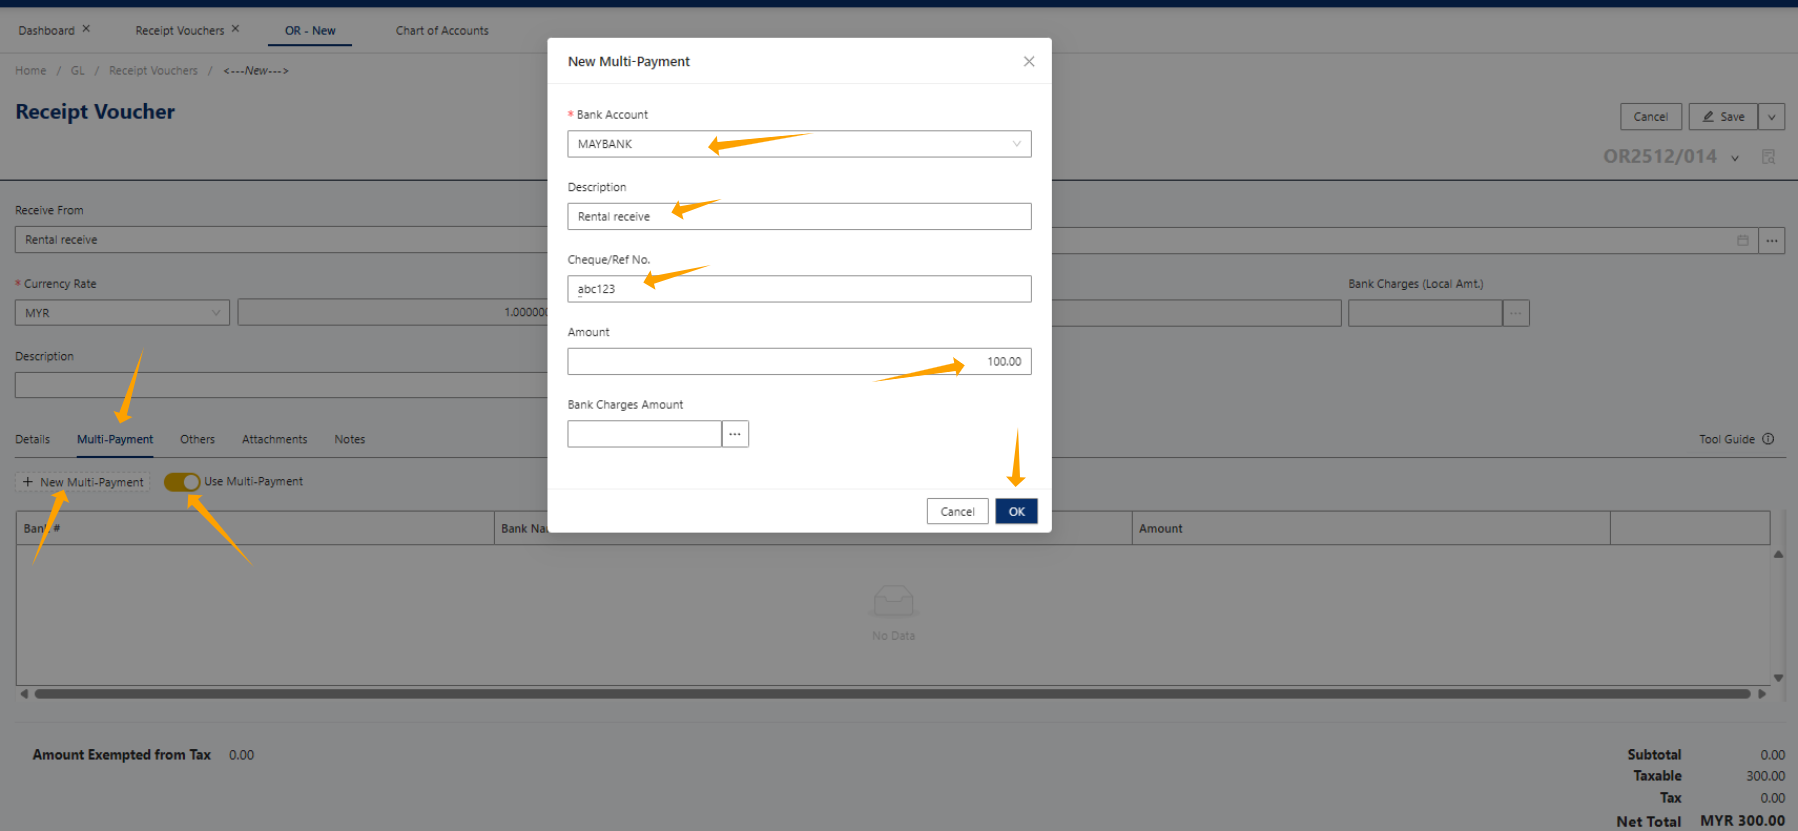
Now, let’s create a simple Receive Voucher. I will use a rental receipt as an example. Enter some basic information, such as Receive From, then select the GL Account (in this example, I chose the Rental Income GL account code). Finally, enter the amount of RM300.
From the screenshot below, we can see that before clicking the Multi-Payment option, the Deposit To field is currently set to Maybank.

Step 4 -
Now, click the Multi-Payment tab, then select Multi-Payment, and click + New Multi-Payment.
At this point, the system will display a small window.
Fill in the details accordingly: select the Bank Account, enter a Description, Cheque/Ref No., and an Amount (enter RM100 first, as there will be two more payment methods later).
If there are any bank charges, enter them as well.
Finally, click OK.
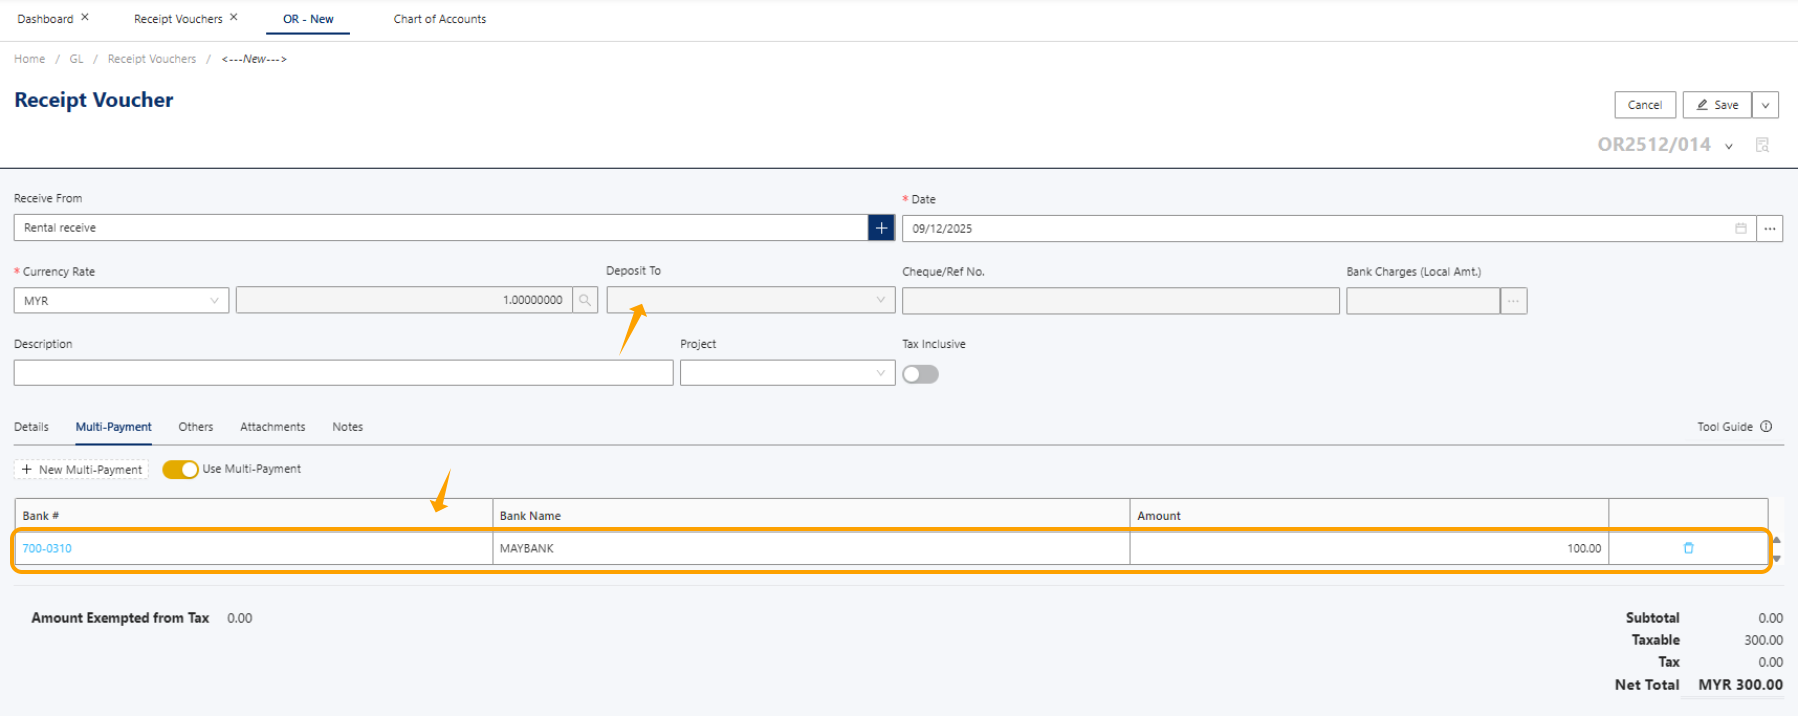
Step 5 - At this point, you will notice that the original Deposit To column is now disabled. This is because you have already selected the Multi-Payment option, and you no longer need to use the Deposit To field.
Step 6 - I have now used the same steps from Step 4 to insert the remaining two payment methods into the Receive Voucher. At this point, most of the steps are completed, and we can proceed to click Save.
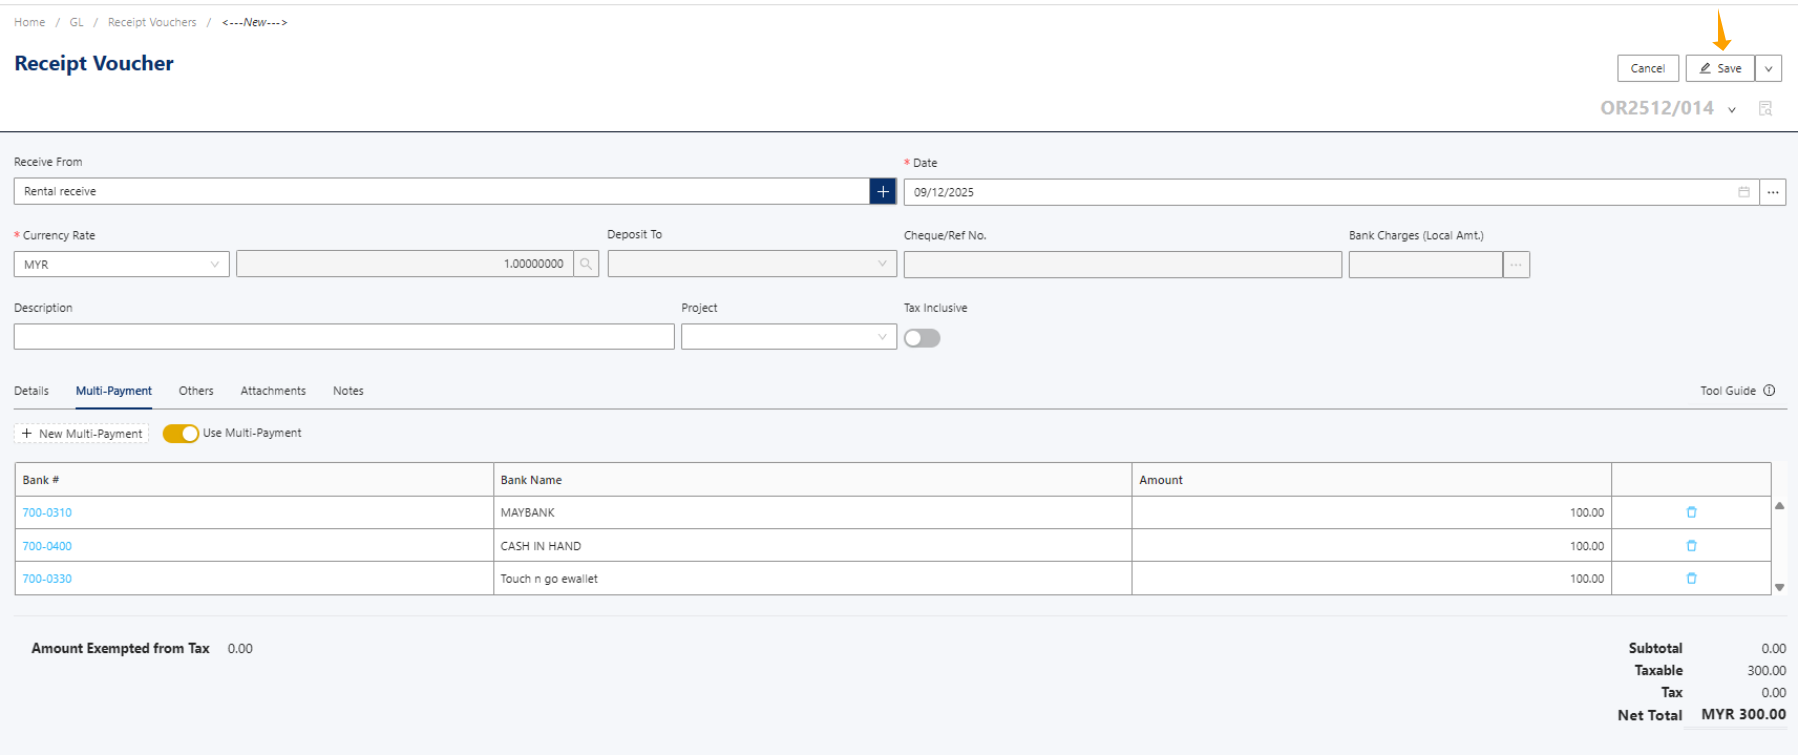
All the steps are now completed. We just need to verify that the GL posting is correct. From the screenshot below, we can see that the Multi-Payment has been successfully created:
Debit Maybank RM100
Debit Cash in Hand RM100
Debit Touch ’n Go RM100
Credit Rental Income RM300.

Thanks!
** Learn more about Azure Cloud
** Learn more about QNE Hybrid Cloud Software
Was this article helpful?
That’s Great!
Thank you for your feedback
Sorry! We couldn't be helpful
Thank you for your feedback
Feedback sent
We appreciate your effort and will try to fix the article
