Scenario:
The N3 AI Accounting Software company database is designed to be user-friendly and easy to navigate, allowing users to view, enter, and manage accounting data efficiently. By following these steps, you can easily create a new company database in N3 software, enabling you to manage your financial, inventory, and payroll data efficiently and effectively.
Solution:
After you have successfully created an Account for the N3 AI Accounting System, you will require to create a company database to start to use the system.
To create a company database, you can place the mouse in the sample company to the Gmail or User Account and click “My Companies”
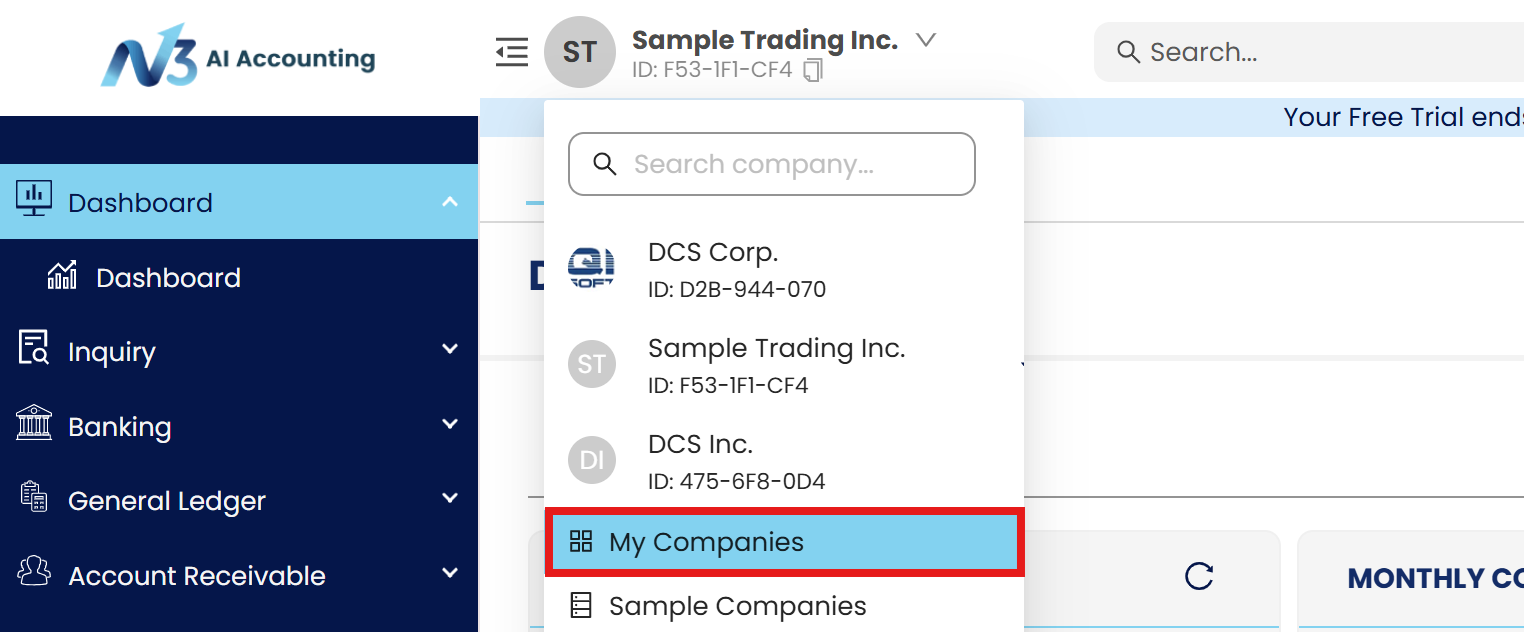
Diagram 1.1 “My Companies” in the Top Left Section of the screen under sample company.
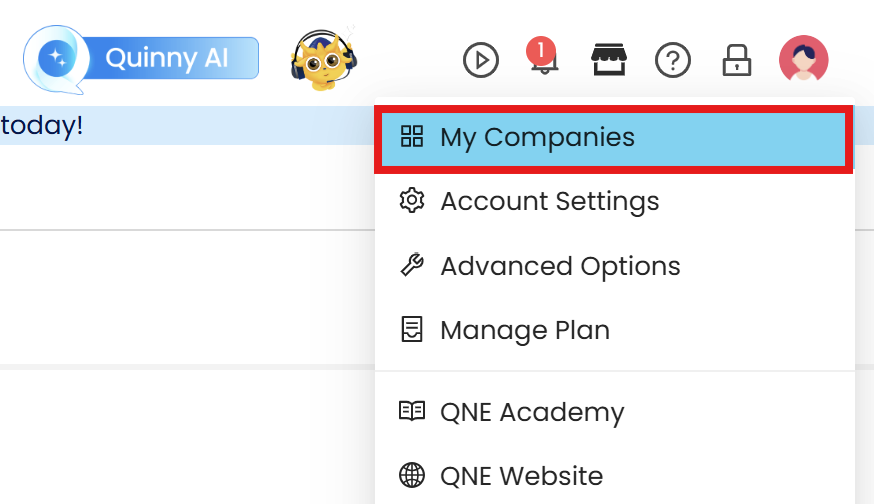
Diagram 1.2 “My Companies” in the Top Right Section of the screen under Account name.
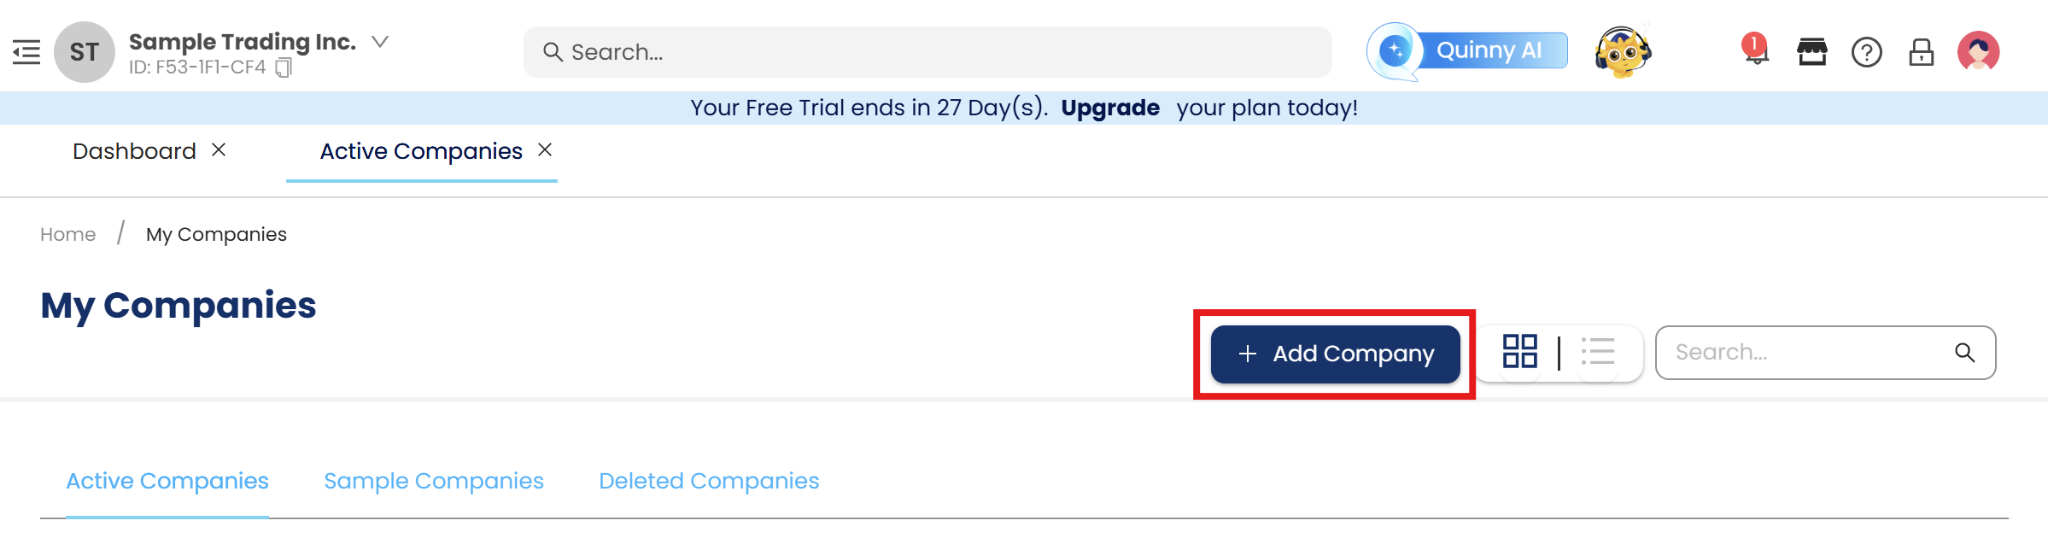
In the “My Companies” Page, kindly click on the “Add Company” Button.
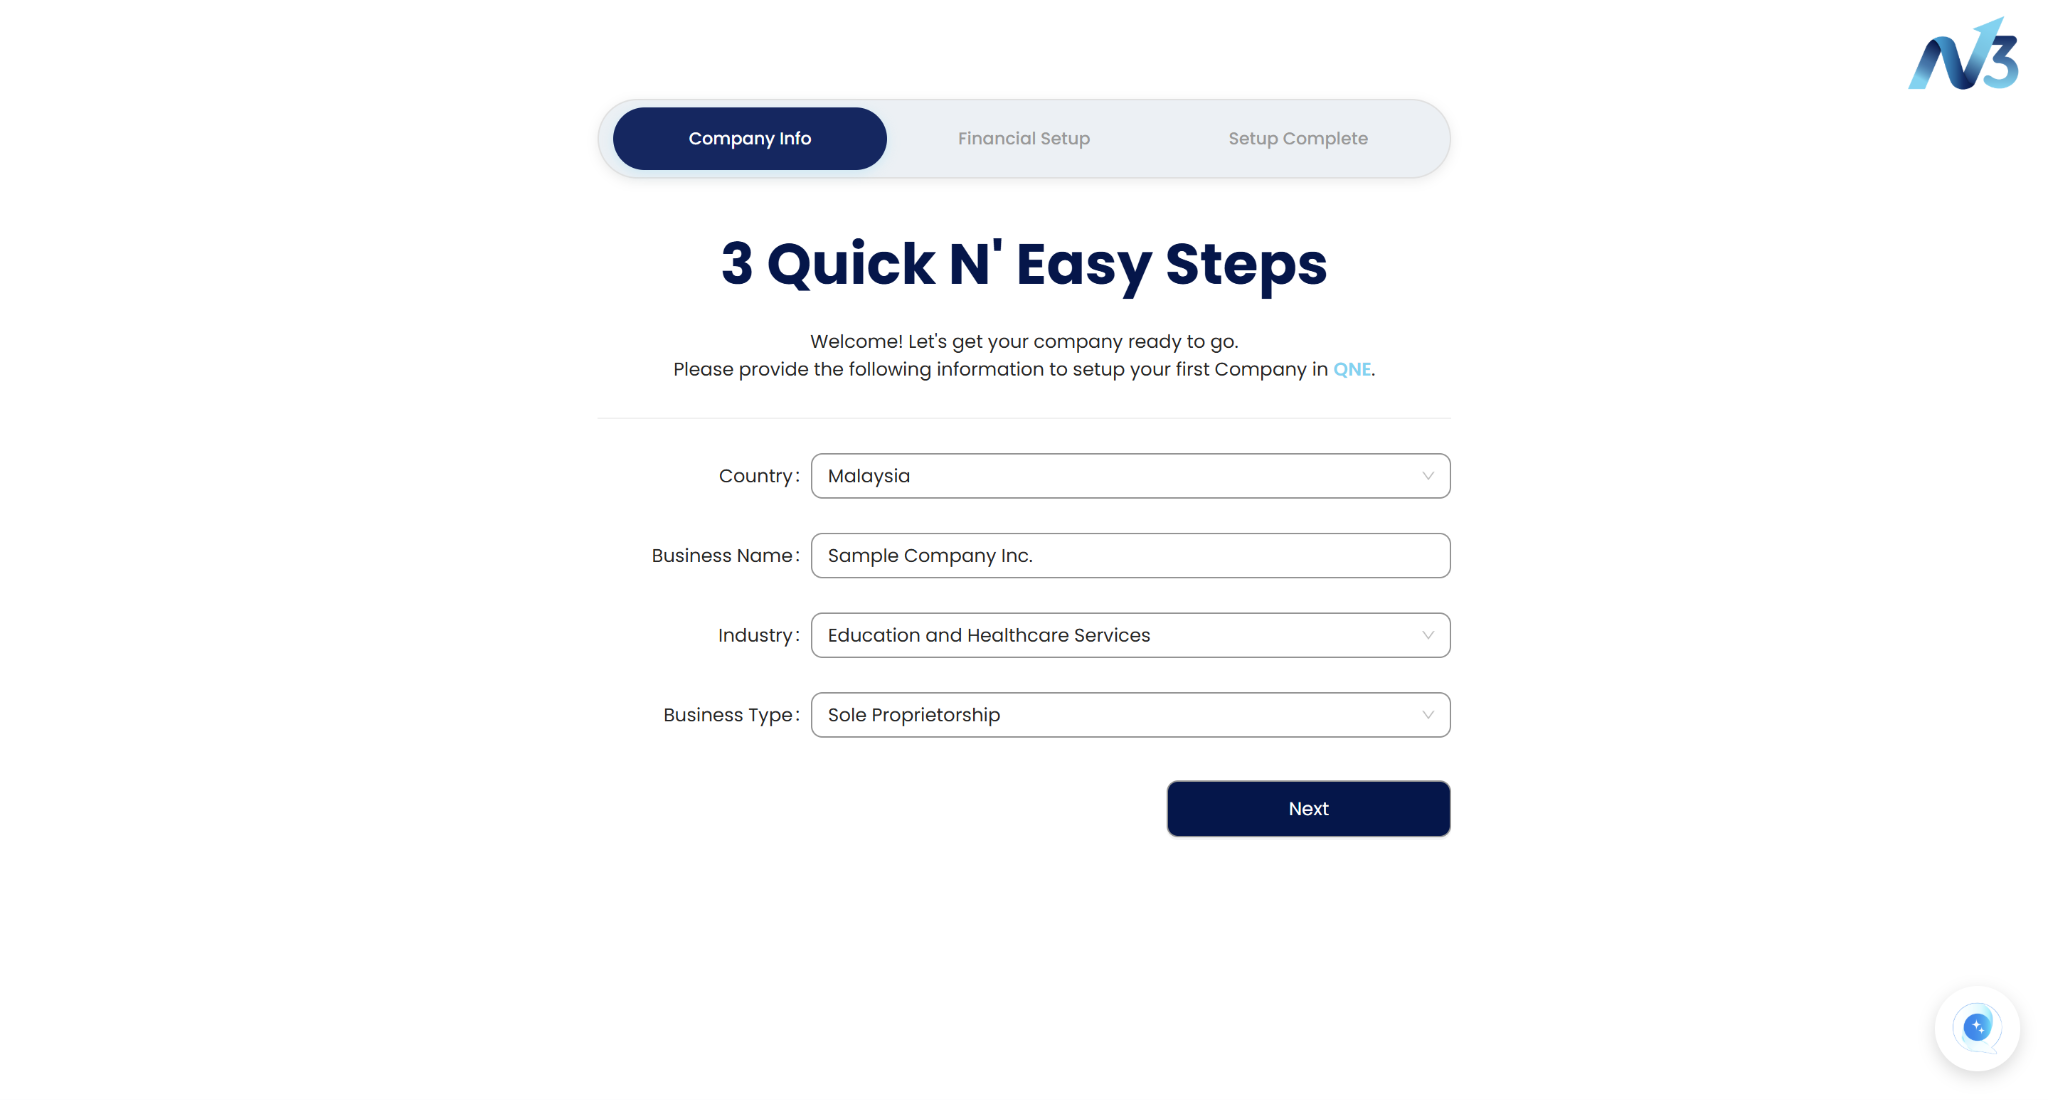
Select your Country and Enter your Company Name.
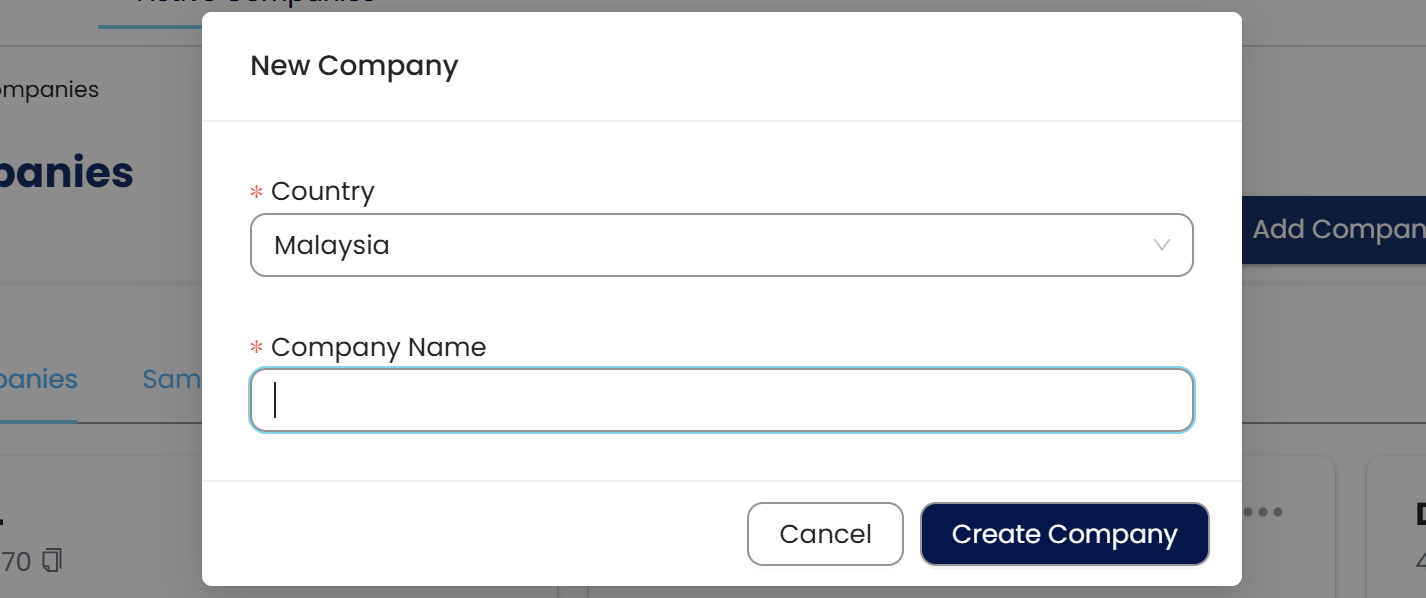
Select Malaysia or Philippines accordingly to the location of your company.
System will prompt to reload the website to process the information.
You will be redirected to this website to setup your newly created company.
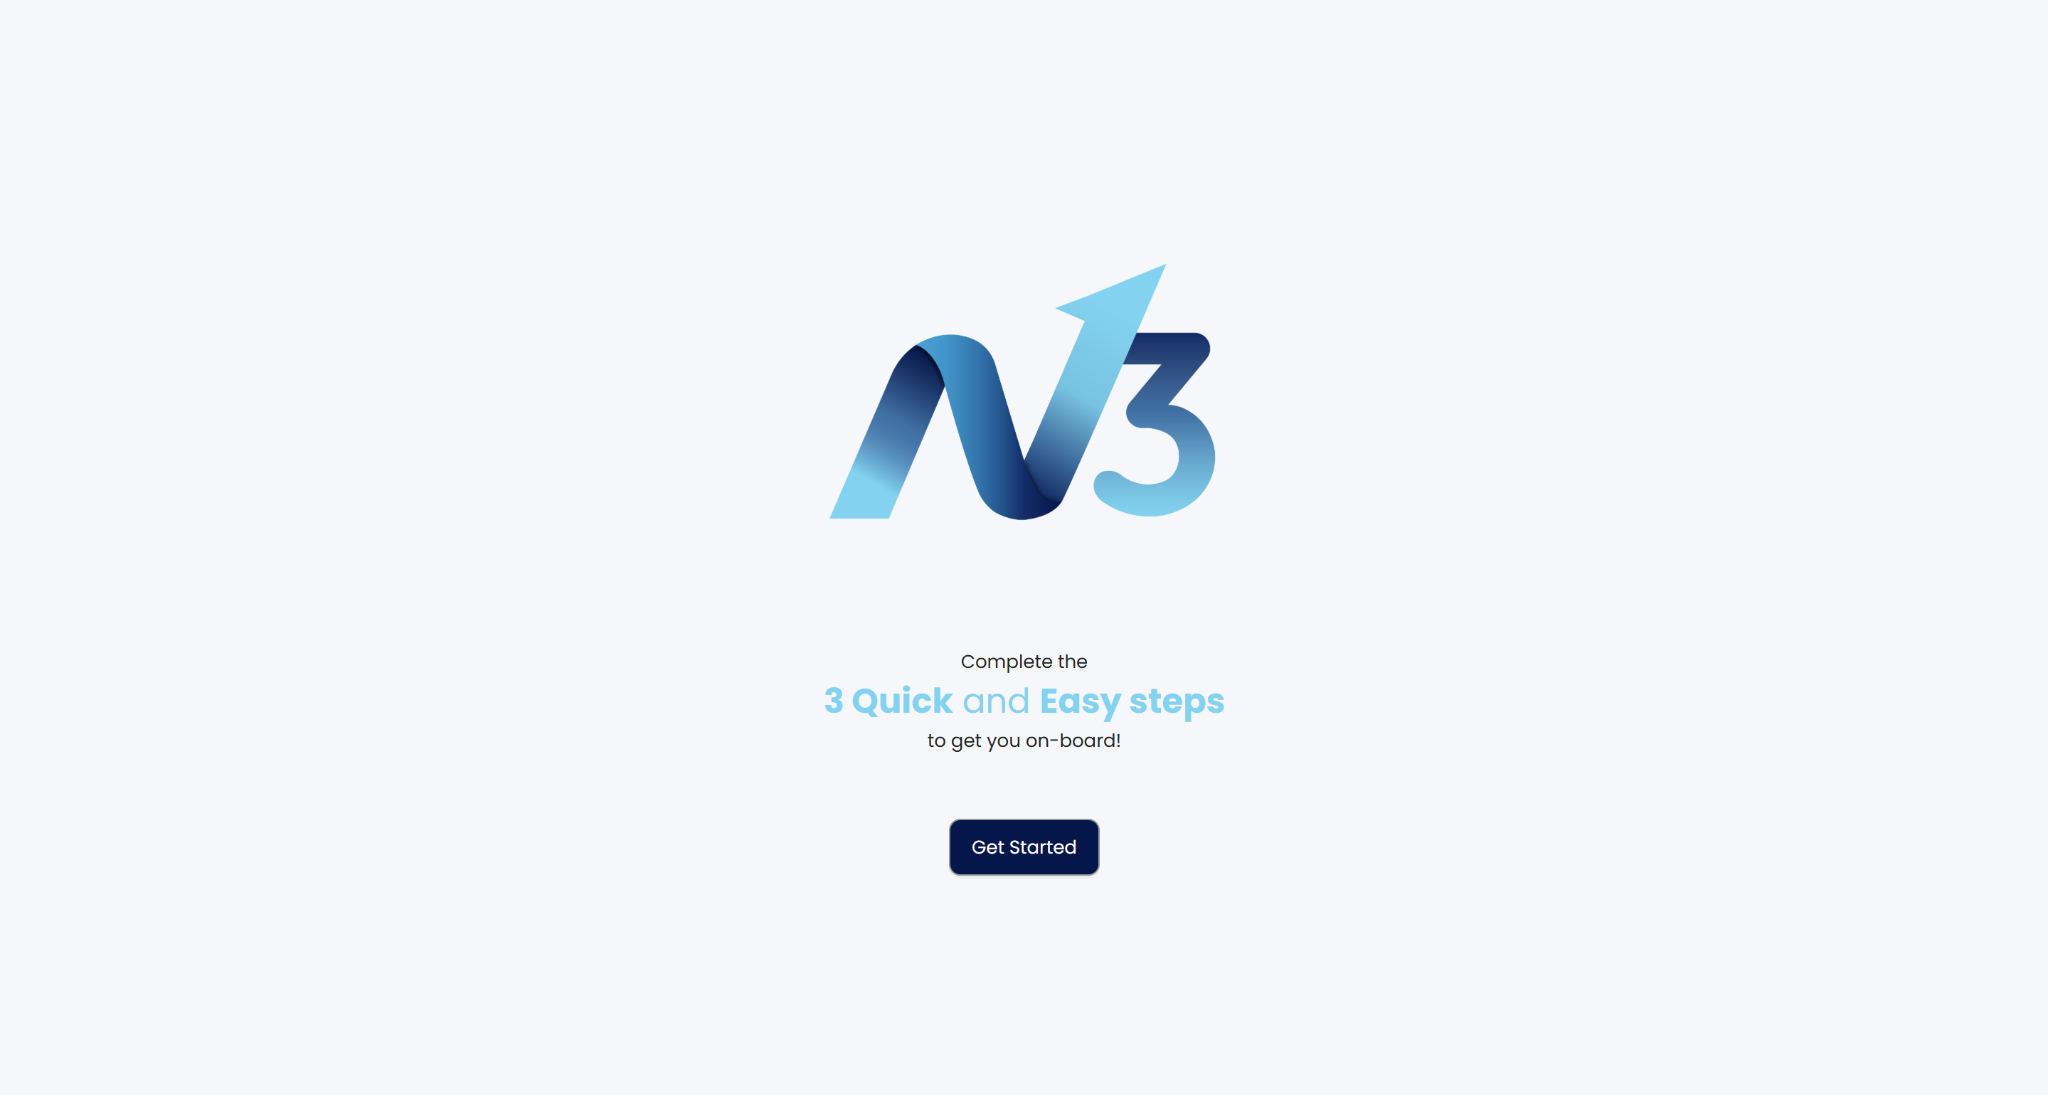
Tips: Kindly Click on “Get Started” to proceed on the company database creation.

This form below will be shown. Please do insert all information accordingly. Then click the “Next” button to proceed to the next page.
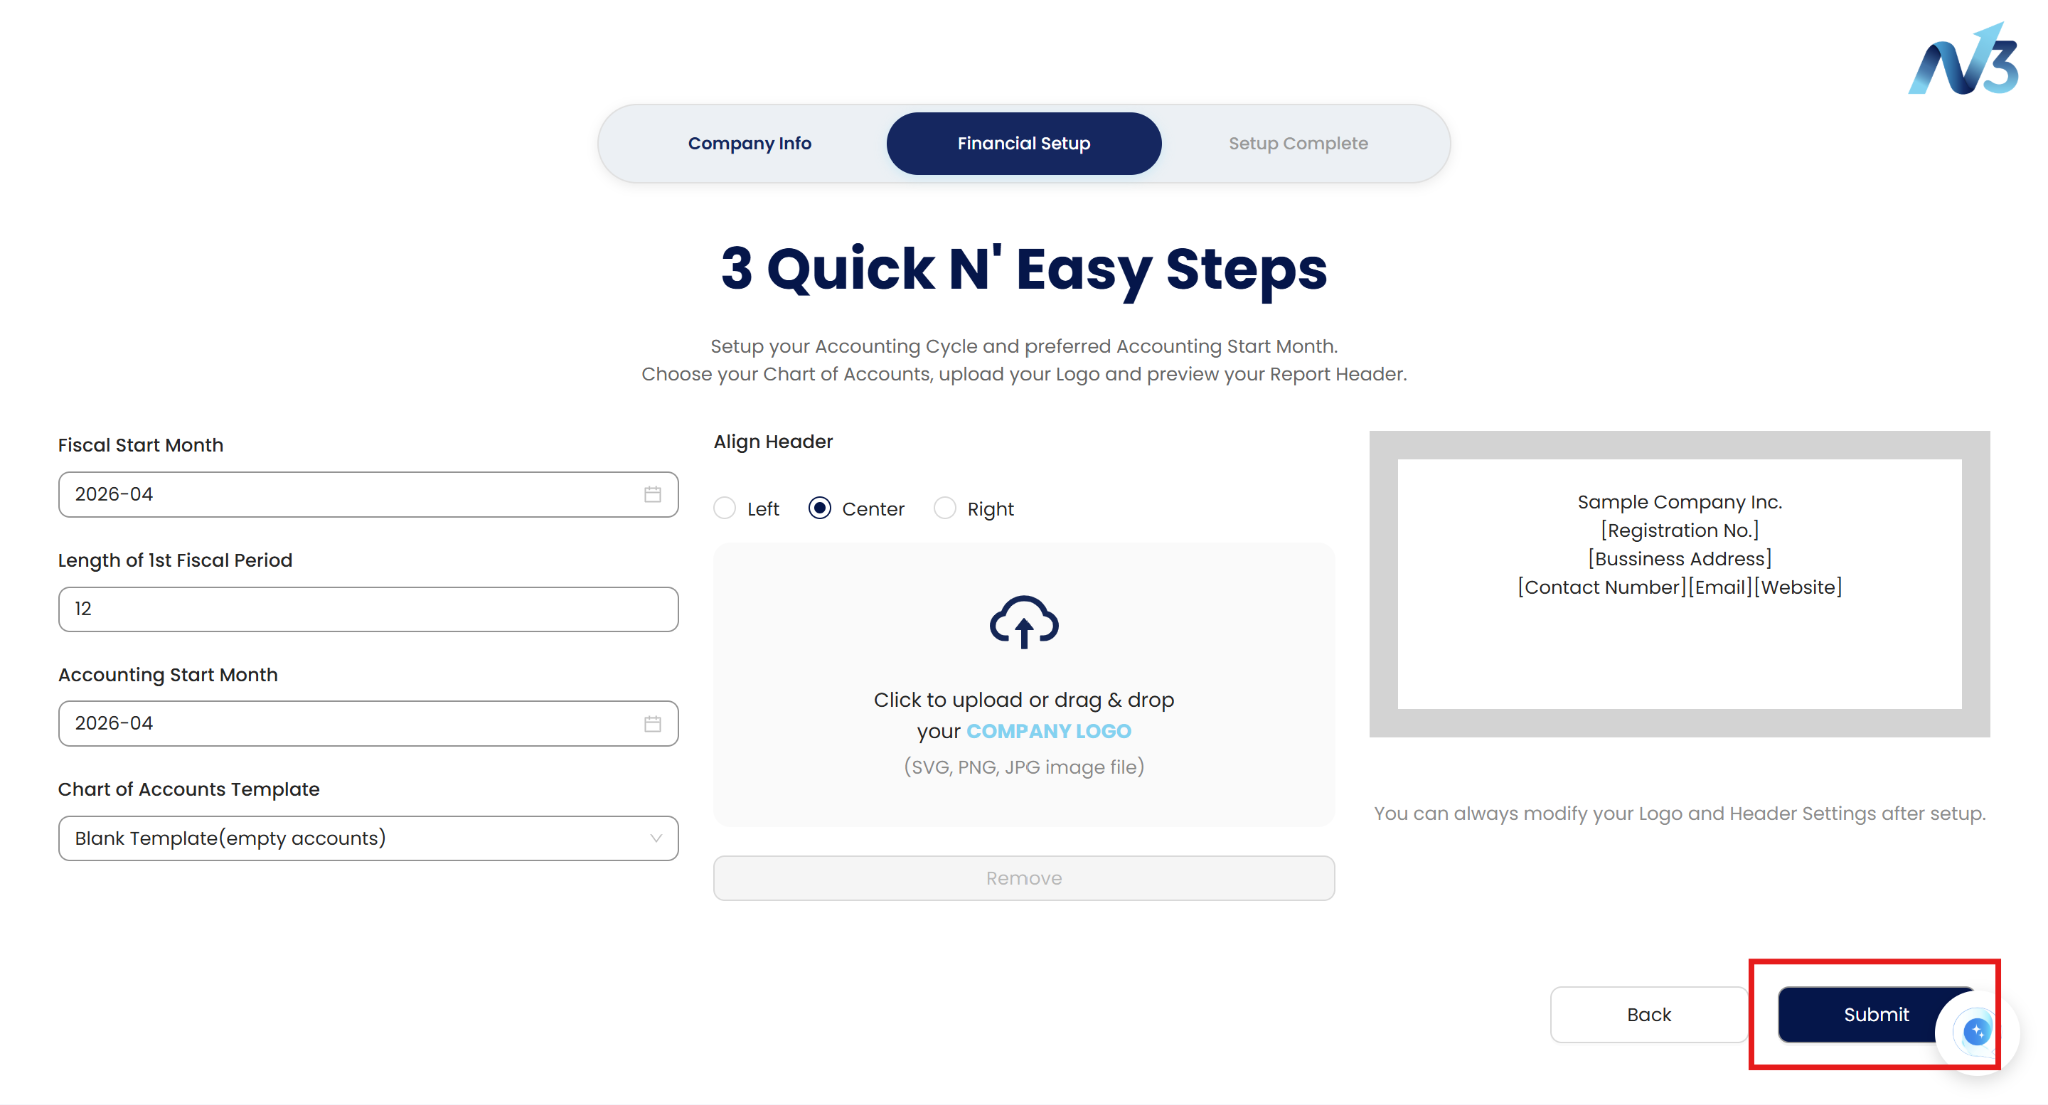
The next page will show the accounting setup where you can setup the fiscal period, accounting start month, Chart of Account template.
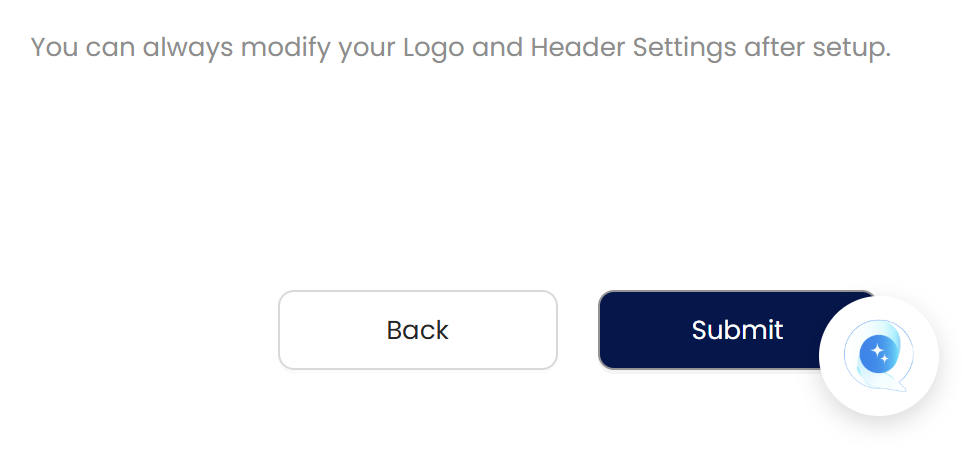
In the same page, you can setup the letter head design where you can design the letter head that will be used in generating all reports.

Note: You can always modify your Logo and Header Settings after setup.

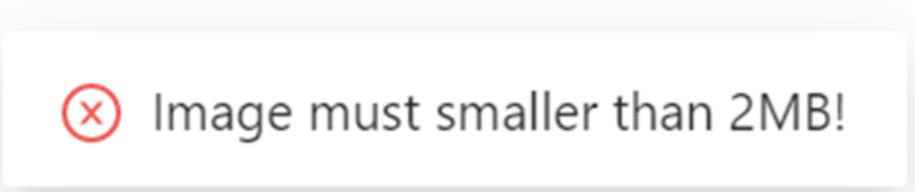
Tips: The file size of the company logo image must be smaller than 2MB.

Proceed the registration by clicking the “Submit” Button.
After clicking the “Submit” Button you have successfully completed the initial setup of your company.
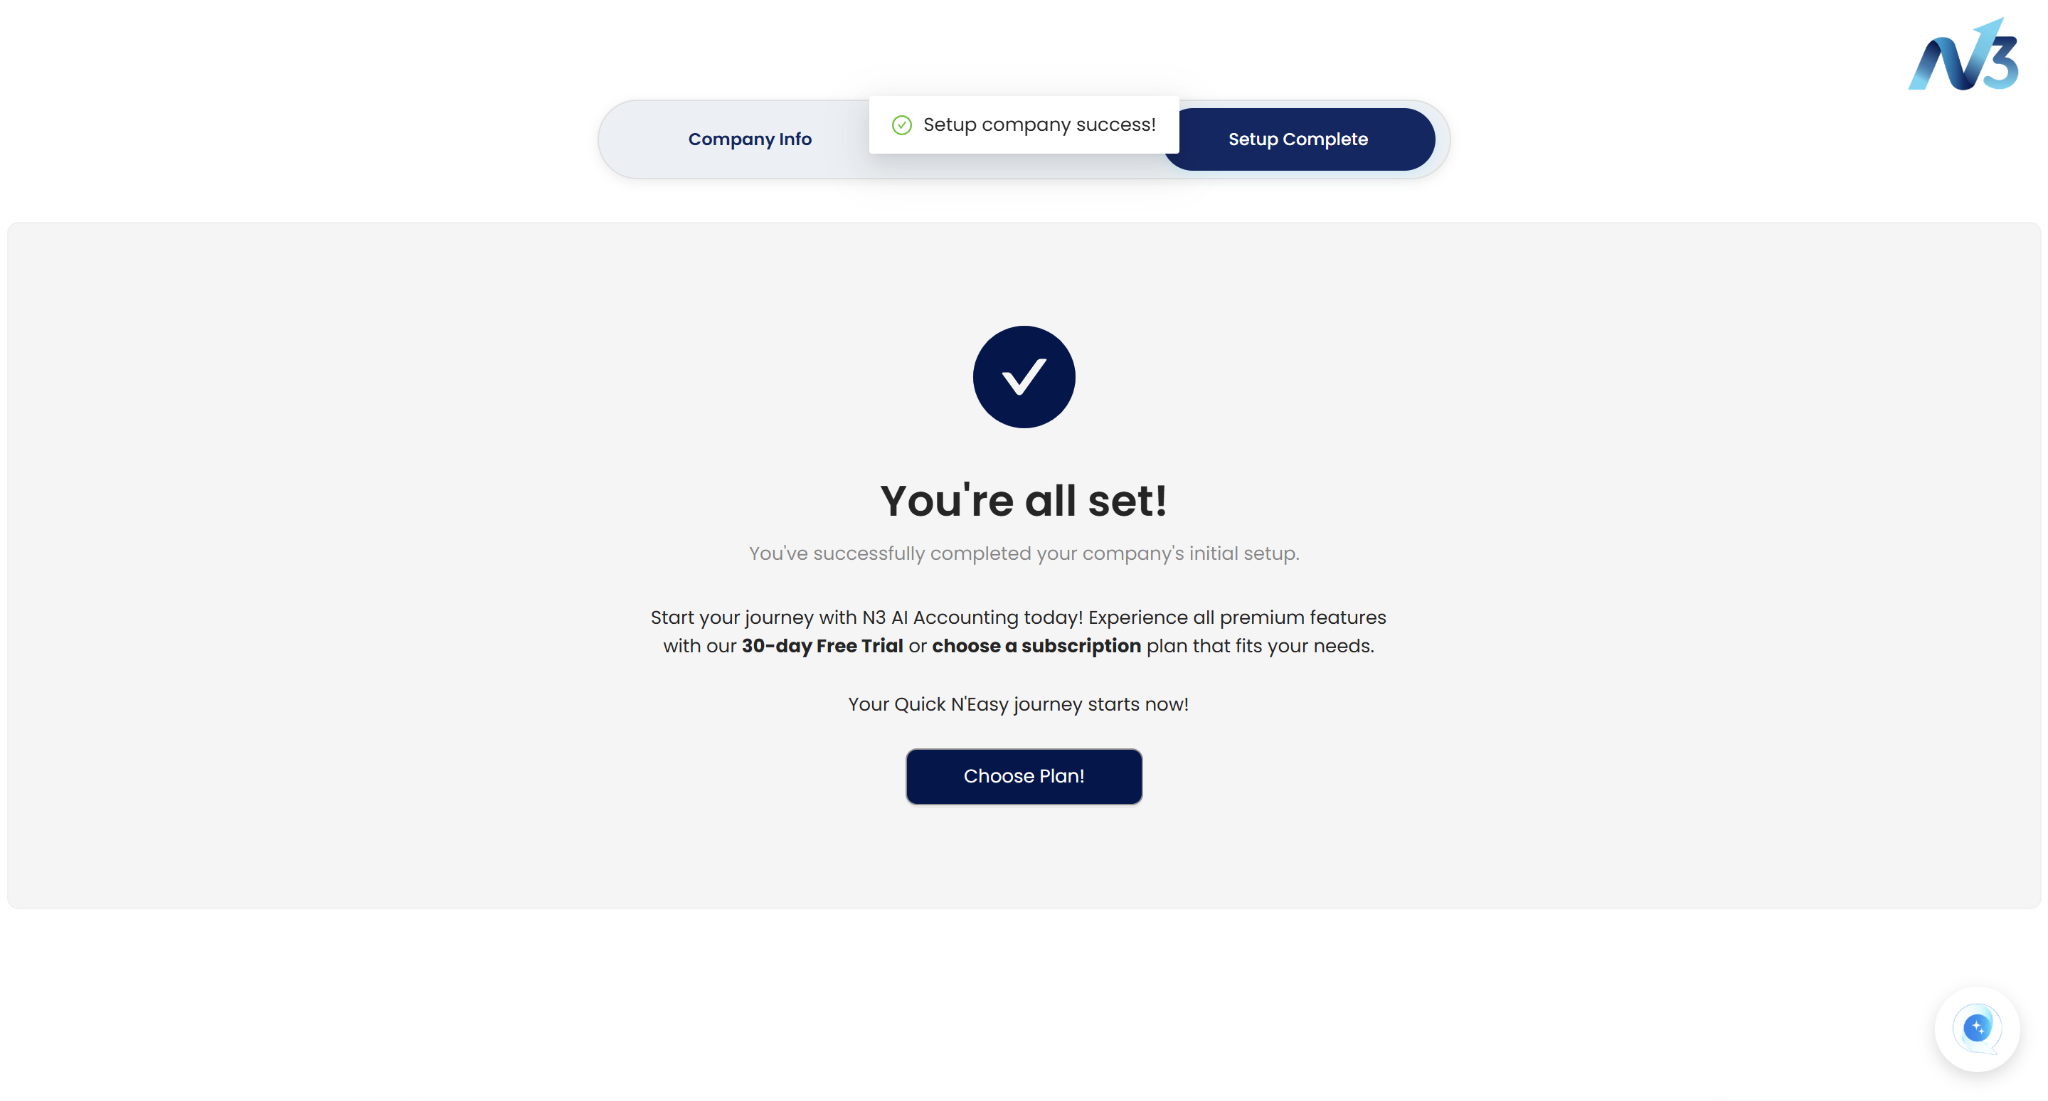
You will be redirected back to the main page with the new company database registered after clicking the “Let’s Go!” button.
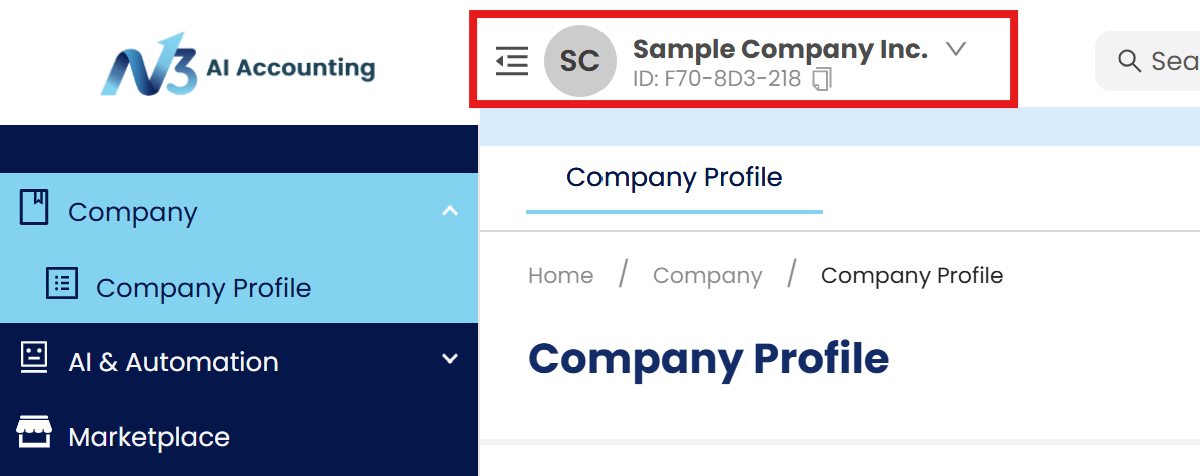
Finally, you have now successfully created a Company database. Thank you.
System Scope: QNE AI Cloud Accounting / N3 AI Accounting
Was this article helpful?
That’s Great!
Thank you for your feedback
Sorry! We couldn't be helpful
Thank you for your feedback
Feedback sent
We appreciate your effort and will try to fix the article
