Overview:
When a cheque issued or received is dishonored by the bank (bounced) or needs to be reverted, marking it as a Bounced / Revert Cheque in the system ensures that your financial records, bank reconciliation, and customer/supplier outstanding balances remain accurate. Instead of deleting the transaction, marking it as bounced preserves the audit trail and posts a reversing entry on the specified bounce date.
This process applies to:
- Receipt Voucher
- Payment Voucher
- Supplier Pay Bills
- Customer Receive Payment
Scenario:
A customer payment was previously recorded via a Receipt Voucher / Receive Payment, or a payment to a supplier was recorded via a Payment Voucher / Pay Bills. Subsequently, the bank notifies you that the cheque has bounced due to insufficient funds, signature mismatch, or other bank issues.
To reflect the actual bank status without losing the historical transaction record, you need to flag the transaction as bounced so the system automatically generates a reversal entry effective on the date the cheque was bounced
Solution:
Follow these steps to mark a transaction as a bounced/reverted cheque:
- Open the specific transaction (Payment Voucher, Receipt Voucher, Pay Bills, or Receive Payment).
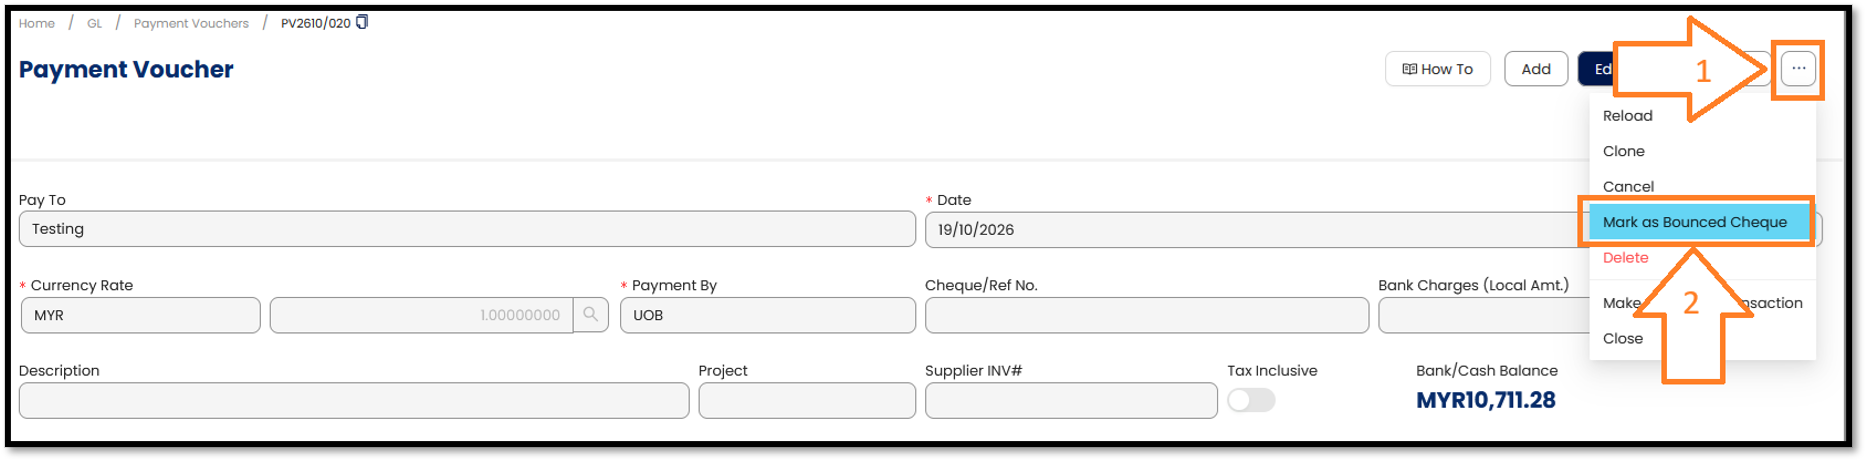
- Click the ... (more options) button on the top-right toolbar. > Select Mark as Bounced Cheque from the context menu.
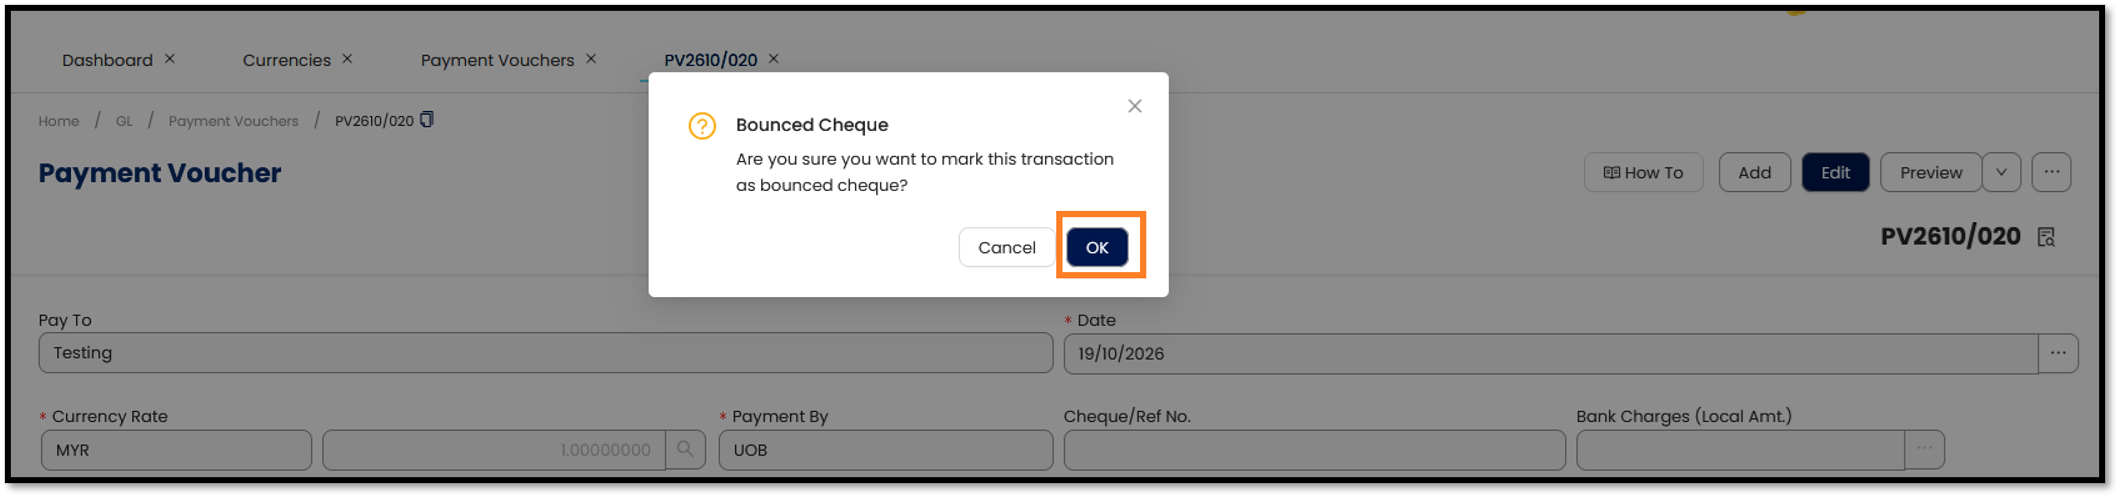
- A confirmation modal will pop up asking: "Are you sure you want to mark this transaction as bounced cheque?". > Click OK to proceed
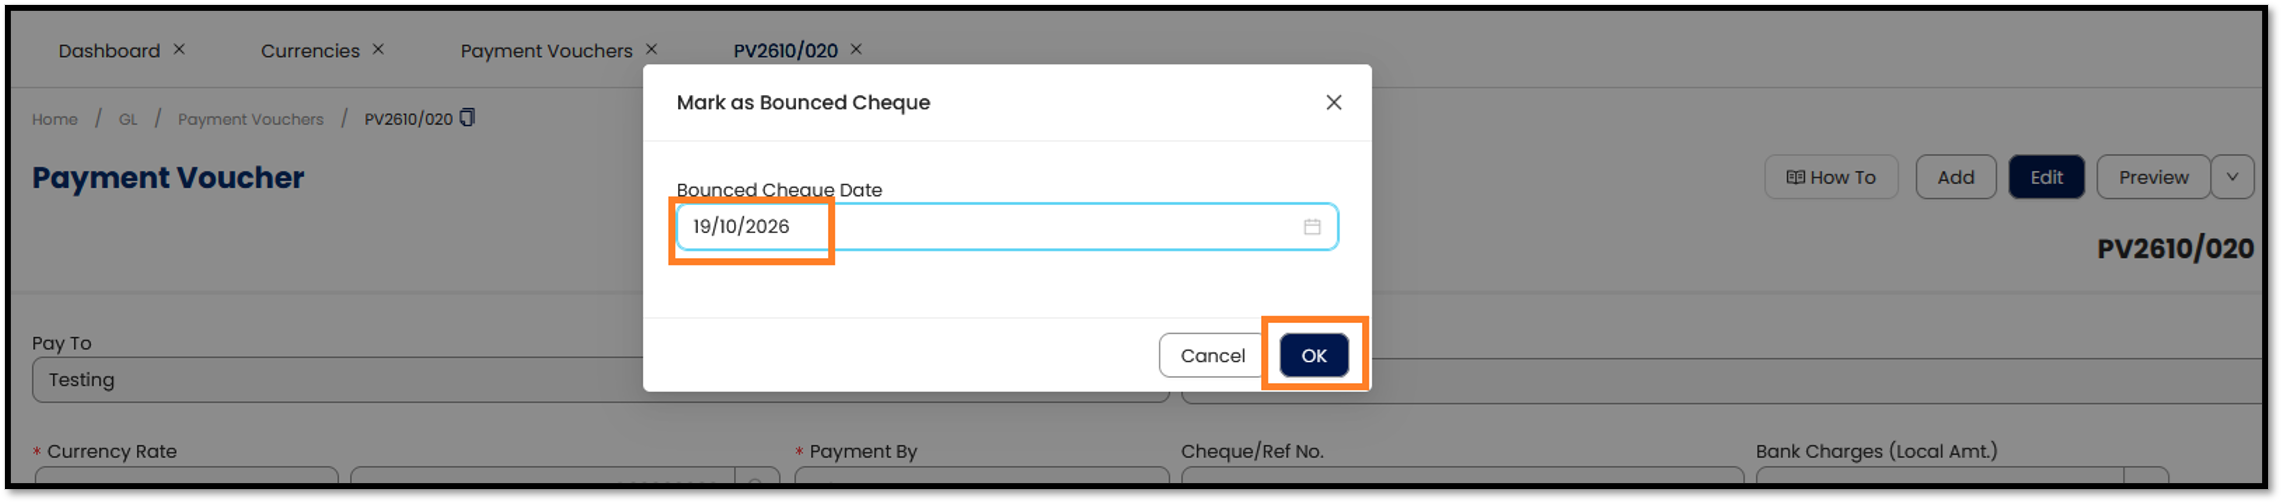
- In the Mark as Bounced Cheque dialog, enter or select the Bounced Cheque Date (the date provided by the bank). > Click OK to complete the action.
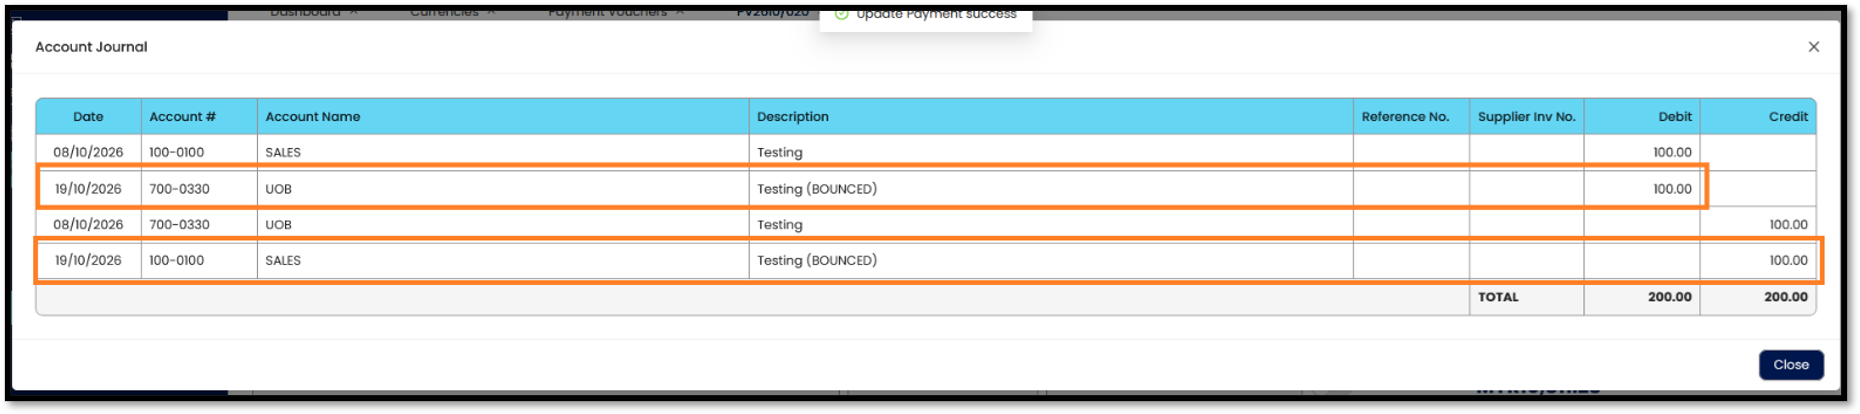
- Once saved, the system automatically posts the reversing accounting entries effective on the specified bounce date.
Note:
• Use the actual date the bank returned the cheque as the Bounced Cheque Date, so the reversal falls in the correct period.
• The original entry stays in the journal, and the reversal is added as separate entries. This keeps a clear audit trail.
• The same menu also has Cancel and Delete. Use Mark as Bounced Cheque only when the bank has actually returned the cheque.
• Check the Account Journal after marking the cheque to confirm the reversal is correct.
Was this article helpful?
That’s Great!
Thank you for your feedback
Sorry! We couldn't be helpful
Thank you for your feedback
Feedback sent
We appreciate your effort and will try to fix the article
