Scenario:
Create and issue Journal Entries in Cloud Accounting System from General Ledger Module. Discover the functions available.
Solution
Journal Voucher is used for double-entry posting affecting the balance of two or more accounts. To access Journal Voucher, first click General Ledger in the Navigation Pane, then select Journal Voucher.
Click ‘Add’ button to add new record.

Input the Description, Date and the Reference No. if applicable. Toggle Tax Inclusive/Tax Exclusive to set Tax Calculation.

Next, in the Details tab, choose the GL Account under Account Column. Enter the Debit and Credit amount for each Account, and set the Tax Code if there’s any.
When posting journal entries, you must adhere to strict double-entry bookkeeping principles for every debit total there must be a corresponding balancing credit.
This doesn’t mean that for every single debit item you must post a matching credit item. You can post several debits, as long as the total column for Debit and Credit is the same.
Click ‘Save’ once done.

To check the posted journal entries, click the ‘GL Journals’ represented by a small magnifying glass icon on the right side.


To preview your transaction in a printable format, click the Preview button in the upper right corner that opens another window in a new browser tab.

Proceed to print or export it to a different file format the previewed Journal Voucher form.

Edit Journal Voucher
To edit an existing Journal transaction, simply go back to Journal Voucher List View.
Click the Doc # and be taken to the Journal Voucher transaction selected.

Click Edit.

Amend the detail(s) as desired, then click among the available saving option buttons to ‘Save’ and apply the changes.

Delete Journal Voucher
Meanwhile, there are two ways to delete the transaction.
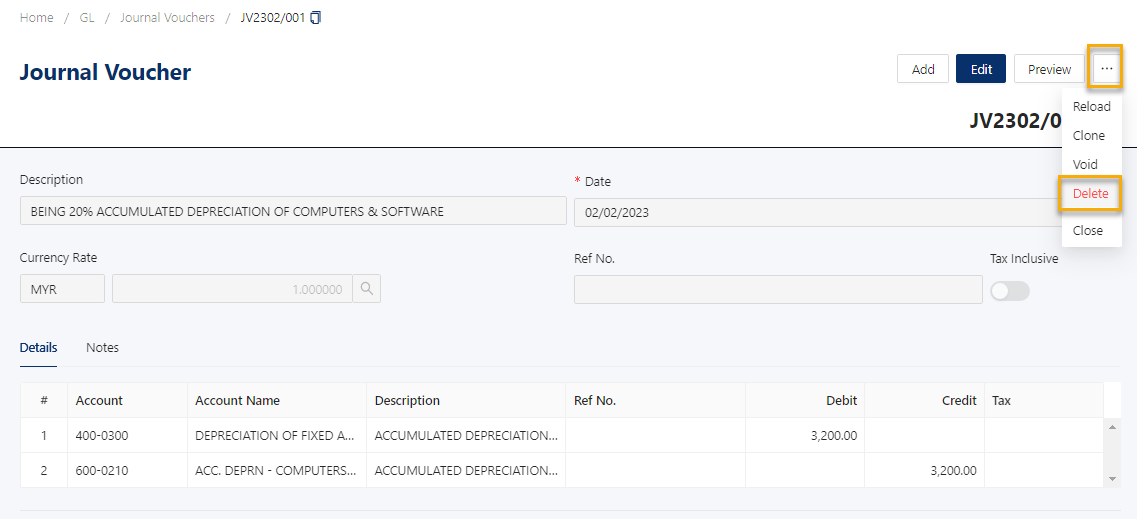
First is to delete from the Transaction View, or within the Journal Voucher transaction itself. Click the triple dot button in the upper right corner of the screen, and choose ‘Delete’.
A message prompt will appear to confirm your action, and the system will only delete the transaction following confirmation.


The other option is to delete from the List View, allowing to delete multiple transactions at once.
You may easily pick several items by using the checkboxes in the far left corner of each row. The Delete button will enable after you have chosen the transaction(s) you want to delete.

After clicking, a request for confirmation will appear before the selected transactions are deleted.


IMPORTANT NOTE:
Every Transaction Screen in QNE Cloud Accounting uses the same Add, Edit, and Delete approach with Journal Voucher.
Was this article helpful?
That’s Great!
Thank you for your feedback
Sorry! We couldn't be helpful
Thank you for your feedback
Feedback sent
We appreciate your effort and will try to fix the article