Overview:
An allowance is an additional payment on top of an employee’s basic salary, such as medical, meal or telephone allowances.
In QNE Cloud Payroll, create each allowance code under Maintenance > Allowances, specifying its name, type and applicable statutory items (EPF, SOCSO, EIS, PCB, PCB(A), HRDF, ORP and EA).
The allowance type determines its tax treatment, while the statutory tick boxes determine which contributions and deductions apply. Certain types, such as Medical Benefits, also display applicable tax exemption limits.
Once created, add the allowance to an employee’s payroll via Generate Payroll > Add Item, enter the amount, and it will be included in the employee’s earnings and payslip.
This guide explains how to create allowance codes and add them to employee payroll.
Scenario:
AAA SDN BHD wants to pay employee EMP00003 (TEST) a medical claim of RM60 in the January 2026 (2nd Half) payroll. The employee’s salary is RM3,500.00, with a payroll total of RM3,090.85 before the allowance.
First, the payroll officer creates an allowance code MC – Medical Claim with the allowance type set to Medical Benefits and enables EPF, SOCSO, EIS and PCB(A).
Next, the officer opens the January 2026 (2nd Half) payroll, adds the Medical Claim allowance of RM60 and processes the payroll.
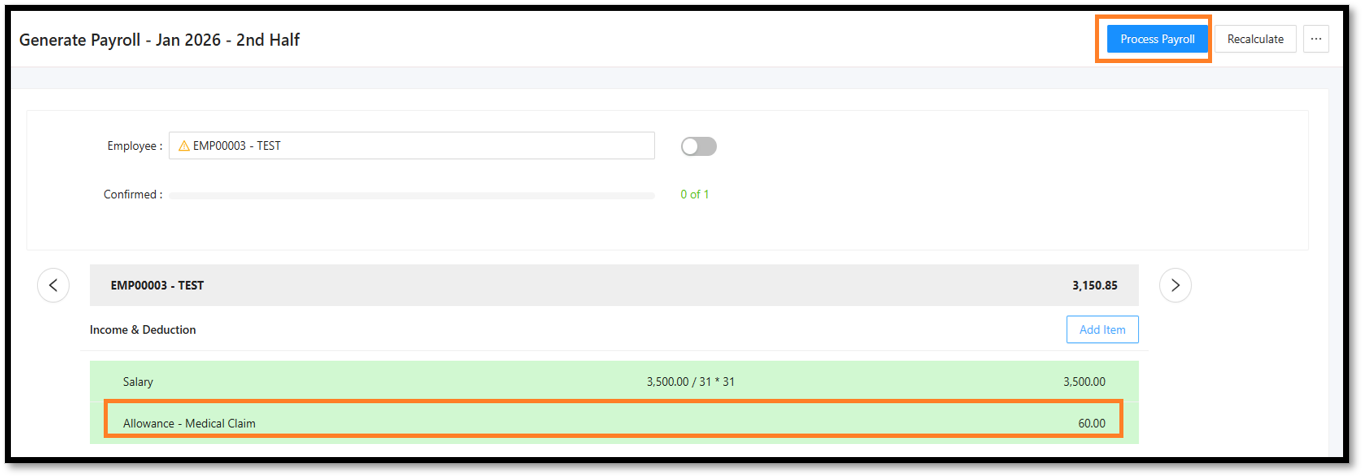
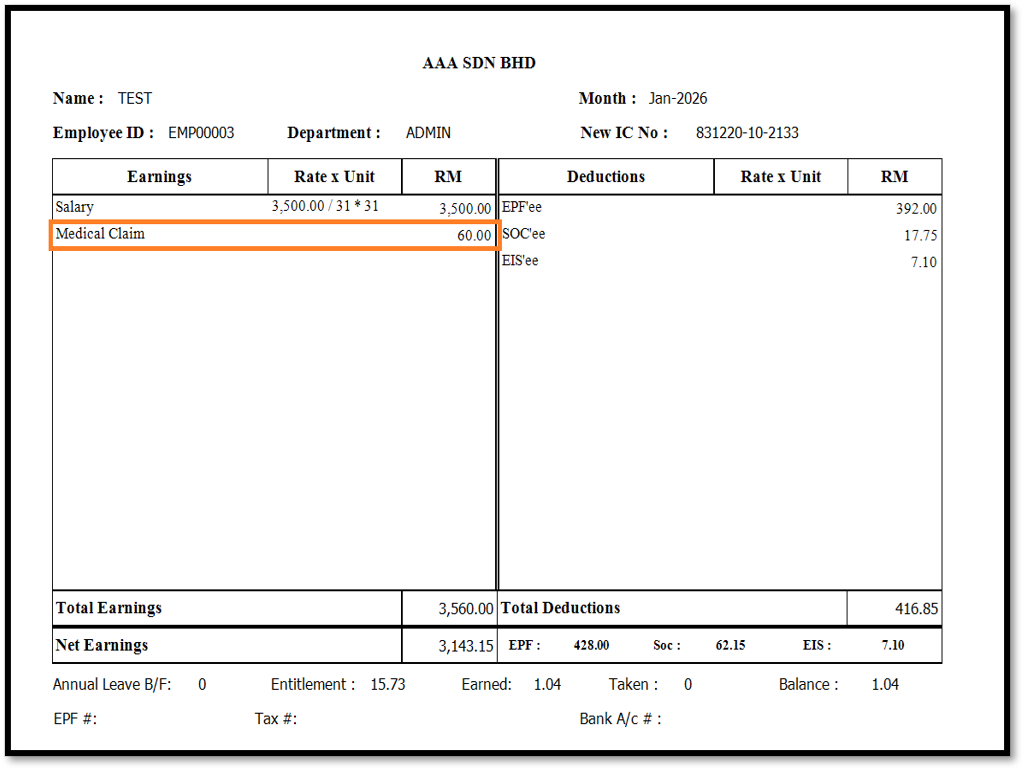
After processing, the payroll total increases to RM3,150.85, and the payslip reflects Medical Claim RM60.00 under earnings, bringing Total Earnings to RM3,560.00.
Solution:
Part 1: Create the allowance code
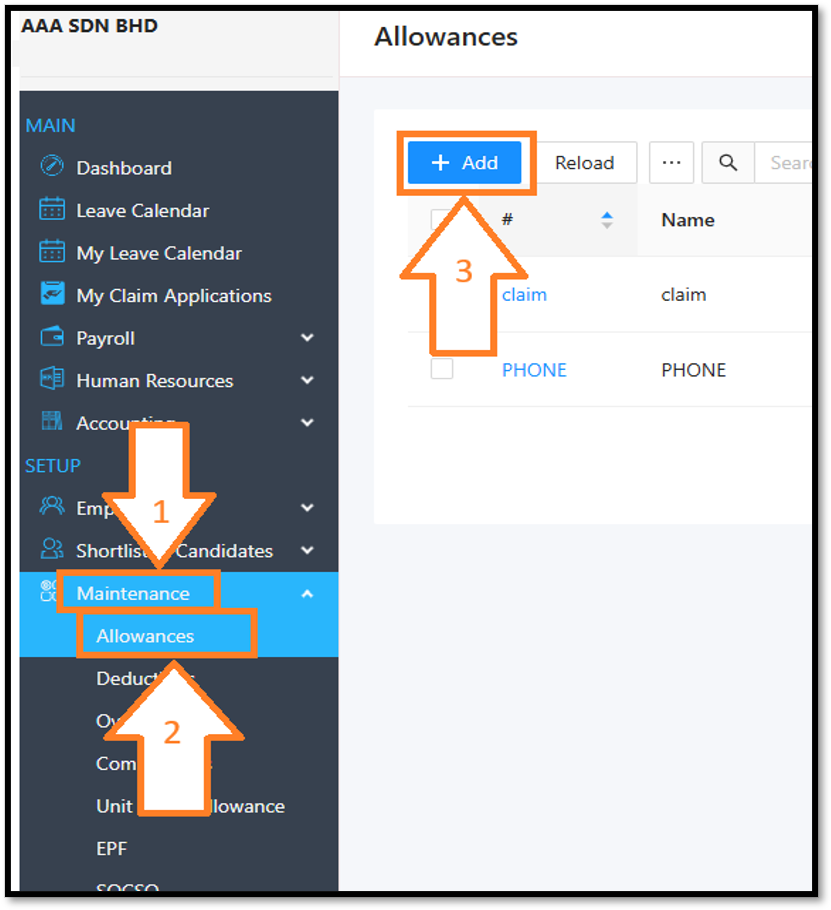
1. In the left menu, click Maintenance (arrow 1).
2. Click Allowances (arrow 2). The list shows the allowance codes that already exist.
3. Click Add (arrow 3).
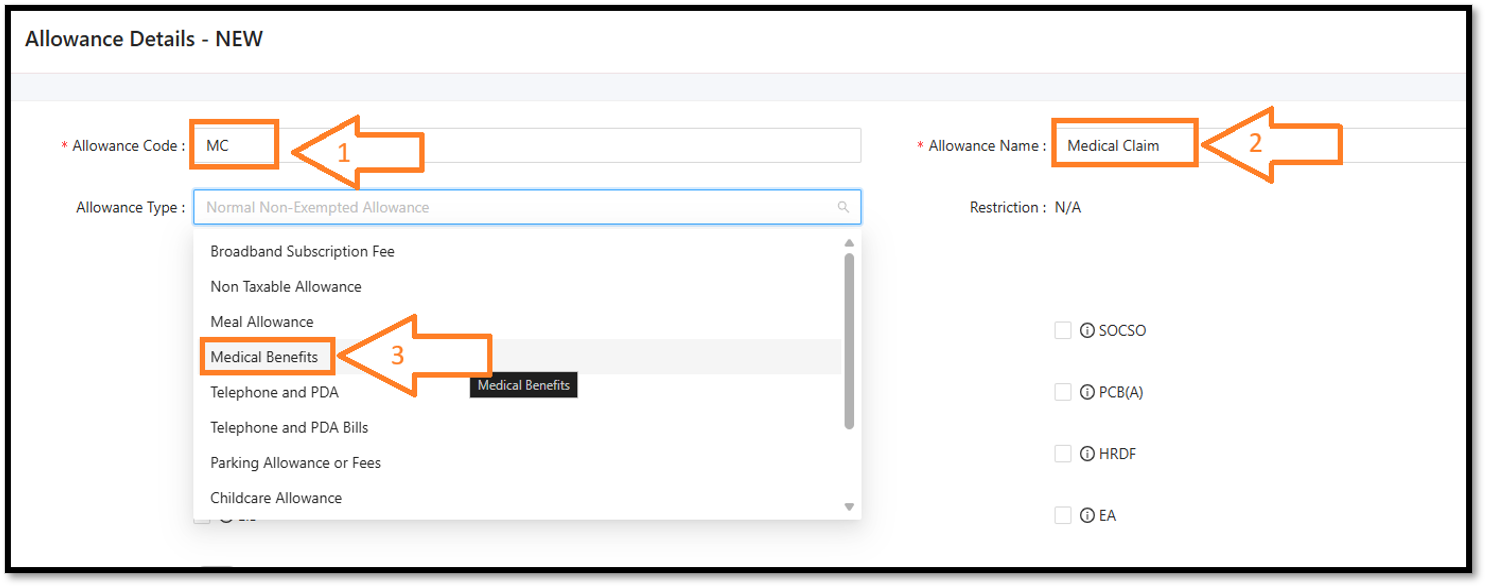
4. On the Allowance Details - NEW screen, enter the Allowance Code (arrow 1), for example MC, and the Allowance Name (arrow 2), for example Medical Claim.
5.Click the Allowance Type field and select the type that matches the allowance (arrow 3), for example Medical Benefits.
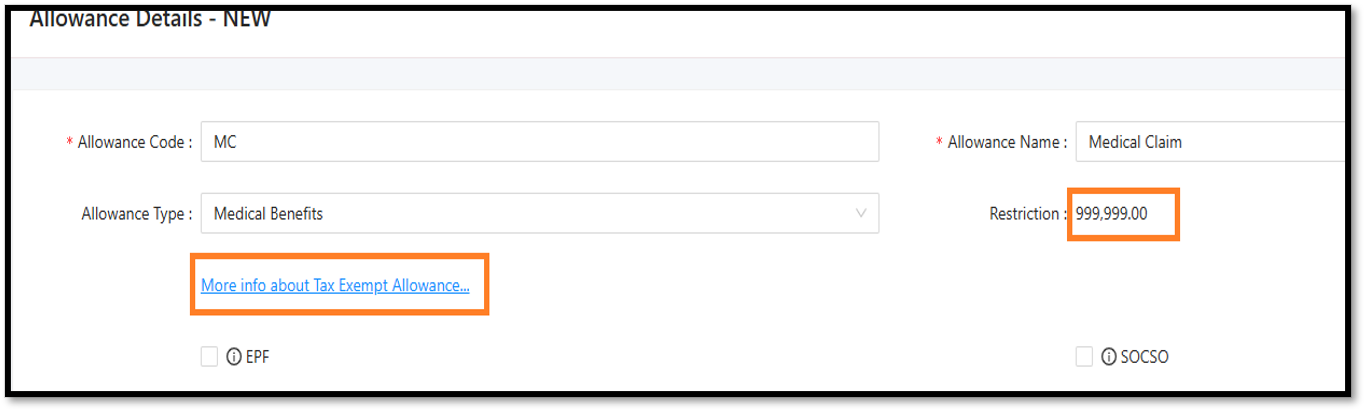
6. After you select the type, the system shows the Restriction for that type (999,999.00 in this example). Click More info about Tax Exempt Allowance… if you want to read about the tax treatment.
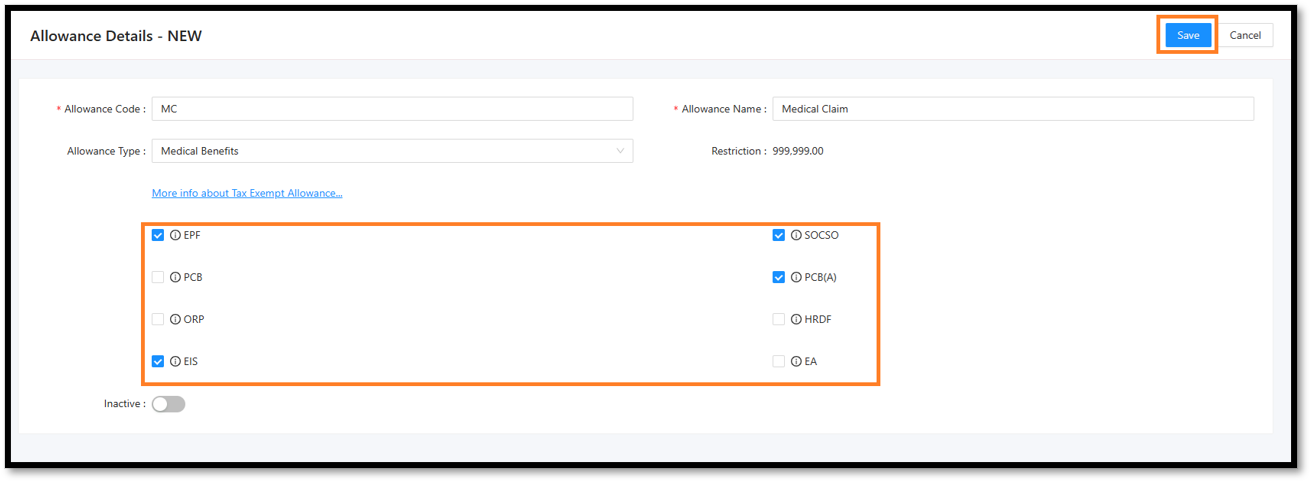
7. Tick the statutory items that apply to this allowance: EPF, SOCSO, EIS, PCB, PCB(A), ORP, HRDF and EA. In this example, EPF, SOCSO, EIS and PCB(A) are ticked. Leave the Inactive toggle off, then click Save.
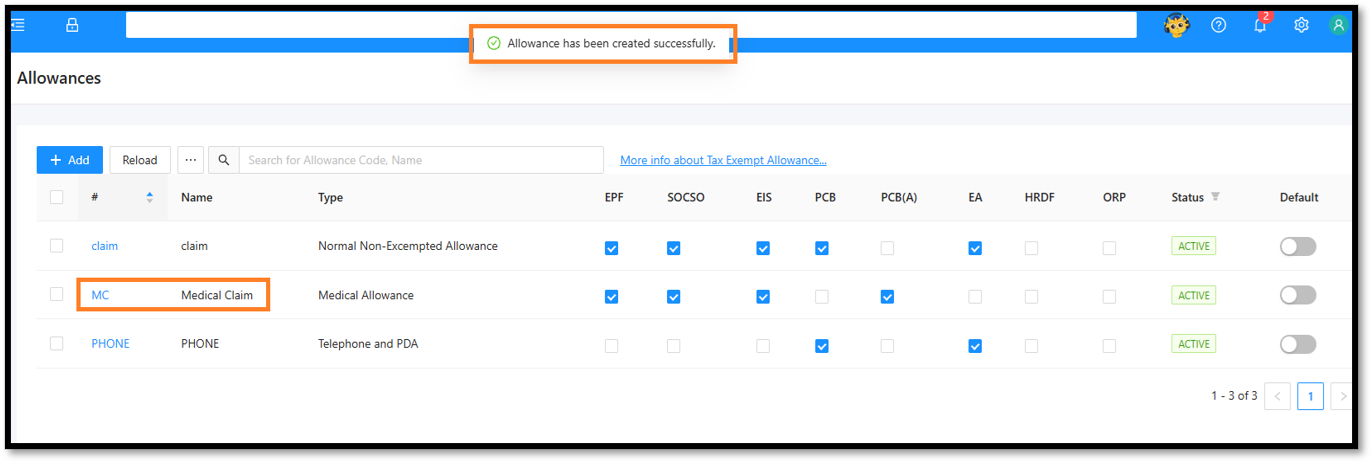
8.The message “Allowance has been created successfully.” appears, and the new allowance (MC – Medical Claim) is added to the Allowances list with the status ACTIVE.
Part 2: Add the allowance to the employee’s payroll
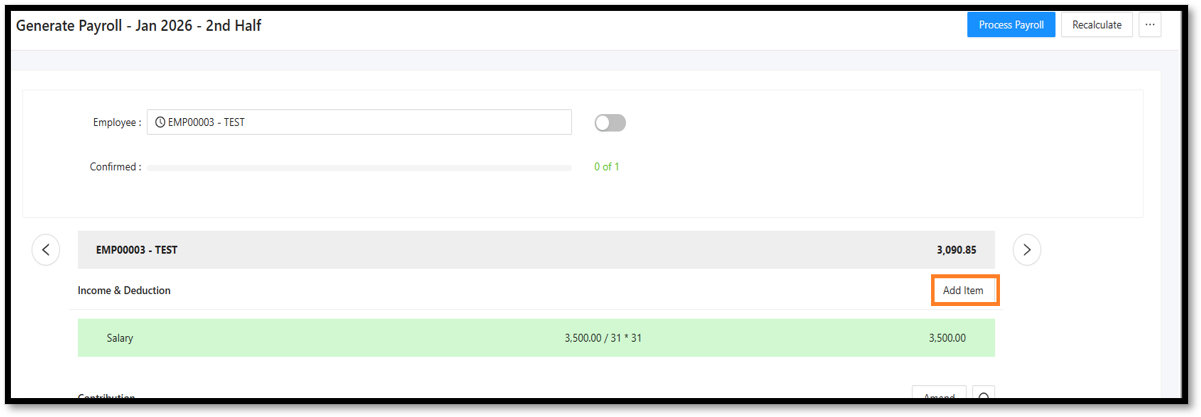
9.Open the payroll for the period in Generate Payroll (for example Jan 2026 - 2nd Half) and select the employee. Under Income & Deduction, click Add Item.
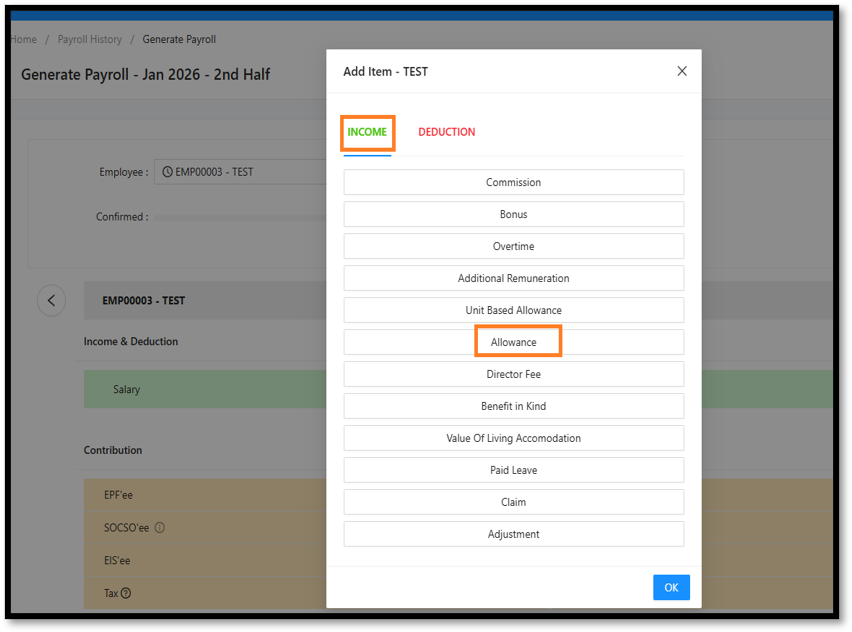
10.In the Add Item window, stay on the INCOME tab, select Allowance, then click OK.
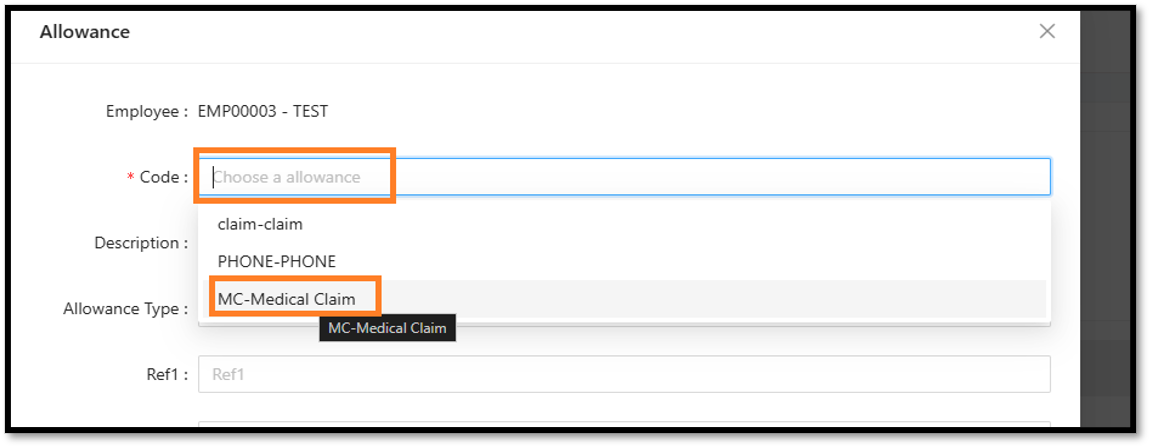
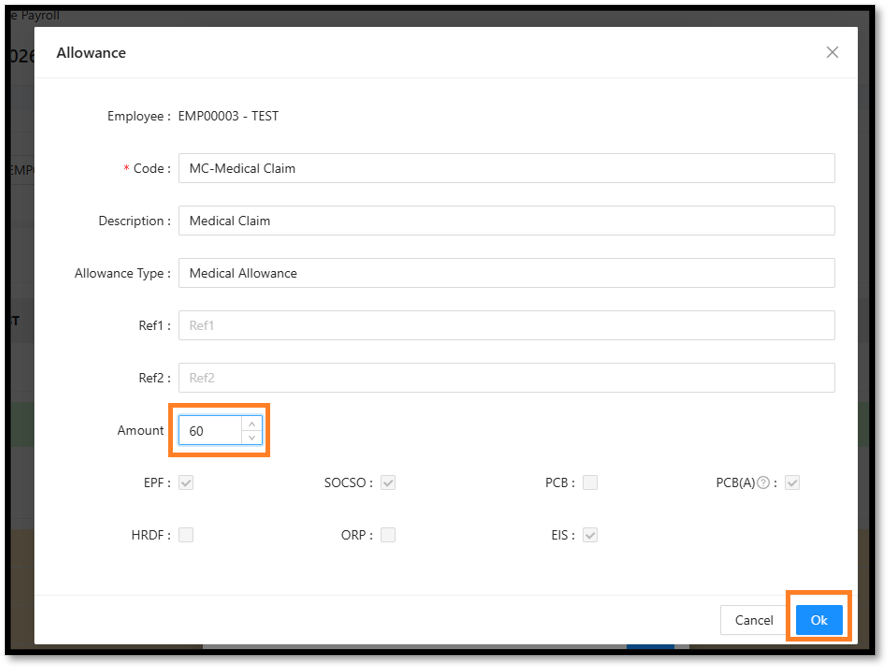
11.In the Allowance window, click the Code field and select the allowance you created, for example MC-Medical Claim.
12.The Description, Allowance Type and statutory items fill in automatically from the allowance code. Enter the Amount (for example 60), then click Ok.
13. The allowance now appears under Income & Deduction (Allowance - Medical Claim 60.00), and the employee’s total is updated from 3,090.85 to 3,150.85. Click Process Payroll to continue.
14.After the payroll is processed, preview the payslip. The allowance is shown under Earnings as Medical Claim (RM60.00) and is included in the Total Earnings.
Note:
- Choose the Allowance Type carefully, because it decides the Restriction and how the allowance is treated for tax.
- Tick only the statutory items that apply to the allowance. The ticks you save are shown as columns in the Allowances list, and they are applied again every time you add the allowance in Generate Payroll.
- Leave the Inactive toggle off, so the allowance stays ACTIVE and can be selected in Generate Payroll.
- Create the allowance code once and reuse it for other employees and other months. Only the amount needs to be entered each time.
- Check the payslip after processing to confirm that the allowance appears under Earnings.
Was this article helpful?
That’s Great!
Thank you for your feedback
Sorry! We couldn't be helpful
Thank you for your feedback
Feedback sent
We appreciate your effort and will try to fix the article
