Overview:
Each stock item has a Sales Price and Purchase Price in its Details tab. When multiple items require price updates, you can use the Import Wizard to update them in bulk instead of editing them individually.
The process involves three steps:
- Export: Add the Sales Price and Purchase Price columns to the Stock Items list and export to Excel.
- Update: Modify the prices directly in Excel.
- Import:Use the Import Wizard to map the columns:
- Stock # → StockCode
- Sales Price → ListPrice
- Purchase Price → PurchasePrice
Once the import is completed, the wizard displays the commit result, and the updated prices will be reflected in the Stock Items list and individual stock records.
Scenario:
Due to supplier price changes, a company needs to update the Sales Price and Purchase Price of multiple stock items.
Staff export the Stock Items list to Excel, update the prices, and import the file back using the Import Wizard. The Balance column is excluded to preserve existing stock quantities.
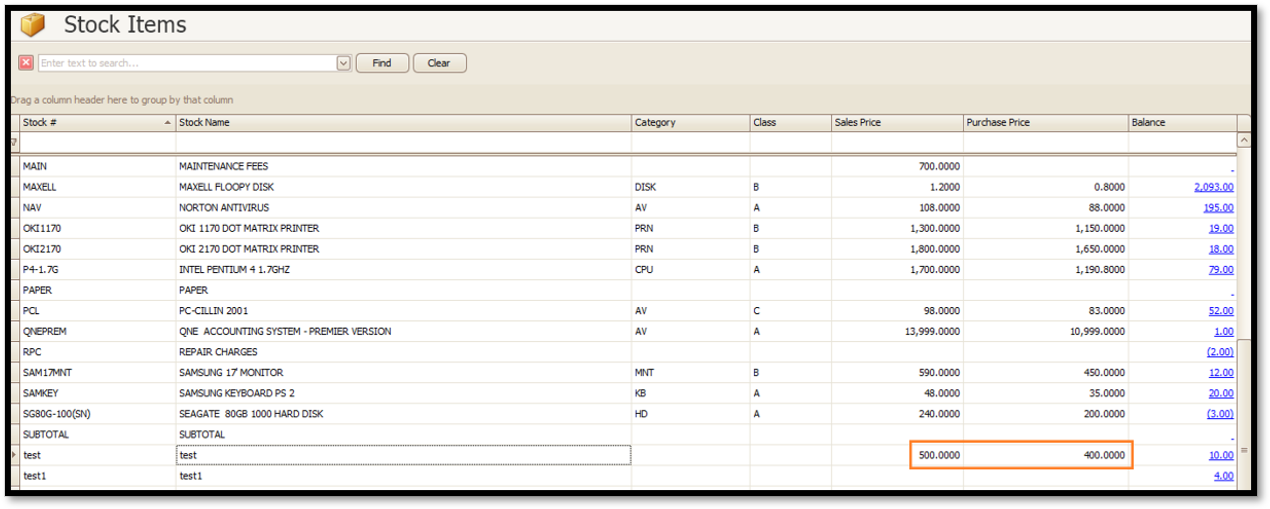
After importing, the new prices are reflected in the Stock Items list. For example, stock item test has a Sales Price of 500.0000 and Purchase Price of 400.0000.
Solution:
Part 1: Show the Sales Price and Purchase Price columns
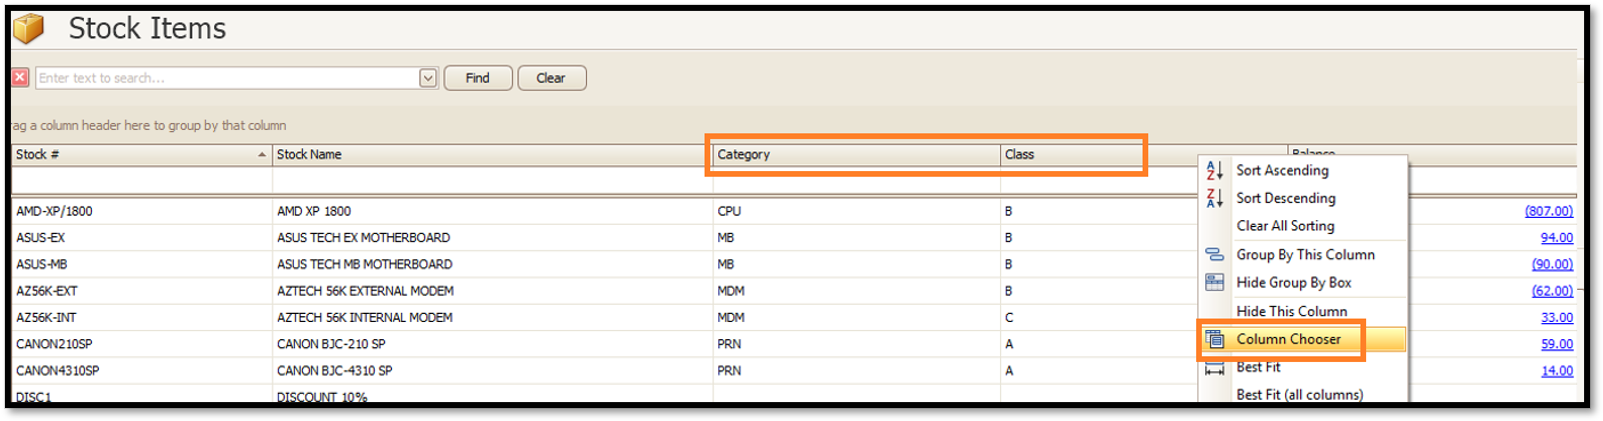
1. Open the Stock Items list. Right-click any column header, for example Category or Class, and click Column Chooser.
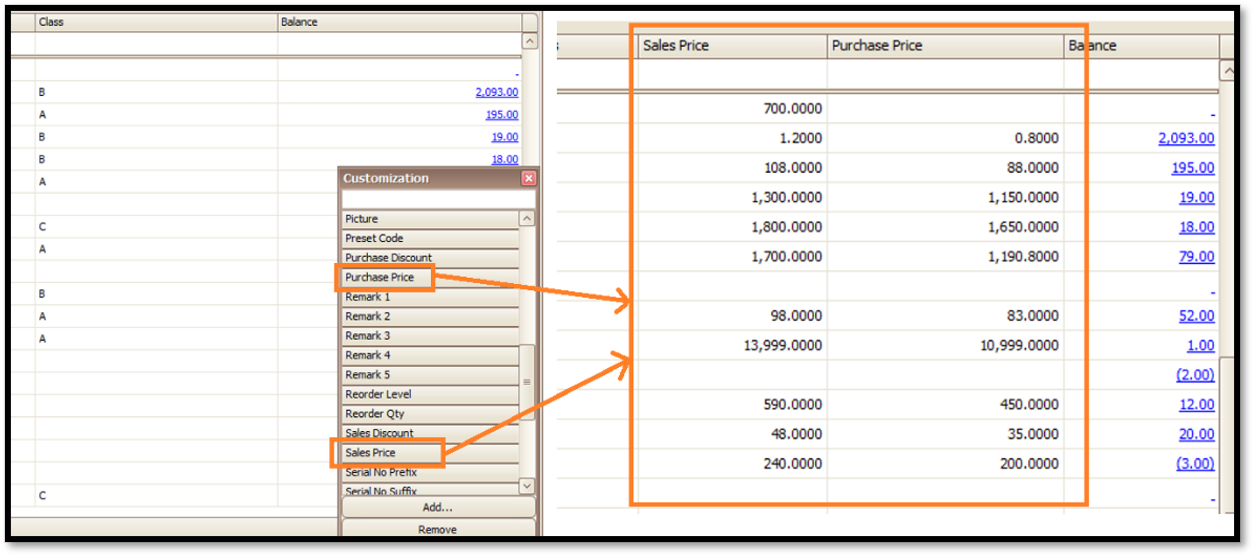
2. In the Customization window, drag Sales Price and Purchase Price into the column header row of the list. The two columns now appear in the list.
Part 2: Export the stock list to Excel and update the prices
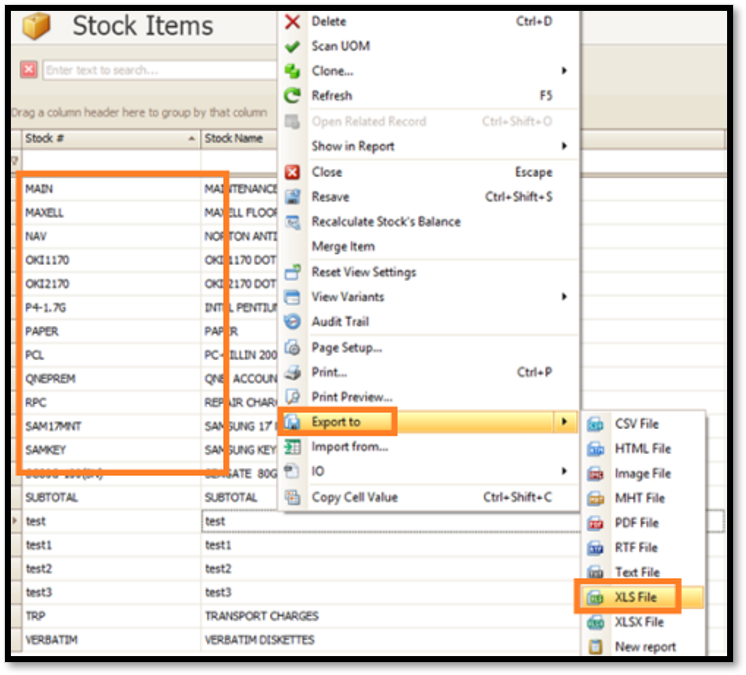
3. Right-click a row in the list, then click Export to and choose XLS File.
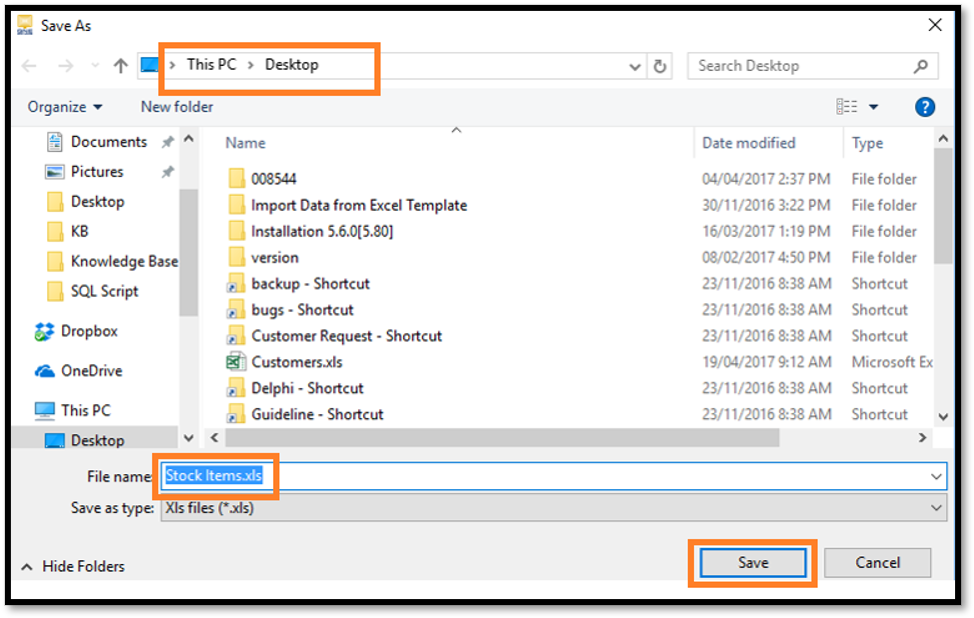
4. In the Save As window, choose the folder to save the file in (for example the Desktop), keep or change the file name (Stock Items.xls), then click Save.
5. Open the Excel file. Update the values in the Sales Price and Purchase Price columns. Do not change the header row or the Stock # column. Save the file and close it.

Part 3: Import the Excel file
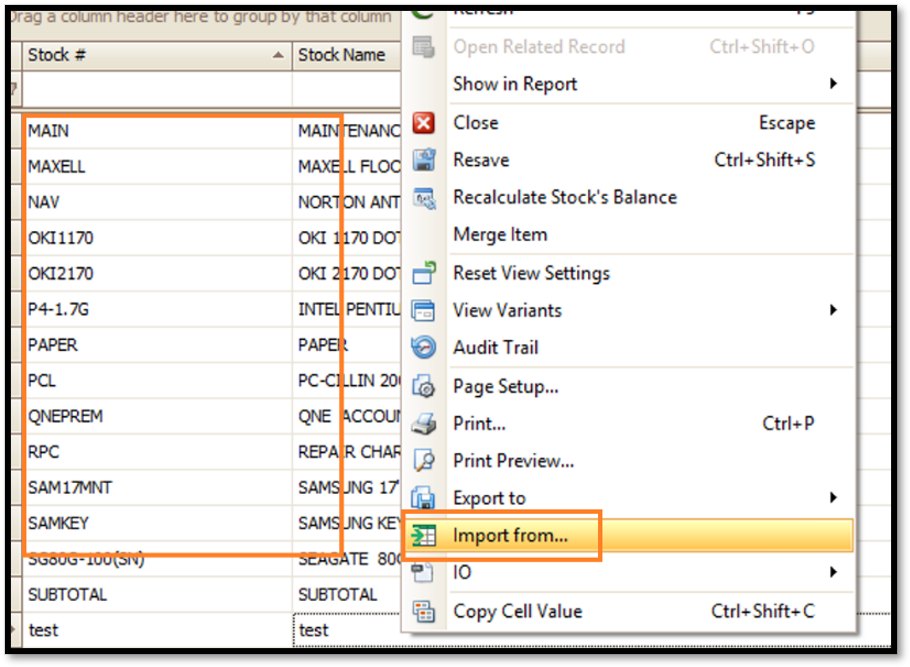
6. Go back to the Stock Items list. Right-click a row and click Import from….
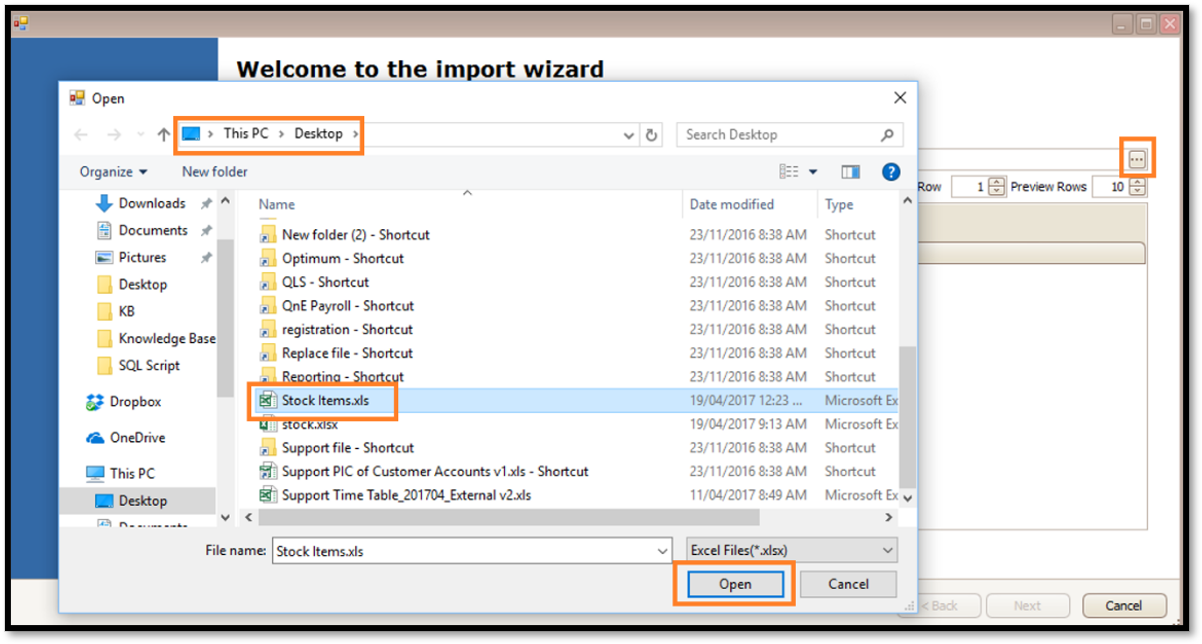
7. In the import wizard, click the … button next to the Excel file box. Select the Excel file you saved (for example Stock Items.xls) and click Open.
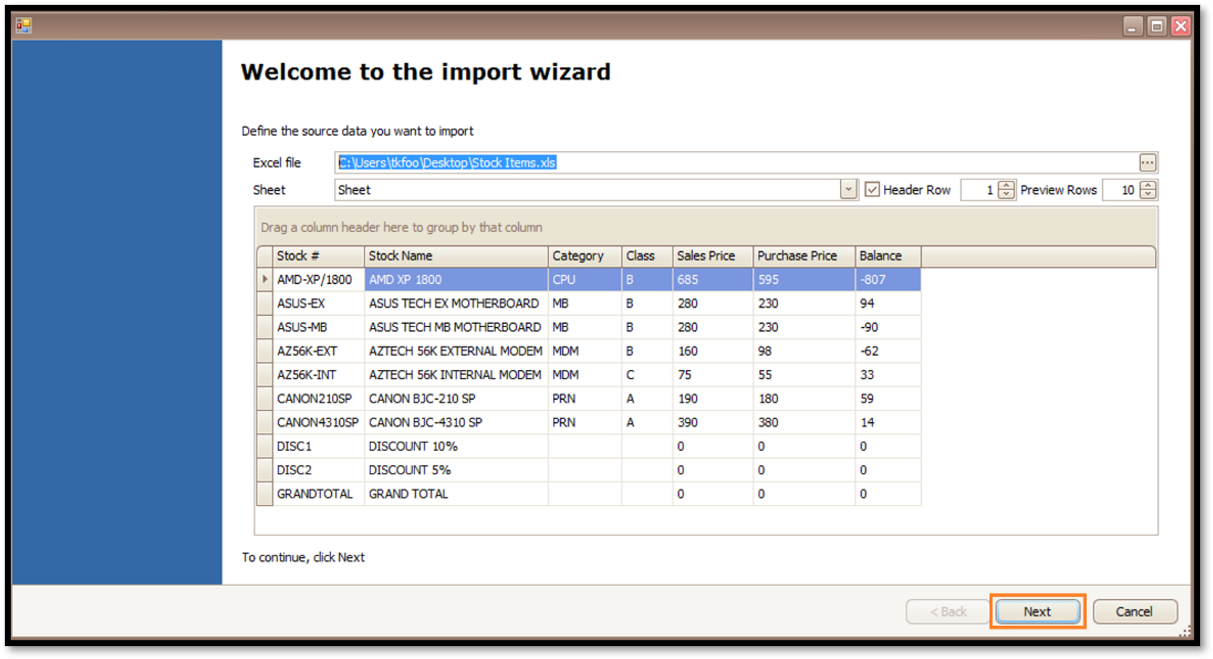
8. The wizard shows the file, the sheet and a preview of the data. Make sure Header Row is ticked, check the preview, then click Next.
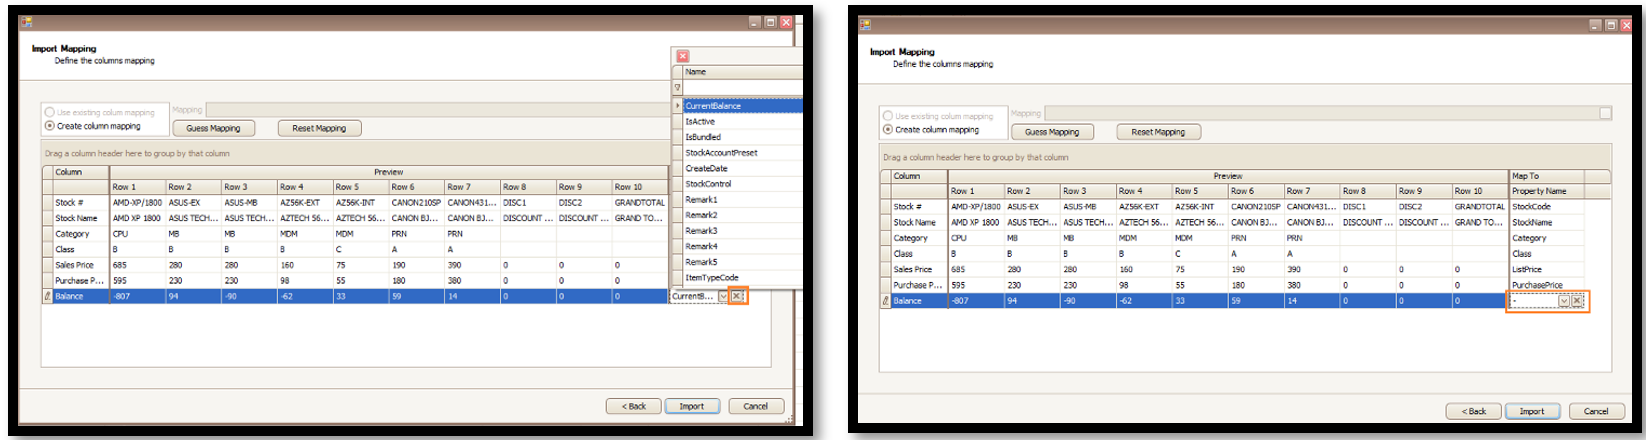
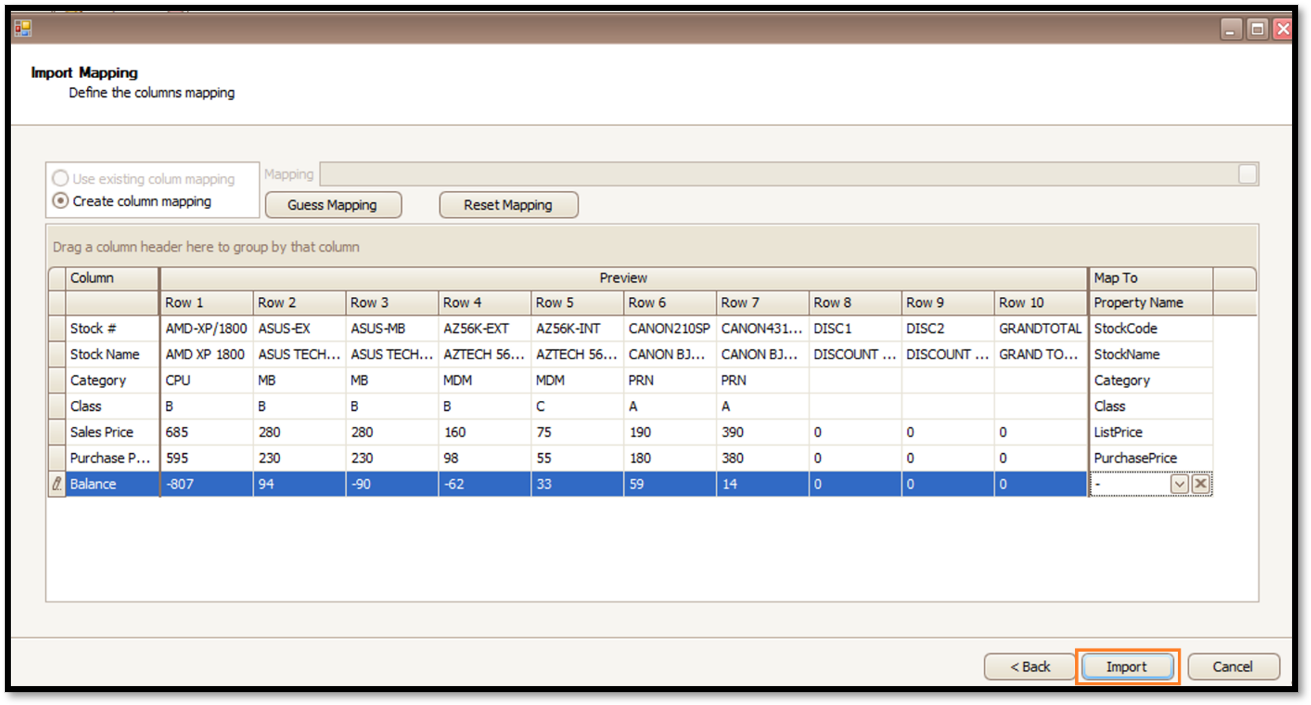
9. On the Import Mapping screen, keep Create column mapping selected and click Guess Mapping. Check that Sales Price is mapped to ListPrice and Purchase Price is mapped to PurchasePrice.
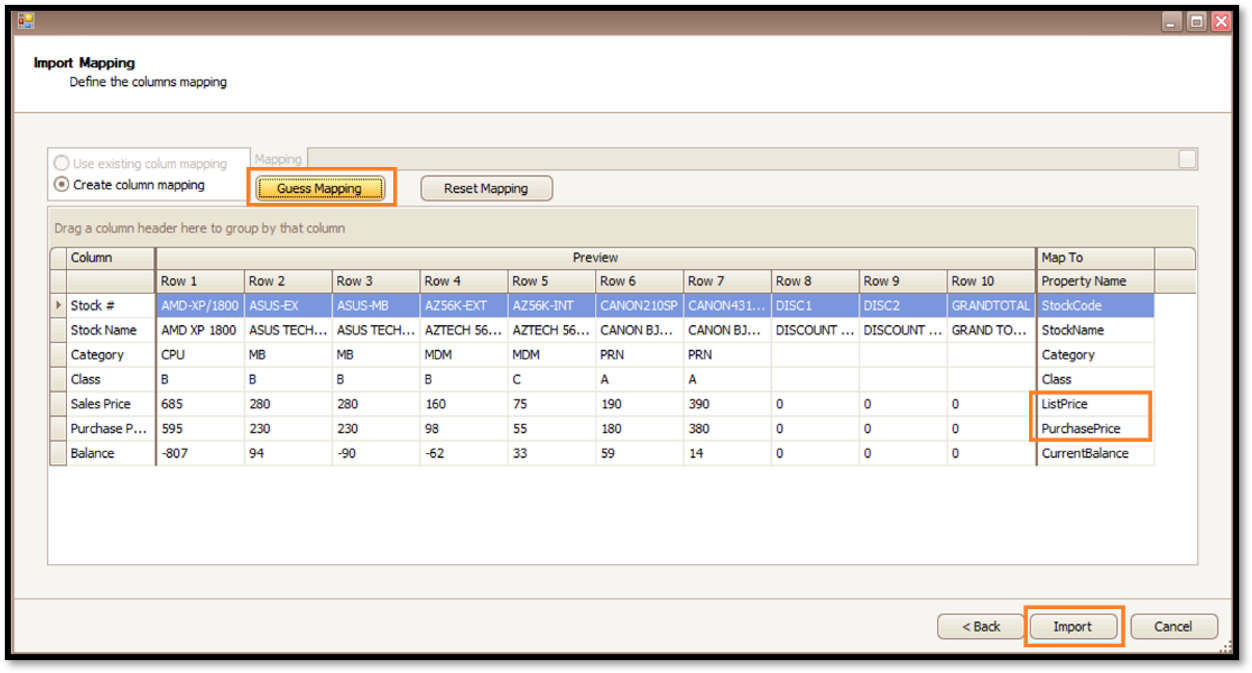
10. Remove the mapping of Balance column to Remove Mapping for Current Balance.
Note: If the Balance column is mapped during import, the current balance will be overwritten by the Excel values. This may cause inaccurate stock balances, as stock movements (in and out) may have occurred after the Excel file was exported
11. Click Import.
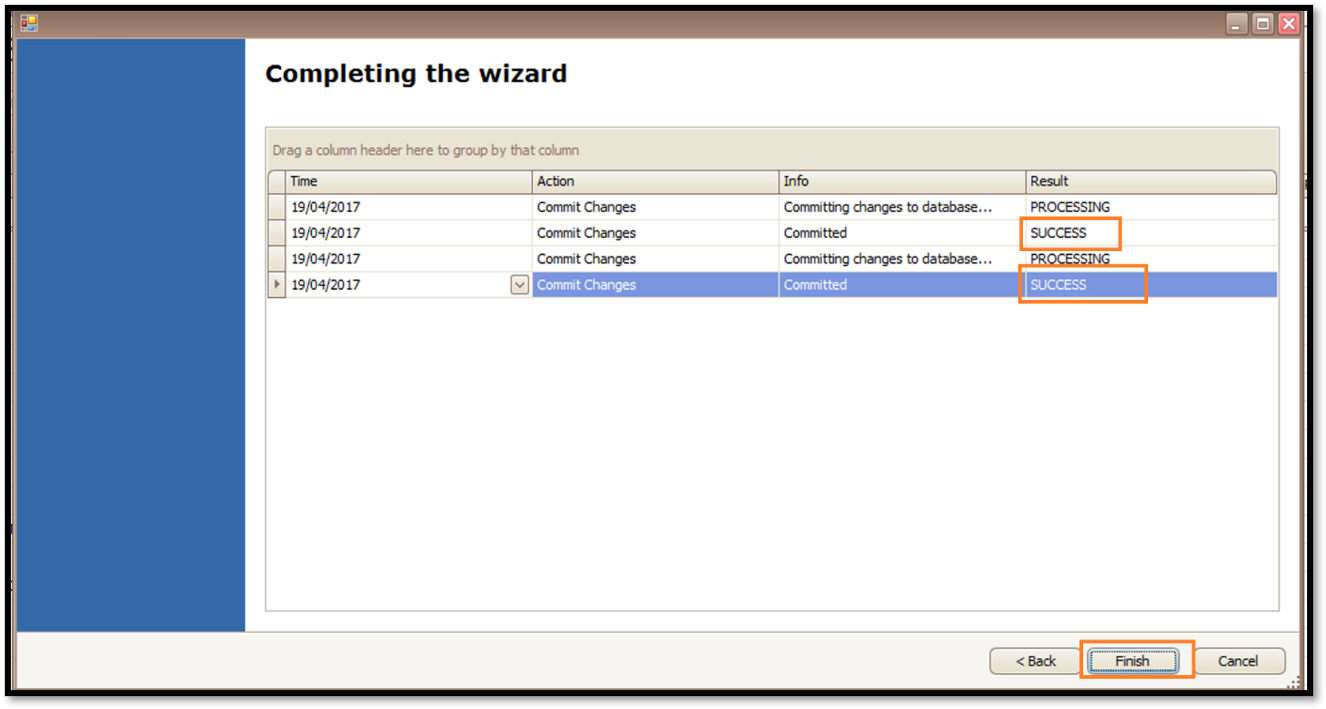
12. The Completing the wizard screen shows the progress of Commit Changes. When the Result column shows SUCCESS, click Finish.
Part 4: Check the result
13. In the Stock Items list, check the Sales Price and Purchase Price columns. They now show the new prices.
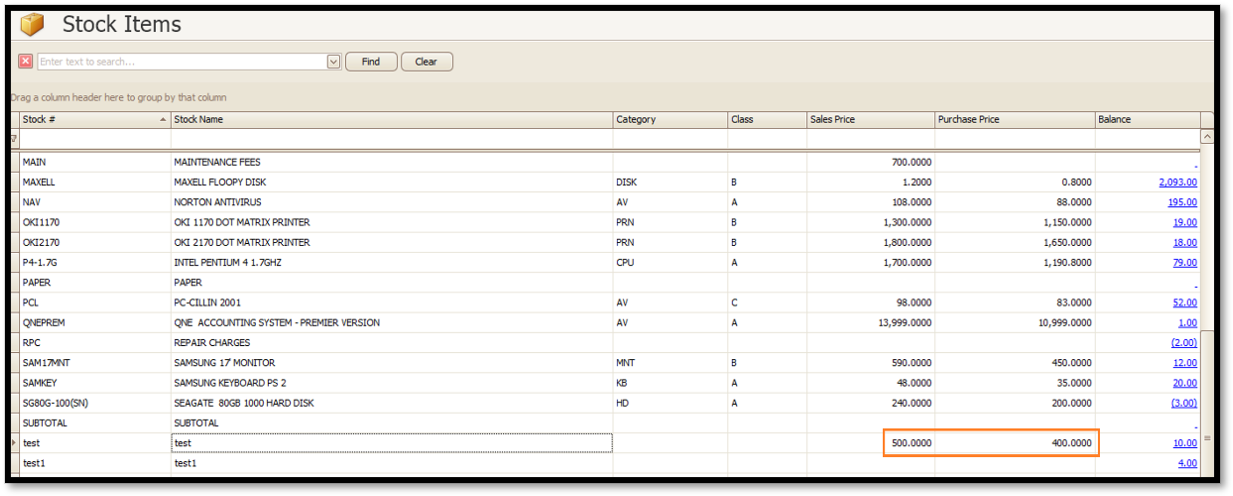
14. To double-check one item, open the stock item. In the Details tab, the Sales Price and Purchase Price show the new values.
Note:
• Do not change the header row or the Stock # column in the Excel file. The Stock # (stock code) is mapped to Stock Code and is used to identify the items.
• Enter the prices as plain numbers, and save and close the Excel file before you import it.
• Remove the mapping of the columns you do not want to import, such as Balance, so that only the data you need is imported.
• If you update a large number of items, make a backup of your data before you import.
• After the import, check that every Result shows SUCCESS and check a few items in the list.
Was this article helpful?
That’s Great!
Thank you for your feedback
Sorry! We couldn't be helpful
Thank you for your feedback
Feedback sent
We appreciate your effort and will try to fix the article
